


ARTICLE CONTENTSOn this page 7 sections
Making Basic Hairstyles
Performance Objectives
By the end of the lesson, students should be able to:
- make basic hairstyles eg. ponytail, braids, bun, simple twist hair styles,
- identify the Steps in making each hair style.
Introduction to Basic Hairstyles
Hairstyles are different ways of arranging hair on the head. Basic hairstyles are simple and common ways to style hair that can be done easily at home or in a salon. Learning to make basic hairstyles is an important skill in beauty and cosmetology, as it helps to keep hair neat, tidy, and looking good.
These styles are suitable for different occasions, whether for school, play, or special events. They also help to protect the hair from damage and keep it out of the face.
Tools and Materials for Hair Styling
Before making any hairstyle, it is important to have the right tools and materials ready. Using the correct tools makes the process easier and helps to achieve a neat finish.
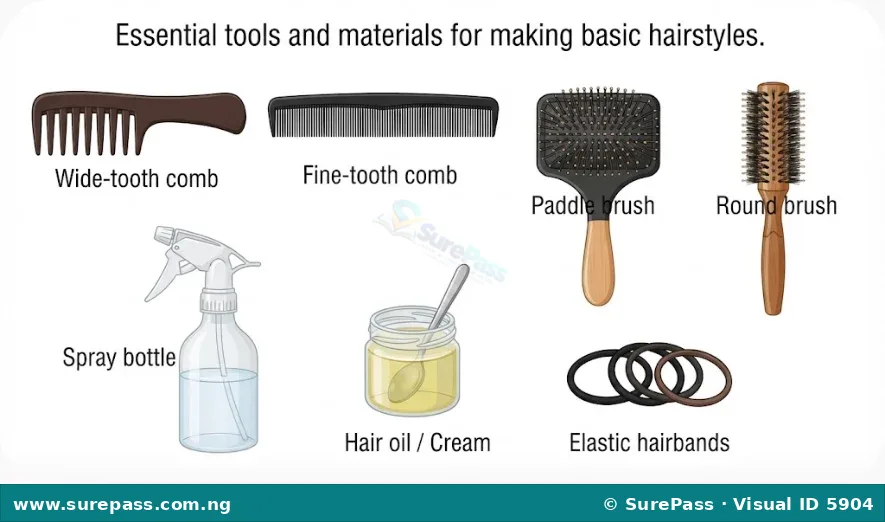
The common tools and materials used for basic hairstyles include:
- Comb: Used for detangling hair and creating neat partings.
- Hairbrush: Used for smoothing the hair and removing tangles.
- Hairbands/Elastic bands: Used to hold hair in place.
- Hair clips/Pins: Used to secure sections of hair or decorative purposes.
- Water spray bottle: Used to dampen hair, making it easier to manage.
- Hair oil or cream: Used to moisturise and add shine to the hair.
General Steps for Preparing Hair
Before starting any hairstyle, it is good practice to prepare the hair. Proper preparation makes styling easier and helps the hairstyle last longer.
The general steps for preparing hair are:
- Detangle the hair: Use a wide-tooth comb or a hairbrush to gently remove any knots or tangles from the hair. Start from the ends and work your way up to the roots.
- Dampen the hair (optional): If the hair is very dry or difficult to manage, lightly spray it with water to make it more pliable.
- Apply hair oil or cream: Apply a small amount of hair oil or cream to moisturise the hair and make it smoother.
- Part the hair: Use a comb to create neat partings as required by the specific hairstyle.
Basic Hairstyles and Their Steps
There are many basic hairstyles that are simple to create. Each style has its own unique look and steps.
1. Ponytail
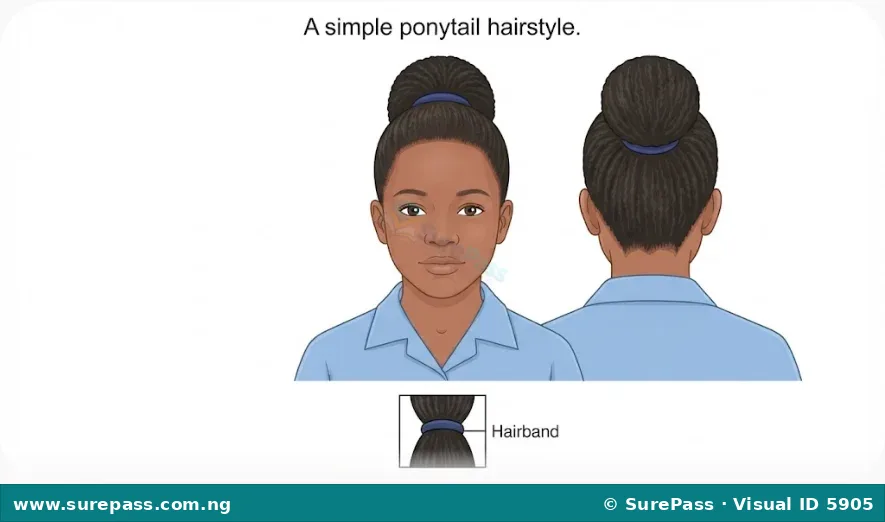
A ponytail is a simple and popular hairstyle where all the hair is gathered and secured at the back of the head, usually with a hairband. It keeps hair away from the face and neck.
The steps to make a ponytail are:
- Prepare the hair by detangling and applying hair cream.
- Gather all the hair together at the desired height (high, middle, or low) at the back of the head.
- Smooth out any bumps or loose strands using a brush or comb.
- Secure the gathered hair tightly with a hairband.
- Adjust the ponytail to ensure it is neat and firm.
2. Braids
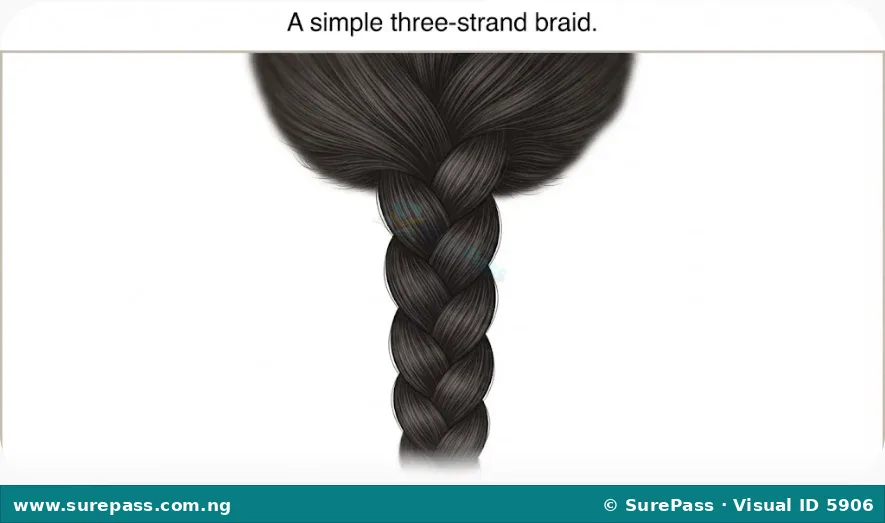
Braids are created by interlacing three or more strands of hair. They are a classic protective style that can last for days or weeks, depending on the type of braid.
The steps to make a simple three-strand braid are:
- Prepare the hair by detangling and applying hair cream.
- Take a section of hair and divide it into three equal strands: left, middle, and right.
- Cross the right strand over the middle strand, so the right strand becomes the new middle.
- Cross the left strand over the new middle strand, so the left strand becomes the new middle.
- Continue this pattern, alternating crossing the outer strands over the middle strand, until you reach the end of the hair.
- Secure the end of the braid with a small elastic band.
3. Bun
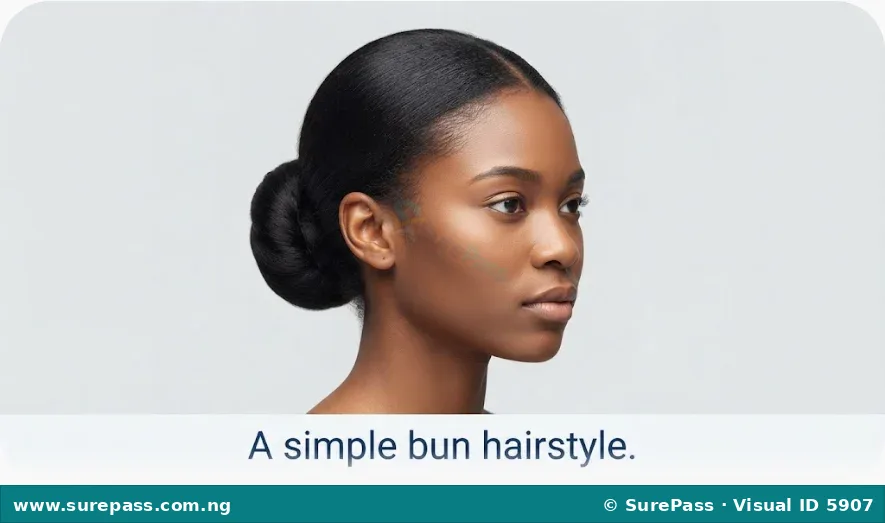
A bun is a hairstyle where the hair is gathered and twisted or wrapped into a coil, then secured in a rounded shape, usually at the back or top of the head. It is a neat and elegant style.
The steps to make a simple bun are:
- Prepare the hair by detangling and applying hair cream.
- Gather all the hair into a ponytail at the desired position (e.g., high on the crown, low at the nape). Secure it with a hairband.
- Twist the ponytail tightly from the base to the ends.
- Wrap the twisted hair around the base of the ponytail in a circular motion, forming a coil.
- Secure the bun with another hairband or hairpins to hold it firmly in place.
4. Chuku
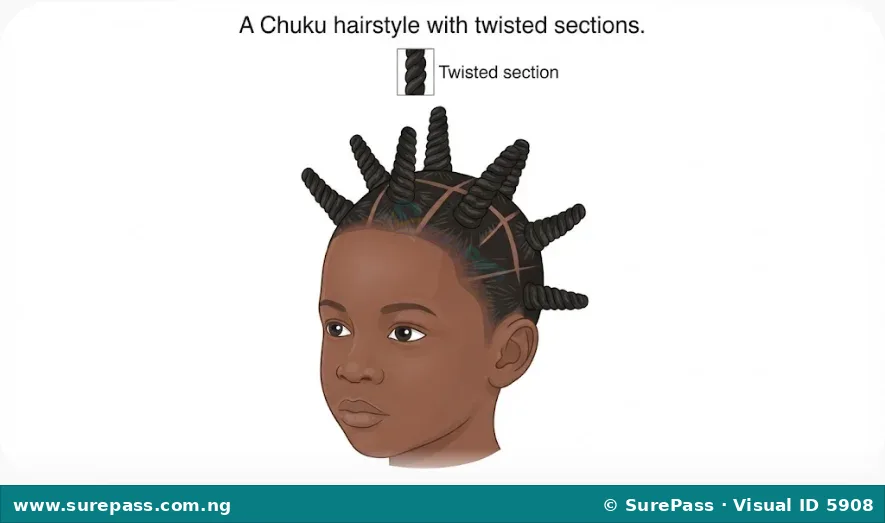
Chuku is a traditional Nigerian hairstyle where the hair is parted into sections, and each section is braided or twisted upwards from the scalp, creating raised ridges or bumps. The braids are usually directed towards the centre or top of the head.
The steps to make a Chuku hairstyle (using simple twists) are:
- Prepare the hair by detangling and applying hair cream.
- Use a comb to create neat partings on the scalp. These partings can be straight, curved, or zigzag, forming sections.
- Take one section of hair. Divide this section into two strands.
- Twist these two strands around each other tightly, starting from the base of the scalp and twisting upwards.
- Continue twisting each section of hair in the desired direction, securing the ends with small elastic bands or tucking them into other twists.
- Repeat for all sections until the entire head is styled.
5. All Back
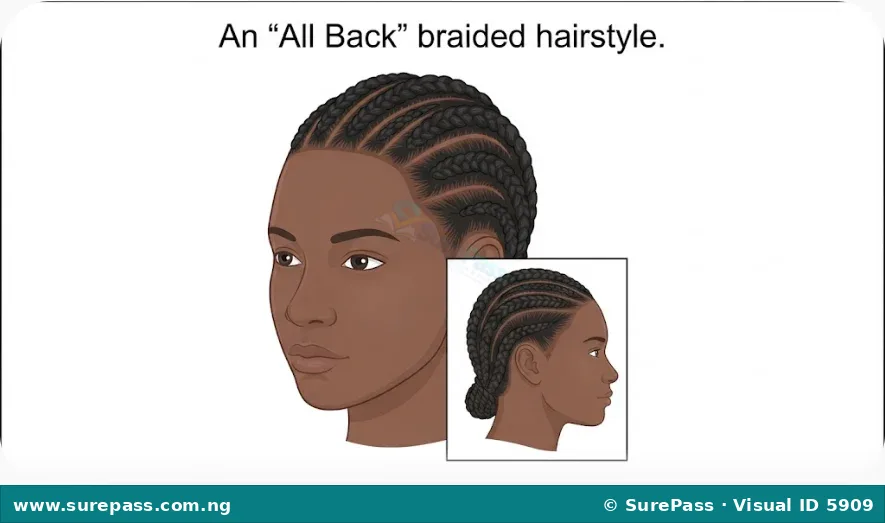
The “All Back” hairstyle involves braiding or twisting all the hair backwards from the hairline towards the nape of the neck. It is a neat and protective style, often done in cornrows or simple twists.
The steps to make an “All Back” hairstyle (using simple braids) are:
- Prepare the hair by detangling and applying hair cream.
- Create neat, straight partings from the front hairline all the way to the nape of the neck. The number of partings depends on the desired number of braids.
- Starting from the front of the head, take a small section of hair from one parting.
- Begin braiding this section, adding small amounts of hair from the sides of the parting as you go, keeping the braid close to the scalp (cornrow style).
- Continue braiding backwards along the parting until you reach the nape of the neck.
- Finish the braid as a regular three-strand braid or twist, and secure the end with a small elastic band.
- Repeat for all other sections until all the hair is braided backwards.
6. Simple Twist
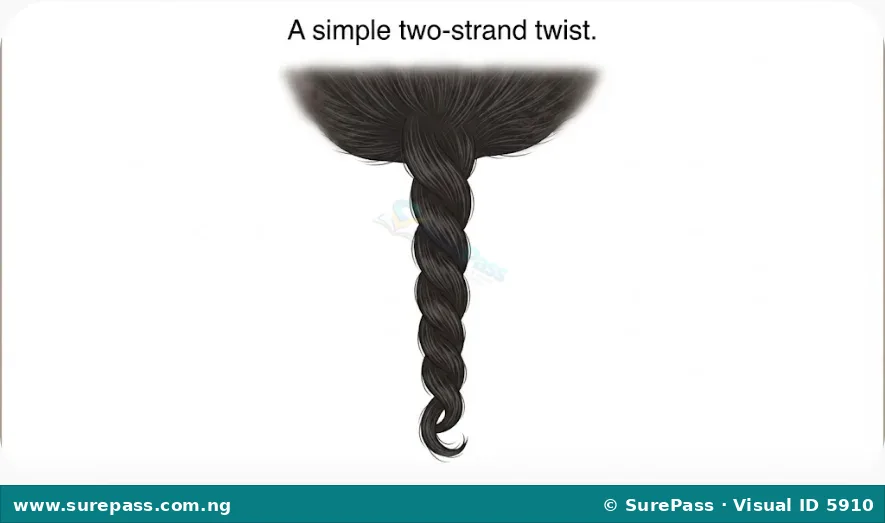
A simple twist involves taking two strands of hair and wrapping them around each other. This can be done on small sections of hair or on larger sections to create a fuller look.
The steps to make a simple two-strand twist are:
- Prepare the hair by detangling and applying hair cream.
- Take a section of hair and divide it into two equal strands.
- Twist the two strands around each other, starting from the base of the hair section.
- Continue twisting tightly until you reach the end of the hair.
- Secure the end of the twist with a small elastic band or by tucking it in.
- Repeat this process for other sections of hair as desired.
Safety Precautions in Hair Styling
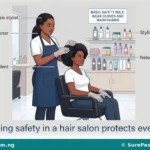
When making hairstyles, it is important to follow safety rules to prevent injury to the person whose hair is being styled and to protect the hair itself.
Important safety tips include:
- Be gentle: Always comb, brush, and style hair gently to avoid pulling or breaking it.
- Use clean tools: Ensure all combs, brushes, and other tools are clean before use to prevent the spread of germs.
- Avoid excessive tightness: Do not make braids, ponytails, or buns too tight, as this can cause headaches, hair breakage, or damage to the scalp.
- Handle sharp objects carefully: If using hairpins or clips, handle them carefully to avoid scratching the scalp or poking the eyes.
- Keep products out of eyes: Be careful when applying hair oils or creams to ensure they do not get into the eyes.
- Work in a well-lit area: Ensure there is enough light to see clearly while styling hair.

0 comments
Open the discussion when you need it. Comments stay collapsed until requested so the initial article remains light.