


ARTICLE CONTENTSOn this page 7 sections
Drawing Techniques and Types of Drawing
Performance Objectives
By the end of the lesson, students should be able to:
- explain basic drawing techniques;
- list the types of drawings;
- discuss drawing media tool and drawing equipment;
- make a drawing of still life, landscape and self-portrait using a mirror.
What is Drawing?
Drawing is a way of making pictures using lines, shapes, and marks on a surface. It is one of the oldest forms of art and a basic skill for many creative activities. People draw to express ideas, record observations, or create beautiful images.
Drawing can be done with many different tools, such as pencils, charcoal, or pens, on surfaces like paper or cardboard. It helps to develop observation skills and hand-eye coordination.
Basic Drawing Techniques
Drawing involves several basic techniques that artists use to create different effects. Understanding these techniques helps in making drawings look more realistic and interesting.
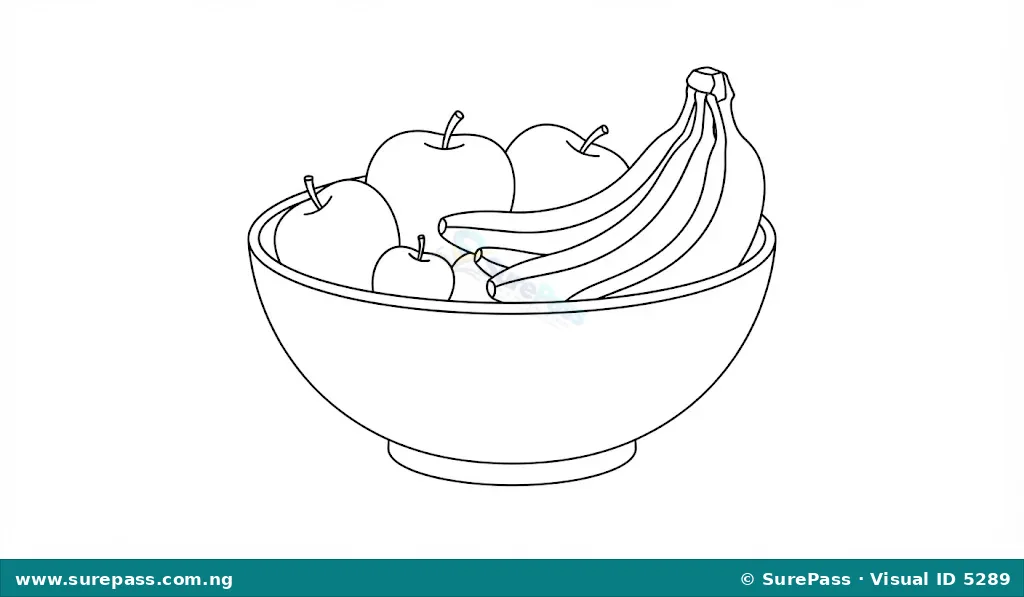
Line Drawing
Line drawing is a fundamental technique where an artist uses lines to create the outline and form of an object. Lines can be thick or thin, dark or light, straight or curved. They define the edges of objects and show their shape.
When making a line drawing, focus on the contours or outer edges of the object. Imagine tracing the object with your pencil without lifting it. This helps to capture the overall shape and structure.
Shading and Texturing
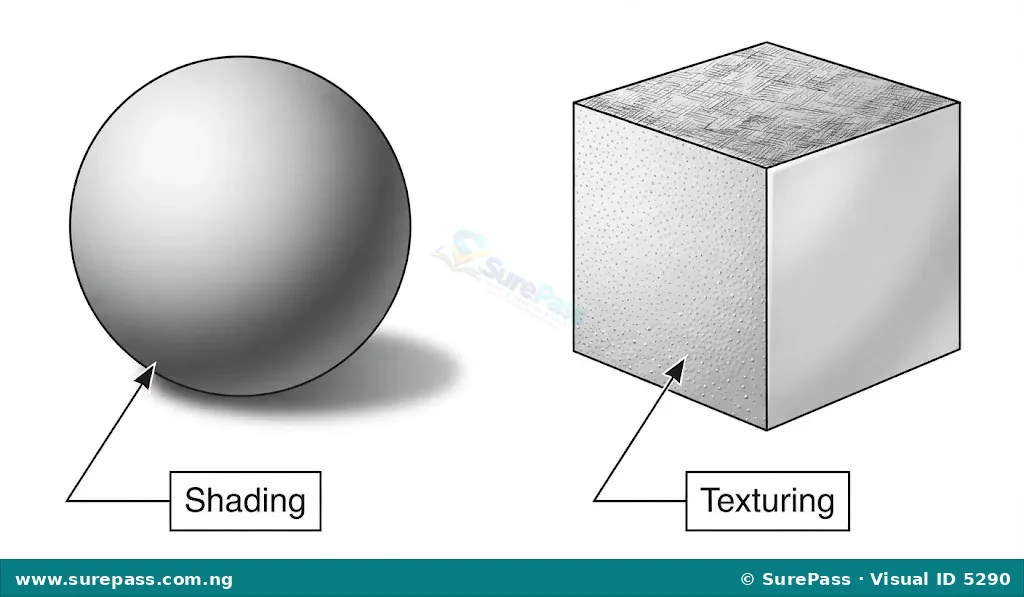
Shading is the technique of adding different tones of darkness to a drawing to create the illusion of light, shadow, and depth. It makes objects look three-dimensional instead of flat. Shading can be done by pressing harder with a pencil or by using different types of strokes.
Texturing is the technique of creating the appearance of different surfaces, such as rough, smooth, furry, or bumpy. It adds realism to a drawing by showing how an object feels to the touch. Textures are created using various marks and patterns.
Examples of shading techniques include:
- Hatching: Drawing parallel lines close together to create tone.
- Cross-hatching: Drawing parallel lines in one direction, then drawing another set of parallel lines across the first set.
- Stippling: Using small dots to build up tone and texture.
- Scribbling: Using random, overlapping lines to create tone and texture.
Perspective Drawing
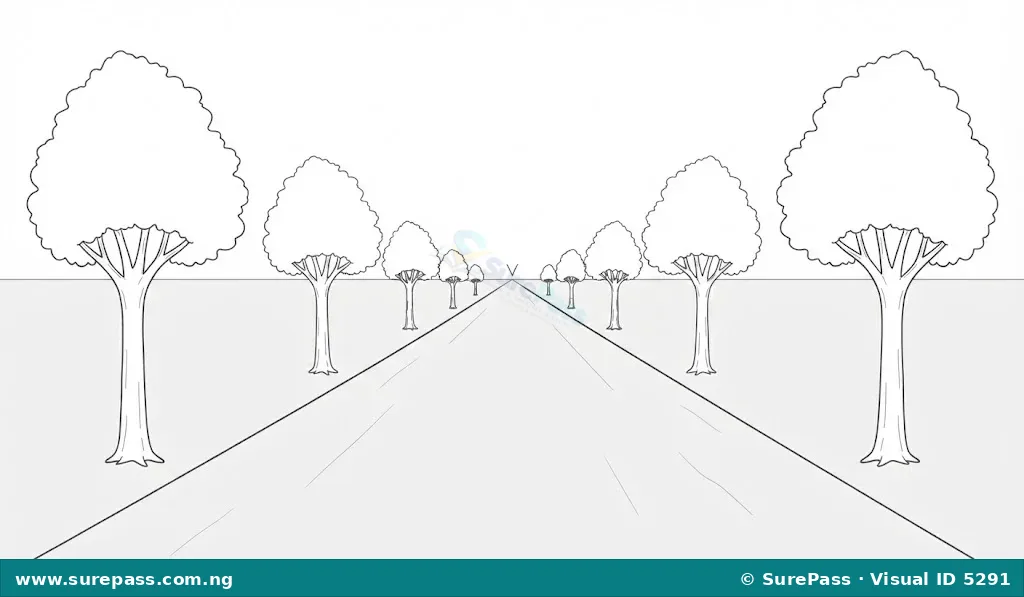
Perspective drawing is a technique used to create the illusion of depth and distance on a flat surface. It makes objects appear closer or farther away, just like they do in real life. Objects that are far away appear smaller, and objects that are closer appear larger.
When drawing with perspective, artists consider how objects shrink in size as they move further into the distance. This helps to create a sense of space and realism in a drawing, making it look like you can look into the picture.
Types of Drawing
Drawings can be categorised based on the subject matter or what is being drawn. Each type focuses on different subjects and often requires specific observation skills.
Still Life Drawing
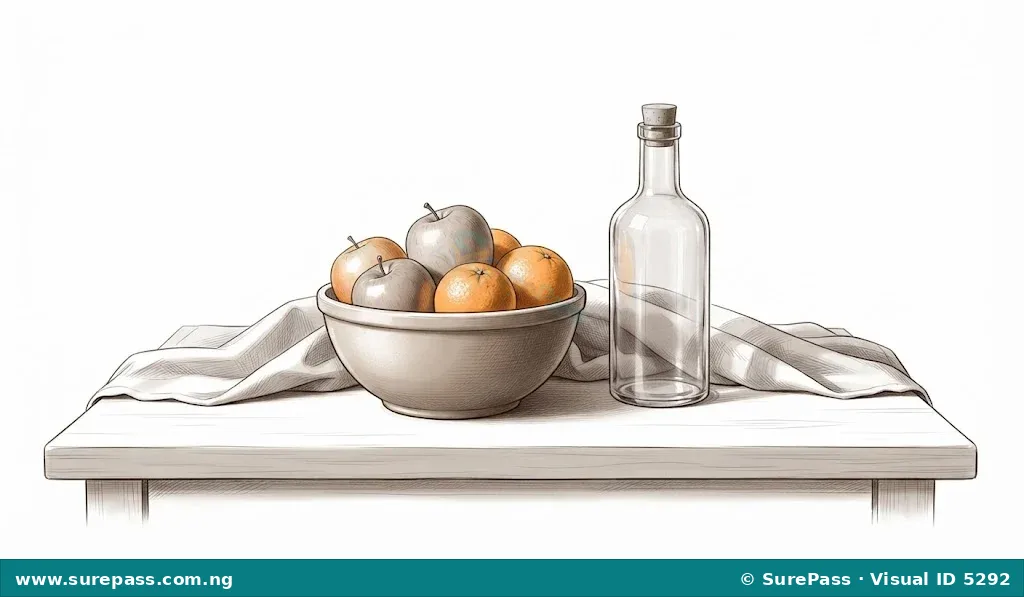
Still life drawing involves drawing inanimate (non-living) objects arranged in a composition. These objects can be anything from fruits, vegetables, flowers, bottles, books, or household items. The artist arranges these objects carefully to create an interesting visual setup.
Composition in still life refers to the way the objects are arranged within the drawing space. A good composition considers balance, variety, and how the objects relate to each other. Still life drawing helps artists practice shading, texture, and form.
Common objects used for still life drawing include:
- Fruits (e.g., oranges, bananas, mangoes)
- Vegetables (e.g., tomatoes, onions, peppers)
- Bottles and jars
- Vases and flowers
- Books and other household items
Nature Drawing
Nature drawing involves drawing subjects from the natural world. This can include landscapes, plants, animals, or natural formations like rocks and rivers. Landscape drawing is a common form of nature drawing, focusing on outdoor scenes.
When drawing nature, artists observe the environment, including trees, mountains, water bodies, and the sky. It often involves capturing the mood and atmosphere of a scene, as well as the details of natural elements.
Examples of subjects for nature drawing include:
- Landscapes (e.g., forests, mountains, beaches, farmlands)
- Trees and plants
- Flowers
- Animals (e.g., birds, insects, domestic animals)
- Rivers, lakes, and waterfalls
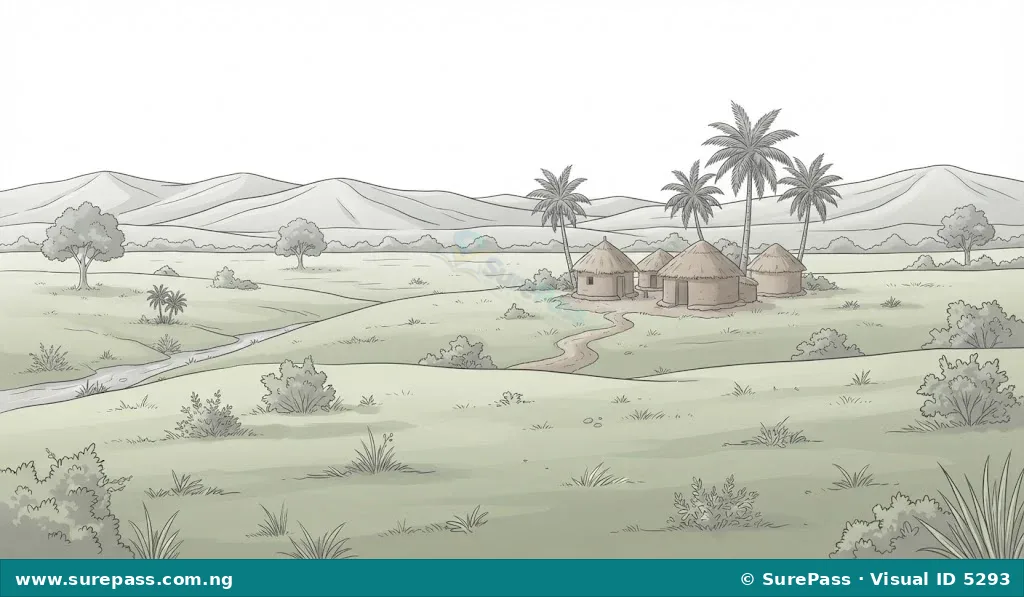
Figure Drawing
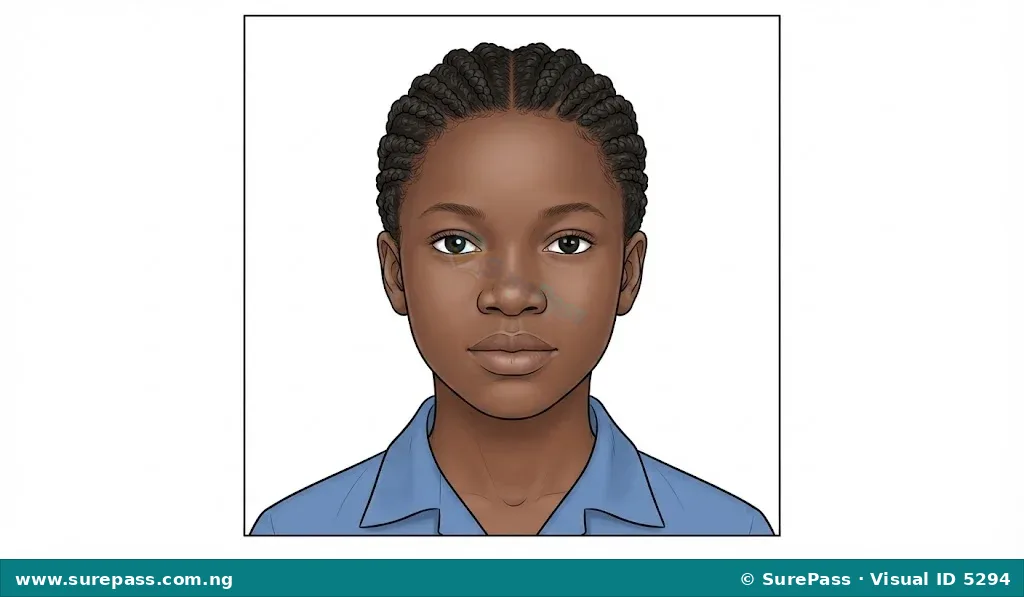
Figure drawing involves drawing the human form. This can include drawing a full body, parts of the body, or portraits. Portrait drawing is a specific type of figure drawing that focuses on capturing the likeness of a person’s face.
When drawing figures, artists pay attention to proportions, anatomy, and expressions. Portrait drawing requires careful observation of facial features like eyes, nose, mouth, and the overall shape of the head to make the drawing resemble the person.
Examples of figure drawing subjects include:
- Portraits (drawing a person’s face)
- Full body figures
- Hands and feet
- People in different poses or activities
Drawing Media and Equipment
To make a drawing, artists use various materials and tools. These are known as drawing media and drawing equipment.
Drawing Media
Drawing media are the materials used to make marks on a surface. They come in different forms and produce different effects.
Common drawing media include:
- Pencils: These are the most common drawing tools. They come in different hardness levels, from hard (H) for light lines to soft (B) for dark lines and shading. HB pencils are common for general drawing.
- Charcoal: This is a soft, black drawing material that produces rich, dark tones and can be easily blended. It is good for expressive drawings and shading large areas.
- Pastels: These are coloured sticks made of powdered pigment. They can be soft or hard and are used to create drawings with vibrant colours and soft, blended effects.
- Ink: Liquid ink is used with pens or brushes to create strong, permanent lines and washes. It is known for its bold and precise marks.
Drawing Equipment
Drawing equipment includes the tools and surfaces that support the drawing process.
Essential drawing equipment includes:
- Drawing Paper: This is the surface on which drawings are made. It comes in various sizes and textures. Smooth paper is good for fine details, while textured paper can hold more media like charcoal or pastels.
- Eraser: Used to remove unwanted marks or to lighten shaded areas. Kneaded erasers are flexible and can lift charcoal or graphite without smudging.
- Sharpener: Used to sharpen pencils to a fine point for detailed work or a blunt point for shading.
- Drawing Board: A flat, firm surface used to support the paper while drawing. It provides a stable base, especially when drawing outdoors or without a table.
- Mirror: Essential for self-portrait drawing, allowing the artist to observe their own face.
Making a Drawing
This section provides steps for making different types of drawings. Remember to observe your subject carefully and practice the techniques you have learned.
How to Draw a Still Life
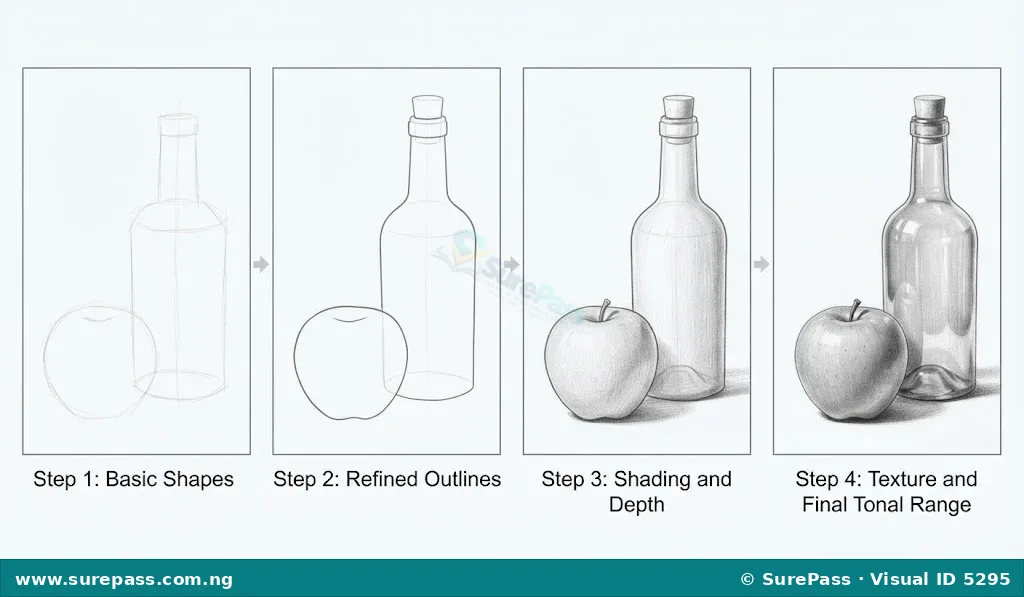
Drawing a still life helps you practice observation, composition, and shading. Follow these steps to create your own still life drawing:
- Choose and Arrange Objects: Select 2-3 simple, inanimate objects (e.g., a fruit, a bottle, a book). Arrange them on a table in an interesting way. Make sure they overlap slightly to create depth.
- Set Up Your Drawing Area: Place your drawing paper on a drawing board or a flat surface. Ensure you have good lighting on your setup and your paper.
- Sketch the Basic Shapes: Lightly sketch the basic shapes of your objects using light lines. Do not press hard. Focus on their overall size and position relative to each other.
- Refine Outlines: Once you are happy with the basic shapes, refine the outlines of each object. Add details like the stem of a fruit or the label on a bottle.
- Add Shading and Texture: Observe where the light hits your objects and where shadows fall. Use shading techniques (like hatching or blending) to create light and dark areas. Add textures to make the objects look realistic (e.g., smooth for a bottle, slightly rough for an orange peel).
- Review Your Drawing: Step back and look at your drawing. Check if the proportions are correct and if the shading creates a sense of depth. Make any necessary adjustments.
How to Draw a Landscape
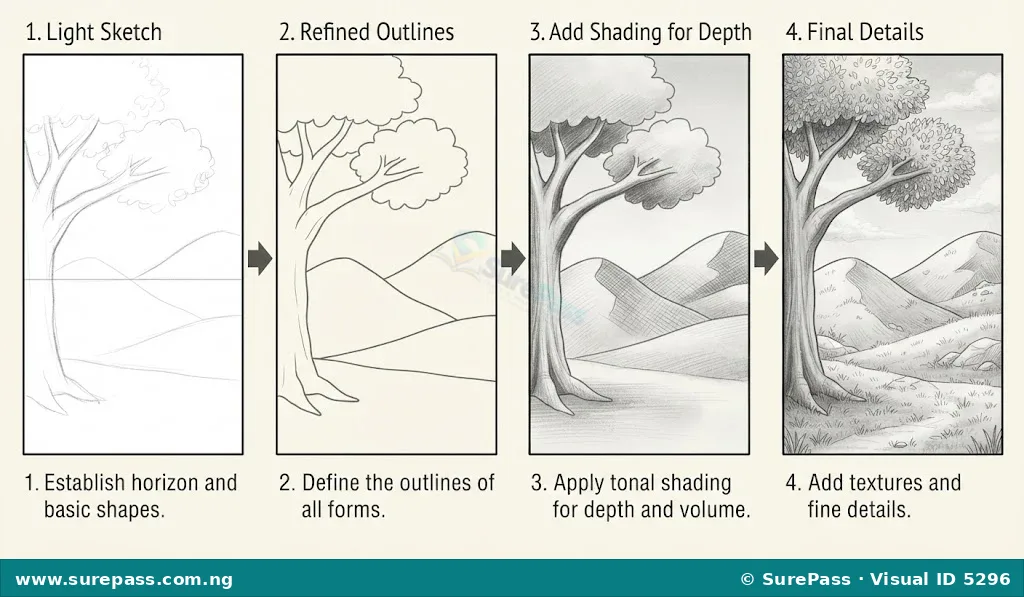
Drawing a landscape allows you to capture the beauty of nature. You can draw from observation outdoors or from a photograph.
- Choose Your View: Look for an interesting outdoor scene. It could be a view from your window, a park, or a field. Identify the main elements like trees, hills, or buildings.
- Establish the Horizon Line: Lightly draw a horizontal line across your paper to represent the horizon, where the sky meets the land. This helps to establish perspective.
- Sketch Main Features: Lightly sketch the largest and most important elements of the landscape, such as the outline of hills, the shape of large trees, or the main structure of any buildings.
- Add Details: Once the main features are in place, add smaller details like leaves on trees, textures on rocks, or patterns on buildings. Remember to make distant objects smaller and less detailed.
- Apply Shading and Tone: Observe the light source in your landscape. Use shading to create shadows and highlights, giving depth to hills, trees, and other features. Consider the different tones of the sky and ground.
- Refine and Finish: Darken important lines and add final touches to enhance the overall look of your landscape.
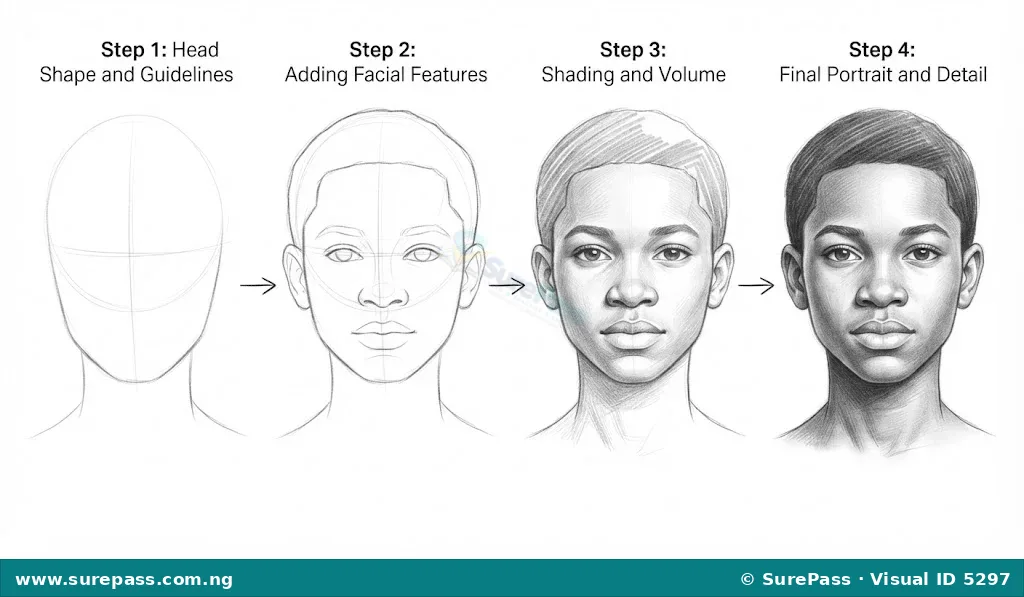
How to Draw a Self-Portrait Using a Mirror
Drawing a self-portrait is a great way to practice figure drawing and observe your own features. You will need a mirror for this.
- Set Up Your Mirror: Place a mirror in front of you so you can see your face clearly. Ensure there is good, even lighting on your face.
- Position Your Paper: Place your drawing paper on a drawing board or a flat surface next to the mirror, so you can easily look between your face and the paper.
- Sketch the Basic Head Shape: Lightly sketch the overall shape of your head on the paper. Start with a simple oval or egg shape. Pay attention to the tilt and angle of your head.
- Mark Key Features: Lightly draw guidelines for the position of your eyes, nose, mouth, and ears. Observe their placement carefully in the mirror. For example, the eyes are usually about halfway down the head.
- Draw Facial Features: Carefully draw your eyes, nose, mouth, and eyebrows. Pay close attention to their unique shapes and how they relate to each other. Observe your expression.
- Add Hair and Neck: Draw the outline of your hair and the shape of your neck and shoulders.
- Apply Shading: Observe the light and shadow on your face in the mirror. Use shading to create depth and form, highlighting areas like your cheekbones and nose, and darkening areas like under your chin.
- Refine and Detail: Add any final details to your features and hair. Make sure the drawing resembles you.

0 comments
Open the discussion when you need it. Comments stay collapsed until requested so the initial article remains light.