


ARTICLE CONTENTSOn this page 7 sections
Collage
Performance Objectives
By the end of the lesson, students should be able to:
- explain the meaning of collage;
- list the types of collages;
- describe the materials and tools used in creating collage;
- state the methods of making collage;
- make a simple collage.
Meaning of Collage
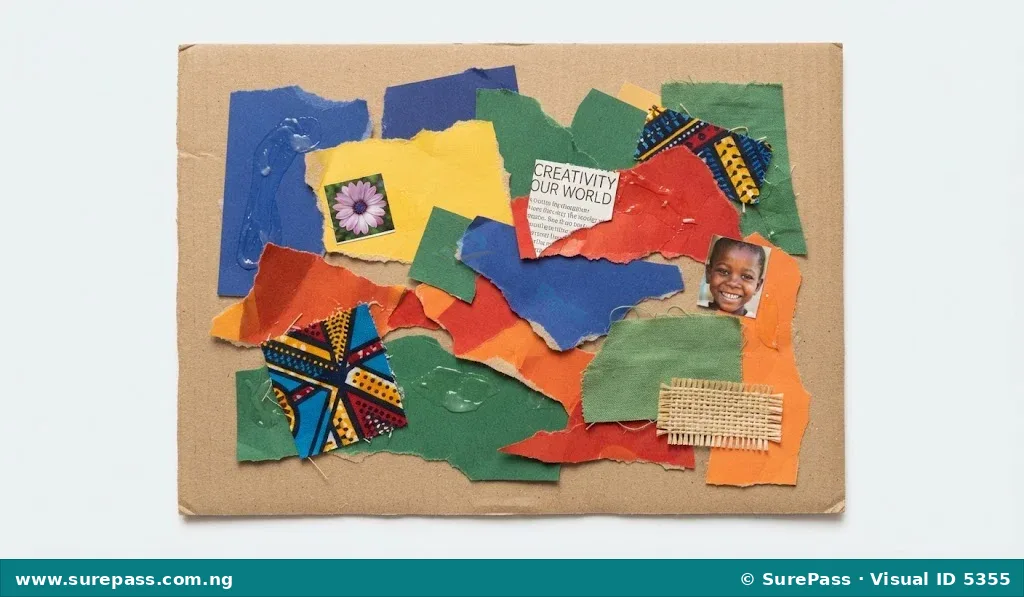
Collage is an art form where different materials are glued onto a surface to create a new image or design.
The word “collage” comes from the French word “coller,” which means “to glue.” It involves combining various materials like paper, fabric, photographs, leaves, or buttons to form a unified artwork. The materials are often cut, torn, or arranged in a way that expresses an idea or tells a story.
Types of Collages
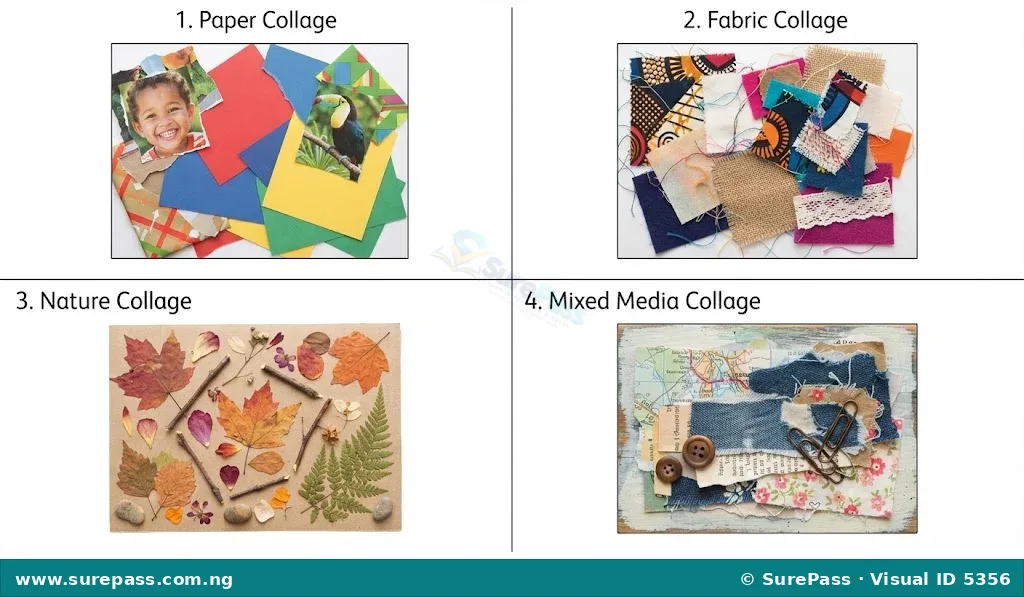
Collages can be made using a wide variety of materials, leading to different types. The type of collage often depends on the main materials used.
- Paper Collage: This is one of the most common types. It uses various kinds of paper, such as newspaper, magazine cutouts, coloured paper, tissue paper, or even old book pages. The paper can be cut, torn, or folded before being glued onto a surface.
- Fabric Collage: This type of collage uses different pieces of fabric, textiles, or threads. Artists might use scraps of old clothes, patterned fabrics, or ribbons to create textures and patterns in their artwork.
- Nature Collage: In a nature collage, natural elements are collected and used. These can include dried leaves, flowers, twigs, sand, small stones, or seeds. These materials bring organic textures and shapes to the artwork.
- Mixed Media Collage: This type combines several different materials in one artwork. For example, a mixed media collage might use paper, fabric, buttons, and small found objects all together to create a rich and varied surface.
Materials and Tools Used in Collage
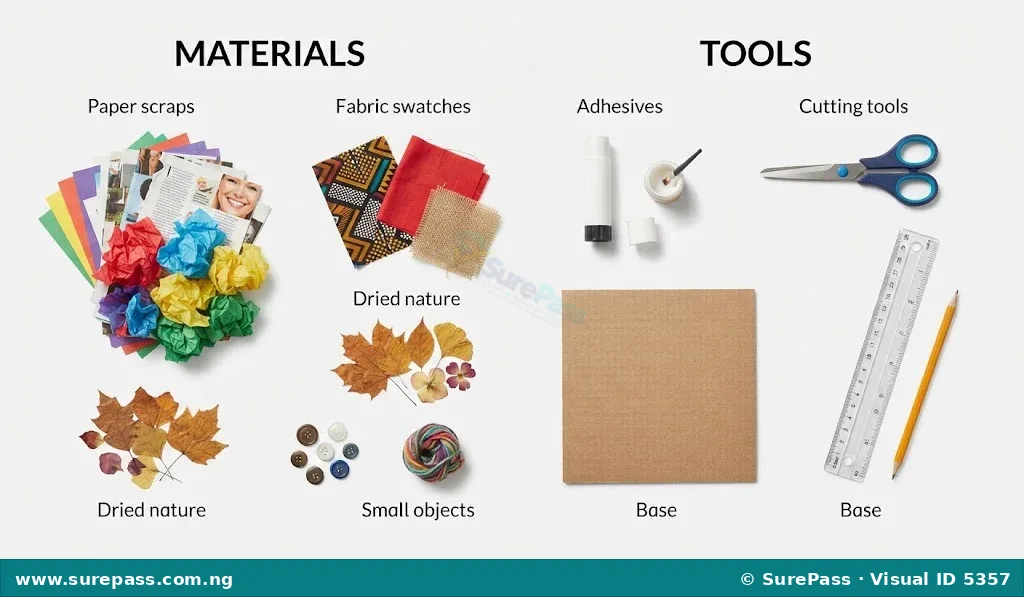
To create a collage, specific materials are needed to form the artwork, and tools are used to prepare and attach these materials.
Materials for Collage
These are the items that are glued onto the surface to create the artwork:
- Paper: This includes various types such as magazine pages, newspaper, coloured paper, tissue paper, old calendars, or even wrapping paper.
- Fabrics: Small pieces of different textiles, such as cotton, lace, felt, or silk, can add texture and pattern.
- Natural Materials: Dried leaves, flower petals, small twigs, sand, or seeds can be collected and used.
- Buttons: Various sizes and colours of buttons can add three-dimensional elements.
- Yarn or Thread: Short pieces of yarn or thread can be used to create lines and textures.
- Found Objects: Small, lightweight objects like bottle caps, beads, or small plastic pieces can be incorporated.
Tools for Collage
These are the items used to prepare and assemble the collage materials:
- Cardboard or Stiff Paper: This serves as the base or surface onto which all the materials are glued.
- Glue Stick or Liquid Glue: Essential for attaching the materials firmly to the base.
- Scissors: Used for cutting paper, fabric, or other materials into desired shapes and sizes.
- Craft Knife: A sharp tool used for precise cutting, especially for thicker materials or intricate shapes. This tool should only be used with adult supervision due to its sharpness.
- Ruler: Used for measuring and for guiding straight cuts with a craft knife.
- Pencil: For drawing outlines or marking cutting lines on materials.
- Bowl: A small bowl can be used to hold smaller materials like buttons or seeds before they are glued.
Methods of Making Collage
The process of making a collage involves several steps, from planning to the final assembly. These steps ensure the materials are arranged effectively to create the desired artwork.
- Gathering Materials: Collect all the necessary materials and tools. This might involve tearing pages from old magazines, cutting fabric scraps, or gathering dried leaves.
- Preparing the Base: Choose a suitable base, such as a piece of cardboard or thick paper. This surface should be strong enough to hold the glued materials.
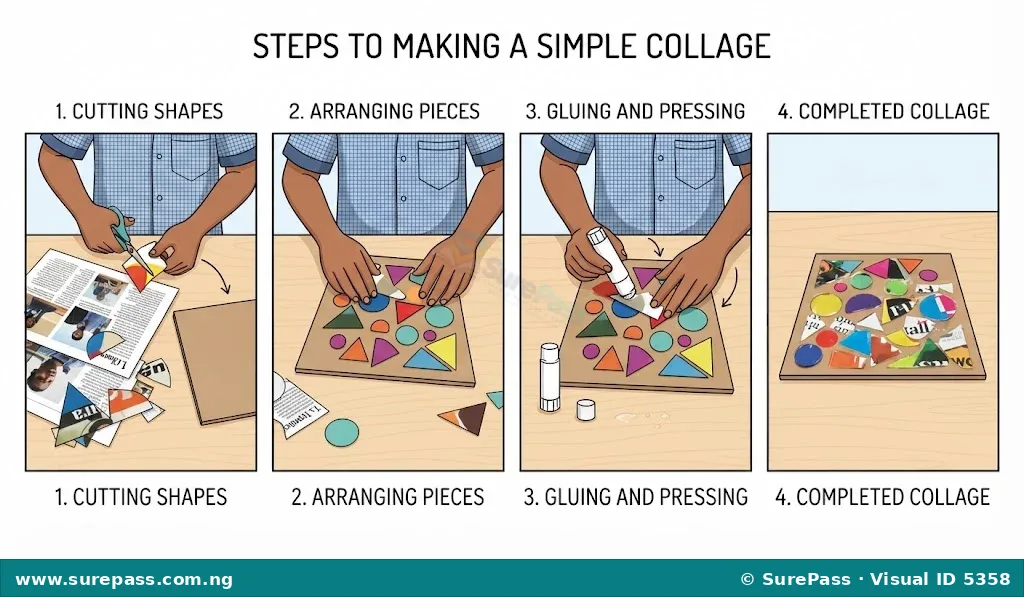
- Planning the Design: Before gluing, arrange the materials loosely on the base. This allows for experimentation with different layouts, colours, and textures until a pleasing design is found. This stage helps to visualise the final artwork.
- Cutting or Tearing: Cut or tear the materials into the desired shapes and sizes. Scissors are used for precise cuts, while tearing creates softer, more organic edges.
- Gluing: Apply glue to the back of each material piece and carefully press it onto the base. Start with larger pieces and then add smaller details. Ensure each piece is firmly attached to prevent it from falling off.
- Layering: Materials can be layered on top of each other to create depth and interesting visual effects. This adds dimension to the collage.
- Finishing: Once all pieces are glued, allow the collage to dry completely. Any excess glue can be wiped away carefully.
How to Make a Simple Collage
Making a simple collage is a fun way to express creativity using everyday materials. This activity will guide you through creating your own artwork.
The required materials are:
- A piece of cardboard (about A4 size)
- Old magazines or newspapers
- Coloured paper scraps (optional)
- A few dried leaves or flower petals (optional)
- Glue stick or liquid glue
- Scissors
- Pencil
The procedure involves the following steps:
- Prepare your workspace: Clear a flat surface and cover it with old newspaper to protect it from glue.
- Gather your materials: Collect your cardboard base, magazines, coloured paper, leaves, glue, scissors, and pencil.
- Choose a theme or idea: Think about what you want your collage to represent. It could be a landscape, an animal, an abstract pattern, or a scene from your imagination.
- Cut or tear materials: Look through your magazines and coloured paper. Cut out interesting pictures, words, shapes, or colours that fit your theme. You can also tear pieces to create soft edges. If using leaves, ensure they are dry and flat.
- Arrange materials on the cardboard: Before applying any glue, place your cut and torn pieces on the cardboard base. Move them around to find the best arrangement. Experiment with layering and overlapping to create depth.
- Begin gluing: Once you are happy with your arrangement, start gluing the pieces one by one. Apply glue to the back of each piece, especially around the edges, and press it firmly onto the cardboard. Start with the pieces that will be at the bottom layer of your design.
- Add layers and details: Continue gluing, adding smaller pieces and details on top of the larger ones. Ensure all pieces are securely attached.
- Allow to dry: Once all the pieces are glued, leave your collage flat in a safe place to dry completely. This might take a few hours, depending on the type of glue used.
- Clean up: Put away your tools and dispose of any leftover scraps.

0 comments
Open the discussion when you need it. Comments stay collapsed until requested so the initial article remains light.