



ARTICLE CONTENTSOn this page 8 sections
Wood Carving
Performance Objectives
By the end of the lesson, students should be able to:
- explain the meaning of wood carving;
- identify tools for carving wood;
- produce a wooden art work by carving.
Meaning of Carving
Carving is the act of cutting away or scraping parts of a solid material to create a desired shape, design or object.
This artistic process involves starting with a solid block of material and gradually removing unwanted portions until the final form is achieved. It is a subtractive method of sculpture, meaning that material is taken away rather than added.
Meaning of Wood Carving
Wood carving is the art of shaping wood into decorative or functional objects by cutting away unwanted portions using sharp tools.
Wood carving is an ancient craft practiced in many cultures around the world, including Nigeria. It is used to produce items such as traditional masks, statues, household utensils, relief panels and decorative furniture.
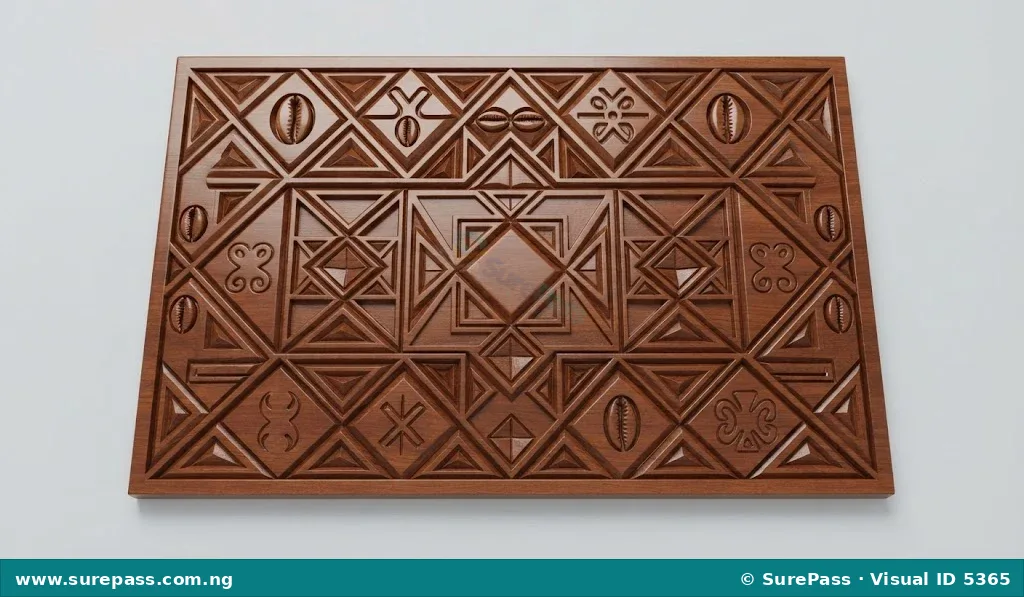
Observe the image below to see an example of a finished wood carving.
Materials for Carving
Carving can be done on different types of solid materials depending on the desired outcome and the tools available. The primary materials used for carving include:
- Wood: This is the most common material for carving. It is obtained from trees and is classified into softwoods and hardwoods. Softwoods, such as Obeche, are easy to cut and are ideal for beginners. Hardwoods, such as Mahogany and Iroko, are durable and are used for long-lasting sculptures.
- Stone: This is a hard, natural mineral substance. Stone carving requires stronger tools than wood carving. Soft stones like soapstone and limestone are commonly used by sculptors to create statues and ornaments.
Tools for Wood Carving
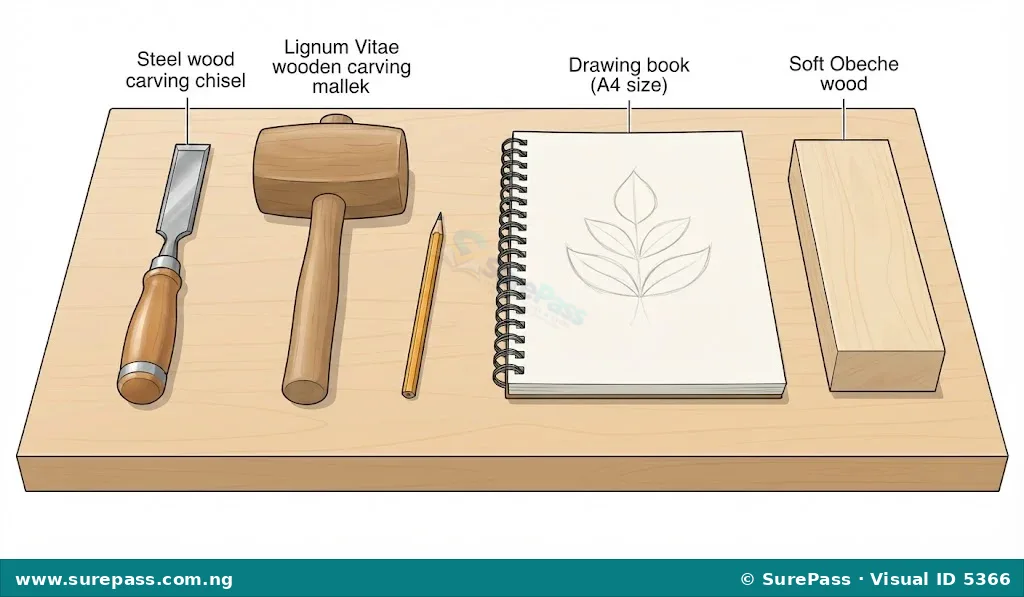
To carve wood successfully, specific tools are required to cut, shape and smooth the material. The essential tools and resources for wood carving include:
- Chisel: A metal tool with a sharp, bevelled cutting edge at one end and a handle at the other. It is used to chip, cut and carve out portions of the wood. Chisels come in various shapes and sizes, including flat chisels and curved gouges.
- Mallet: A hammer-like tool, usually made of wood or rubber, used to strike the handle of the chisel. The mallet provides the force needed to drive the chisel into the wood without damaging the tool handle.
- Drawing Book: A book containing plain sheets of paper used for sketching and planning the design before carving begins.
- Pencil: A drawing tool used to sketch the design in the drawing book and transfer the outline onto the surface of the wood block.
The diagram below shows the basic tools and materials used in wood carving.
How to Produce a Simple Wooden Carved Object
Producing a carved wooden object requires careful planning, patience and the correct application of tools. Beginners should start with a simple relief carving, such as a leaf or a geometric shape, on a flat block of softwood.
The required materials and tools for this project are:
- A flat block of softwood, such as Obeche wood
- A drawing book and a pencil
- A sharp carving chisel
- A wooden mallet
- Sandpaper for smoothing
The carving procedure involves the following steps:
- Draw the desired design clearly in the drawing book using a pencil.
- Transfer the design onto the flat surface of the wood block by drawing the outline directly onto the wood with the pencil.
- Secure the wood block firmly to a workbench or table using a clamp to prevent it from moving during carving.
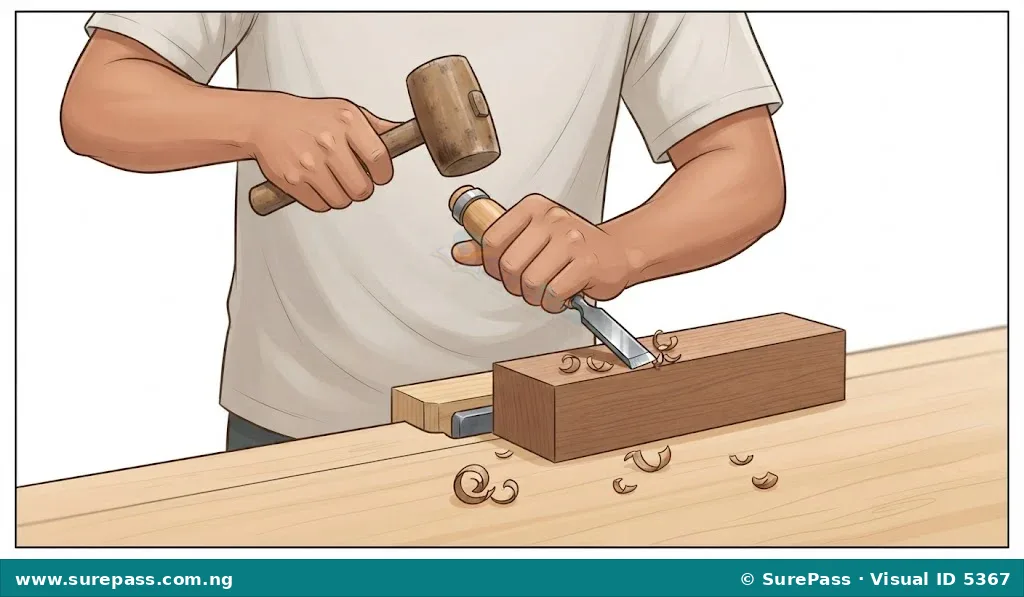
- Hold the chisel firmly with one hand, placing the sharp edge along the pencil outline at a slight angle.
- Hold the mallet with the other hand and tap the handle of the chisel gently to make shallow cuts along the outline.
- Angle the chisel slightly and chip away the wood from the background area surrounding the design, making the main design stand out in relief.
- Use the chisel carefully to smooth the edges of the raised design.
- Rub sandpaper over the carved surface to remove rough edges and make the object smooth.
Look at the illustration below to observe the correct posture and tool handling during the carving process.
Safety Rules in Wood Carving
Because wood carving involves the use of sharp tools, safety precautions must be followed to prevent injuries. Important safety tips include:
- Always carve away from the body, never towards the hands, chest or fingers.
- Keep both hands behind the sharp cutting edge of the chisel at all times.
- Ensure the wood block is securely clamped to the workbench before starting to carve.
- Wear protective goggles to shield the eyes from flying wood chips and dust.
- Keep the workspace clean and sweep away wood shavings regularly to prevent slipping.
- Never play or run around with sharp carving tools in the studio or workshop.




0 comments
Open the discussion when you need it. Comments stay collapsed until requested so the initial article remains light.