



ARTICLE CONTENTSOn this page 7 sections
Carving
Performance Objectives
By the end of the lesson, students should be able to:
- define carving;
- identify tools for carving;
- state materials for carving
- state stages of carving;
- Produce artwork, shapes and sculpture by carving.
Meaning of Carving
Carving is the art of shaping materials by cutting, chipping, or scraping away parts of them.
It involves removing unwanted pieces from a solid block of material to create a desired form, shape, or image. Carving can be done to make sculptures, decorative objects, or useful items.
Materials for Carving
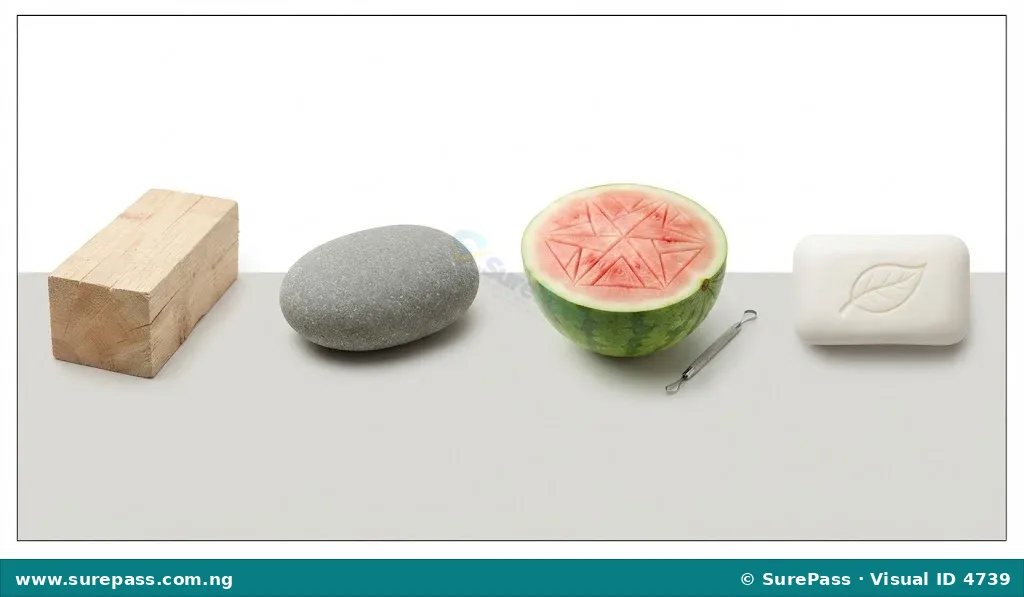
Many different materials can be used for carving, depending on the desired artwork and the tools available. Some materials are soft and easy to carve, while others are hard and require stronger tools and more effort.
Common carving materials include:
- Wood: This is a very popular material for carving. Different types of wood have different hardness, colours, and grain patterns. Softwoods like Obeche or Iroko are easier to carve, while hardwoods like Mahogany or Teak are more challenging.
- Stone: Stone carving is an ancient art form. Stones like marble, granite, and soapstone are used. Soapstone is softer and easier for beginners, while marble and granite are very hard and require special tools and skills.
- Fruits and Vegetables: Soft fruits like watermelon, pawpaw, and apples, and vegetables like yam, carrots, and potatoes, can be carved into decorative shapes for special occasions or food presentation. These are often used for temporary artworks.
- Soap: Bars of soap are excellent for beginners because they are soft, easy to cut, and safe to handle. Simple tools can be used to create various shapes.
- Clay: While often modelled, clay can also be carved when it is partially dry (leather-hard) to add details or remove material.
Tools for Carving and Their Uses
Carving requires specific tools to remove material and shape the chosen medium. The type of tool depends on the material being carved and the detail required.
Important carving tools include:
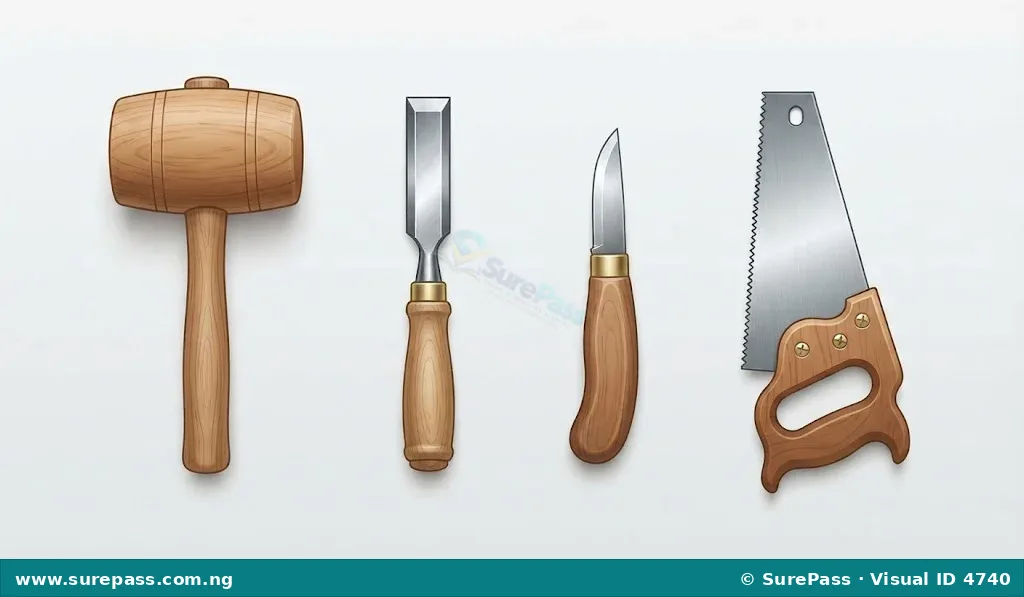
- Chisel: A chisel is a tool with a shaped cutting edge on its blade. It is used to cut, carve, or shape wood, stone, or other hard materials. Chisels come in various sizes and shapes for different carving effects.
- Mallet: A mallet is a type of hammer, usually made of wood or rubber. It is used with a chisel to strike the end of the chisel handle, pushing the blade into the material to remove larger pieces.
- Knife: Carving knives are sharp tools used for cutting, trimming, and adding fine details to softer materials like wood, soap, or fruits. They require careful handling due to their sharp blades.
- Saw: A saw is a tool with a toothed blade used for cutting larger pieces of material, especially wood. Saws are used to cut the initial block of material to a manageable size or to remove large sections before detailed carving begins.
- Pencil and Drawing Book: These are essential for planning the carving. The design is first drawn on paper and then transferred to the carving material.
Safety Note: Chisels, knives, and saws are sharp tools. They should only be used under the direct supervision of an adult or by adults themselves. Always handle tools with care to prevent injuries.
Stages of Carving
Carving an artwork involves several steps, from planning to finishing. Following these stages helps to create a good carving.
The main stages of carving are:
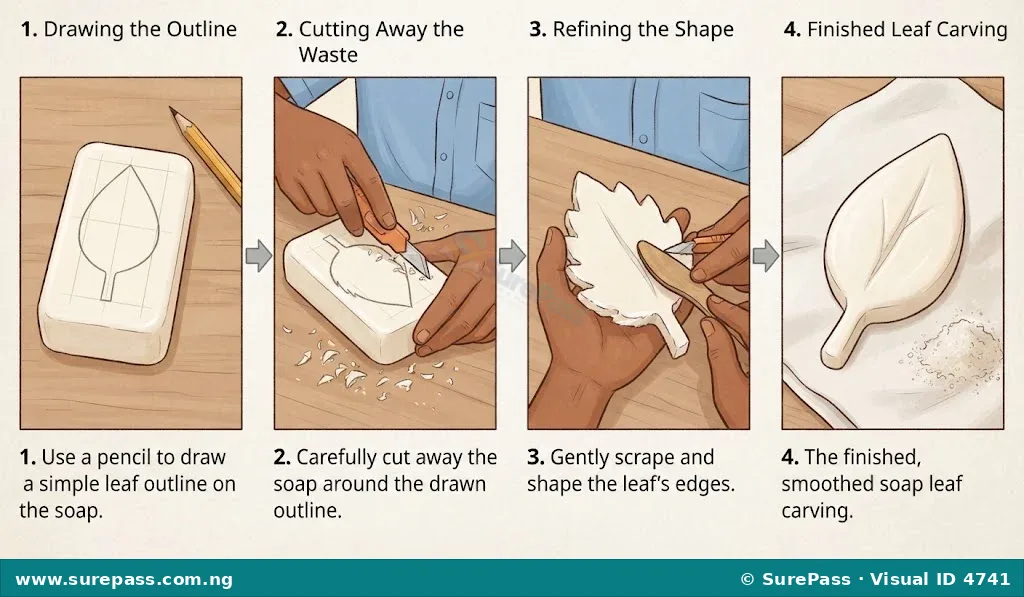
- Planning and Drawing: Before starting to carve, it is important to decide what to create. This involves drawing the design on paper from different angles. This drawing serves as a guide for the carving.
- Transferring the Design: Once the drawing is ready, the design is carefully transferred onto the carving material using a pencil or marker. This outline shows where to cut and shape the material.
- Roughing Out (Basic Shaping): In this stage, large pieces of the material are removed to get the basic shape of the artwork. This is like creating a rough outline in 3D. For harder materials, tools like saws and chisels with mallets are used. For softer materials, a knife or even a spoon can be used.
- Detailing: After the basic shape is formed, smaller tools like carving knives or smaller chisels are used to add details, textures, and finer lines to the artwork. This stage brings the carving to life.
- Finishing: The final stage involves smoothing the surface of the carving. This can be done by sanding with sandpaper, scraping, or polishing. For wood carvings, a protective finish like varnish or oil might be applied. For soap or fruit carvings, simply cleaning the surface is often enough.
Producing Artworks by Carving
Carving allows for the creation of various artworks, shapes, and sculptures. For beginners, using soft materials like soap is a safe and effective way to learn the basic techniques.
How to Carve a Simple Shape from Soap
This activity will guide you through carving a simple shape, like a leaf or a fish, from a bar of soap. This helps to practise the stages of carving.
The required materials are:
- A bar of white or light-coloured soap
- A blunt plastic knife or a wooden craft stick (for younger learners, a plastic spoon can also work)
- A pencil
- A piece of paper
- A small brush (optional, for cleaning)
- A tray or newspaper to catch soap shavings
The procedure involves the following steps:
- Prepare your workspace: Lay down newspaper or place a tray on your table to collect soap shavings.
- Plan your design: On a piece of paper, draw a simple shape like a leaf, a fish, or a star. Keep it simple for your first carving.
- Transfer the design: Place your drawing on the bar of soap. Use the pencil to trace the outline of your design onto the soap. Press gently so the pencil mark appears on the soap.
- Rough out the shape: Hold the soap firmly. Using your plastic knife or craft stick, carefully begin to cut away the soap around the outline of your design. Remove small pieces at a time. Work slowly to get the basic shape of your design.
- Shape and refine: Once the basic shape is visible, start to round the edges and smooth the surfaces. If you are carving a leaf, you can gently scrape lines for the veins. If it’s a fish, you can shape the fins and tail.
- Add details: Use the tip of your plastic knife or craft stick to add any small details to your carving. For example, a small circle for an eye on a fish, or a central line on a leaf.
- Clean and finish: Use your fingers or a small brush to gently remove any loose soap shavings from your carving. You can smooth the surface further by gently rubbing it with a damp finger.
- Display your artwork: Your carved soap artwork is now complete! You can place it on a shelf or give it as a gift.
Safety Tip: Always carve away from your body. If using a sharp knife, ensure an adult is supervising closely or doing the cutting for you.


0 comments
Open the discussion when you need it. Comments stay collapsed until requested so the initial article remains light.