


ARTICLE CONTENTSOn this page 7 sections
Shape Construction with Paper, Wood or Metal
Performance Objectives
By the end of the lesson, students should be able to:
- explain the meaning of shape construction;
- list materials used for shape construction;
- identify tools used for shape construction;
- identify different shape construction methods;
- use appropriate tools to construct different shapes by folding and bending metal or cardboard.
What is Shape Construction?
Shape construction is the process of making different shapes or objects from various materials.
It involves changing flat materials or raw pieces into useful three-dimensional forms. For example, a flat sheet of paper can be folded into a box, or a piece of wood can be cut and joined to make a chair. This process helps to create many items used in daily life.
Materials Used for Shape Construction
Many different materials can be used to construct shapes. The choice of material often depends on the type of shape being made and its intended use.
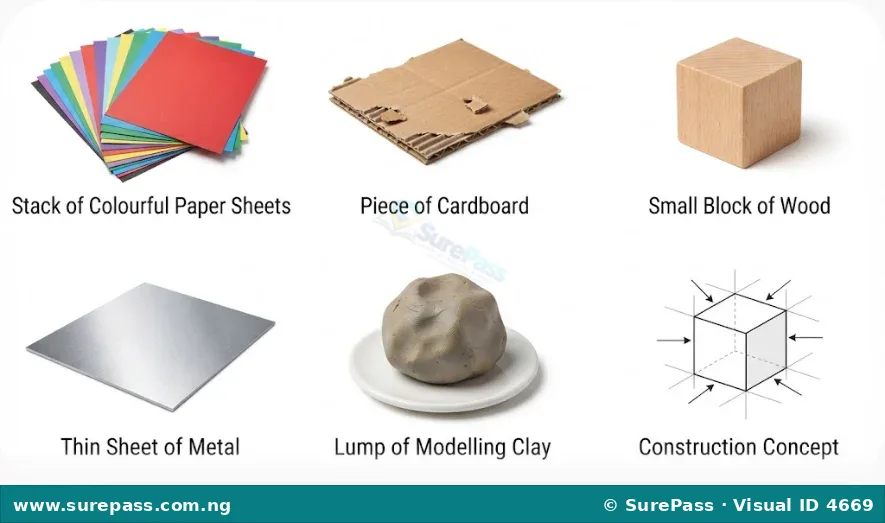
Common materials for shape construction include:
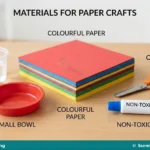
- Paper and Cardboard: These are light and easy to cut, fold, and bend. They are often used for making models, boxes, and decorative items.
- Wood: Wood is a strong and natural material. It can be cut, carved, and joined to make furniture, toys, and building structures.
- Metal: Metal is very strong and durable. It can be cut, bent, and joined to make tools, vehicles, and parts of buildings. Thin metal sheets or wires are easier to work with for simple constructions.
- Clay: Clay is a soft, mouldable material that can be shaped easily with hands or tools. It hardens when dried or baked, and is used for making pots, sculptures, and bricks.
Tools Used for Shape Construction
Special tools are needed to work with different materials and create shapes. Using the correct tool makes the work easier and safer.
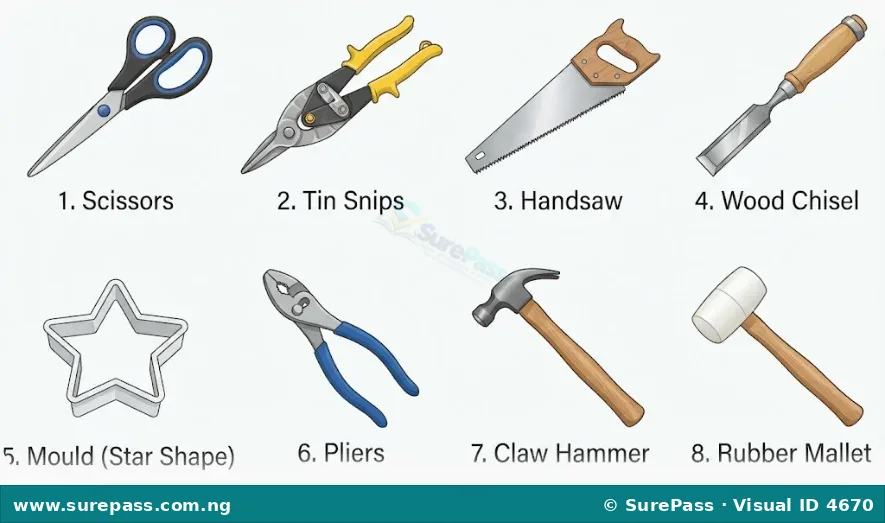
Some common shape construction tools are:
- Scissors: Used for cutting paper and thin cardboard.
- Snips: These are special scissors-like tools used for cutting thin metal sheets. They are also called tin snips.
- Saws: Used for cutting wood into different sizes and shapes. There are different types of saws, like handsaws.
- Chisel: A tool with a sharp edge used for carving or cutting pieces out of wood or other soft materials.
- Moulds: These are hollow forms into which a liquid or soft material (like clay) is poured or pressed to give it a specific shape as it hardens.
- Pliers: Tools used for gripping, bending, and cutting wires or small pieces of metal.
- Hammer: Used for driving nails into wood or for shaping metal by striking it.
- Mallets: Similar to hammers but usually have a softer head (like rubber or wood) to avoid damaging the material being struck, often used with chisels or for shaping metal without leaving marks.
Methods of Shape Construction
There are different ways to construct shapes from materials. For Primary 4, two important methods are folding and bending.
-
Folding: This method involves creasing a flat material, like paper or cardboard, along a line to change its shape. Folding helps to create edges and corners, turning a flat sheet into a three-dimensional object like a box or a fan.
When folding, it is important to make neat and accurate creases to ensure the final shape is strong and well-formed.
-
Bending: This method involves curving or changing the angle of a material without creasing it sharply. Bending is often used for materials like thin metal sheets, wires, or even thick cardboard to create curved shapes like cylinders or cones. It can also be used to create hooks or loops from wire.
Bending requires applying steady force to gradually curve the material. Tools like pliers can help to bend metal accurately.
Constructing Shapes by Folding and Bending
Constructing shapes involves careful handling of materials and tools. Safety is very important when working with tools, especially sharp or heavy ones.
Safety Tips for Shape Construction
Important safety tips include:
- Always ask an adult for help or supervision when using sharp tools like scissors, snips, or saws.
- Use tools carefully and only for their intended purpose.
- Keep fingers away from cutting edges and moving parts of tools.
- Wear protective gloves if handling rough or sharp materials like thin metal sheets.
- Keep the work area clean and tidy to avoid accidents.
- Store tools properly after use.
Constructing a Box from Cardboard (Folding)
A box is a common shape that can be constructed by folding cardboard. This activity helps to understand how flat materials can become three-dimensional objects.
The required materials are:
- A sheet of cardboard (e.g., an old cereal box or carton)
- Ruler
- Pencil
- Scissors
- Glue or tape
The procedure involves the following steps:
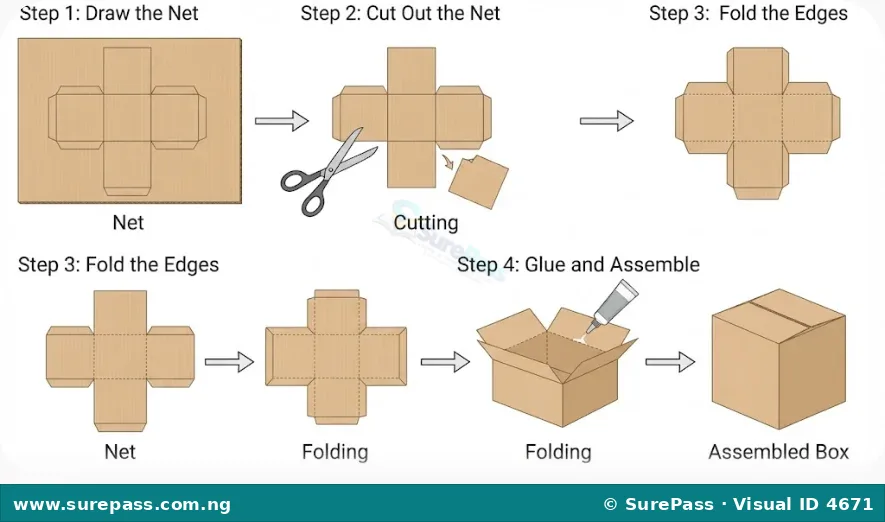
- Prepare the cardboard: Lay the cardboard flat. Using a ruler and pencil, draw a cross shape or a net of a cube/rectangular box. This means drawing a central square/rectangle for the base, with four other squares/rectangles attached to its sides (these will be the walls), and small flaps on the edges of the walls for gluing.
- Cut the shape: Carefully cut out the drawn shape using scissors. Make sure to cut along the outer lines accurately.
- Fold the edges: Use the ruler to help you fold along all the pencil lines. Press firmly to create sharp creases. These creases will form the edges of the box.
- Apply glue or tape: Apply glue or tape to the small flaps.
- Assemble the box: Bring the sides of the box upwards and attach the flaps to the inside of the adjacent walls. Press firmly until the glue holds or the tape is secure.
- Finish: Allow the glue to dry completely. You now have a constructed box.
Constructing a Cylinder from Cardboard (Bending and Folding)
A cylinder is a shape with two circular ends and a curved side. It can be made by bending cardboard.
The required materials are:
- A sheet of cardboard
- Ruler
- Pencil
- Scissors
- Glue or tape
- A circular object (like a cup or compass) for drawing circles
The procedure involves the following steps:
- Draw the parts: On the cardboard, draw a large rectangle for the curved body of the cylinder. Add small flaps along one long edge and one short edge of the rectangle. Then, draw two circles of the same size for the top and bottom of the cylinder. Add small tabs around the edges of the circles for gluing.
- Cut the parts: Carefully cut out the rectangle and the two circles.
- Bend the rectangle: Gently bend the rectangular piece of cardboard to form a curved shape. Overlap the short edges and glue or tape the flap to create the side wall of the cylinder.
- Attach the circles: Fold the tabs around the circles inwards. Apply glue or tape to these tabs.
- Assemble the cylinder: Attach one circle to one open end of the curved body, pressing the tabs against the inside of the cylinder wall. Repeat for the second circle on the other end.
- Finish: Allow the glue to dry. You have now constructed a cylinder.
Shaping Thin Metal (Bending)
Thin metal sheets or wires can be bent to create different shapes. This requires more force than cardboard and often needs tools like pliers.
The required materials are:
- Thin metal wire or a small, thin metal sheet (e.g., from an aluminium can, with edges smoothed)
- Pliers
- Gloves (for safety)
- An adult for supervision
The procedure involves the following steps:
- Wear gloves: Put on gloves to protect your hands from sharp edges or rough surfaces of the metal.
- Hold the metal: Hold the metal wire or sheet firmly with one hand, or use pliers to grip it.
- Apply bending force: Use pliers to grip the part of the metal you want to bend. Slowly and steadily apply pressure to bend the metal into the desired curve or angle. For wire, you can use pliers to create loops or zig-zag patterns. For thin sheets, you can gently curve them.
- Check the shape: Observe the shape you are creating. Adjust the bending as needed.
- Safety first: Always ensure an adult is supervising, especially when working with metal, as it can have sharp edges.

0 comments
Open the discussion when you need it. Comments stay collapsed until requested so the initial article remains light.