


ARTICLE CONTENTSOn this page 7 sections
Fullness in Garments, Types, Functions and Techniques for SS 1
Performance Objectives
By the end of the lesson, students should be able to:
- state the meaning of fullness in garment;
- explain the methods and functions of fullness in garments;
- state the points to consider in disposing fullness in garment;
- practice how to work each fullness with sample fabric.
Understanding Fullness in Garments
Fullness in garments refers to the extra fabric incorporated into a clothing design to allow for body curves, ease of movement, or to create a specific style or silhouette. The human body is not flat; it has curves and contours, especially around the bust, waist, hips, and shoulders. Without fullness, garments would be tight, uncomfortable, and unable to fit the body’s natural shape.
The process of managing this extra fabric to fit the body or achieve a desired design is known as disposing of fullness. This involves shaping the fabric so that it lies smoothly over the body’s curves or creates decorative effects.
Types of Fullness Disposals in Garments
Fullness disposals are techniques used to control and shape extra fabric in a garment. These techniques help to fit the garment to the body’s contours, provide comfort, and add decorative elements. The main types of fullness disposals include darts, tucks, pleats, gathering, and shirring.
1. Darts
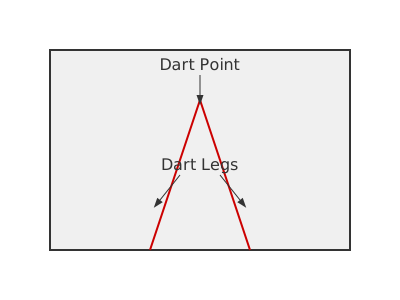
A dart is a folded and stitched wedge of fabric that tapers to a point. It is used to shape a flat piece of fabric to fit a curved part of the body, such as the bust, waist, or hips.
Darts are essential for creating a tailored fit. They remove excess fabric from a wider area and direct it towards a narrower area, allowing the garment to conform smoothly to the body’s three-dimensional shape. For example, bust darts shape the fabric over the bust, while waist darts shape it around the waistline.
2. Tucks
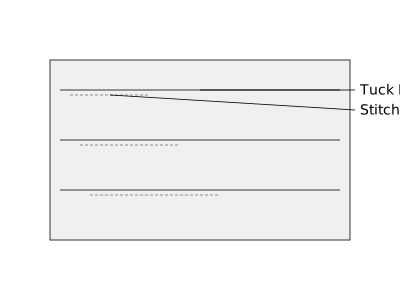
Tucks are folds of fabric stitched down for a specific length, creating a decorative and shaping effect. They are similar to darts but are usually narrower and can be used in groups to create texture or control fullness over a larger area.
Tucks can be used for both shaping and decoration. They can be found on blouses, dresses, and skirts, often appearing in rows to add visual interest or to gently draw in fabric without creating a sharp, tailored look like a dart. Tucks can be pin tucks (very narrow), spaced tucks, or blind tucks (where the fold covers the stitching line).
3. Pleats
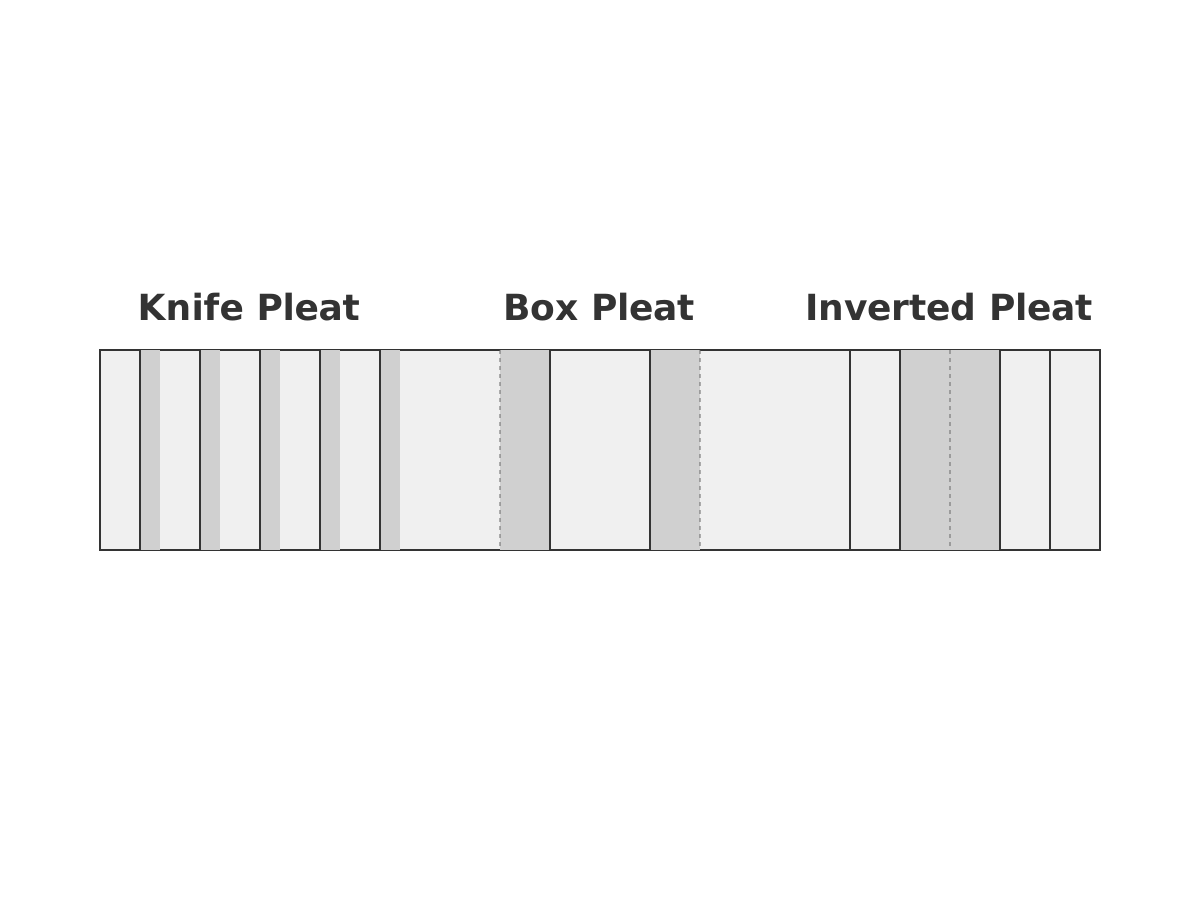
Pleats are folds of fabric that are pressed or stitched into place, creating a structured and decorative effect. Unlike tucks, pleats are typically wider and can be left unstitched for part of their length to allow for movement.
Pleats are commonly used in skirts, dresses, and trousers to add fullness, allow for ease of movement, and create a stylish appearance. They can be single folds or multiple folds, and their appearance varies depending on how they are folded and pressed. Common types include knife pleats (all folds facing one direction), box pleats (two folds facing away from each other), and inverted pleats (two folds facing towards each other).
4. Gathering
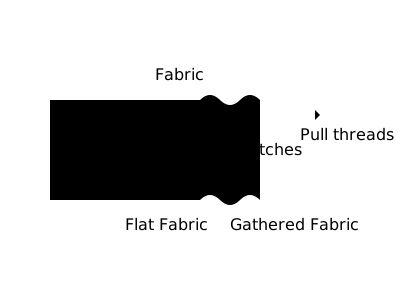
Gathering is a technique where a longer piece of fabric is drawn into a shorter length, creating soft, even folds. This is achieved by stitching one or more rows of loose stitches and then pulling the threads to draw the fabric together.
Gathering is used to create soft fullness, often seen in sleeves, skirt waistlines, and ruffles. It provides a relaxed and flowing look, adding volume and drape to a garment. It is a common method for attaching a wider piece of fabric to a narrower one, such as attaching a full skirt to a fitted waistband.
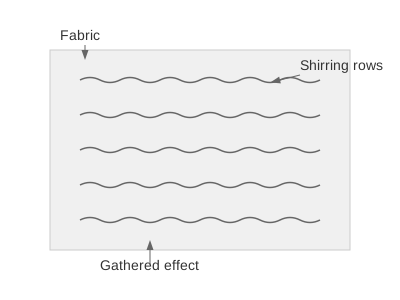
5. Shirring
Shirring is a decorative technique that involves multiple rows of gathering, often using elastic thread, to create a stretchy, textured, and fitted effect. It is essentially a series of parallel gathers.
Shirring is used to create elasticity and shape in areas like bodices, cuffs, and waistbands, allowing the garment to stretch and conform to the body. It provides both fullness control and flexibility, making it comfortable to wear while also adding a decorative element. Shirring can be done with regular thread for a non-stretchy effect or with elastic thread for stretch.
Functions of Fullness Disposals in Garments
Fullness disposals serve several important functions in garment making:
- Shaping Garments: They allow flat fabric to be shaped to fit the three-dimensional curves of the human body, such as the bust, waist, and hips. Darts are primary for this function.
- Providing Ease and Comfort: By controlling excess fabric, they ensure the garment is comfortable to wear and allows for freedom of movement. Gathering and pleats often contribute to this.
- Adding Decorative Elements: Many fullness disposals, like tucks, pleats, gathering, and shirring, are used to enhance the aesthetic appeal of a garment, adding texture, volume, and style.
- Controlling Volume: They manage the amount of fabric in a garment, preventing it from being too bulky or too tight in certain areas.
- Creating Specific Silhouettes: Fullness disposals are crucial in achieving various fashion silhouettes, from fitted and tailored to loose and flowing.
Points to Consider When Disposing Fullness in Garments
When choosing and applying fullness disposal techniques, several factors should be considered to ensure the best outcome for the garment:
- Fabric Type: The weight, drape, and texture of the fabric greatly influence which fullness disposal method is suitable.
- Lightweight fabrics (e.g., chiffon, silk) gather and shirr beautifully, creating soft, flowing fullness.
- Medium-weight fabrics (e.g., cotton, linen) work well with darts, tucks, and pleats, holding their shape effectively.
- Heavyweight fabrics (e.g., denim, wool) are best suited for darts and larger, structured pleats, as gathering can become too bulky.
- Garment Design and Style: The overall aesthetic and intended look of the garment dictate the choice of fullness disposal.
- For a tailored, structured look, darts and sharp pleats are often preferred.
- For a soft, romantic, or casual look, gathering, shirring, and soft tucks are more appropriate.
- Body Shape and Fit: The wearer’s body shape and the desired fit of the garment are crucial.
- Darts are essential for fitting garments closely to the body’s curves.
- Fullness from gathers or pleats can be used to camouflage certain areas or add volume where desired.
- Placement of Fullness: The location of the fullness disposal affects the garment’s appearance and fit.
- Bust darts are typically placed at the side seam or shoulder.
- Waistline fullness (gathers, pleats) is usually distributed evenly around the waist.
- Ease of Construction: Some methods are simpler to execute than others. Beginners might find gathering easier than perfectly pressed pleats.
- Durability and Maintenance: Consider how the fullness disposal will hold up to wear and washing. Pleats may require pressing, while gathers are generally low maintenance.
Producing Different Types of Fullness on Sample Fabrics
Practicing these techniques on sample fabrics helps to develop the necessary skills before working on an actual garment. For each technique, use a piece of plain woven fabric (like calico or cotton) approximately 20cm x 20cm.
Materials and Tools Required:
For these practical exercises, gather the following:
- Fabric pieces (approximately 20cm x 20cm for each sample)
- Sewing machine (or hand sewing needle and thread)
- Matching sewing thread
- Pins
- Measuring tape or ruler
- Fabric marker or tailor’s chalk
- Scissors
- Iron and ironing board
- Elastic thread (for shirring)
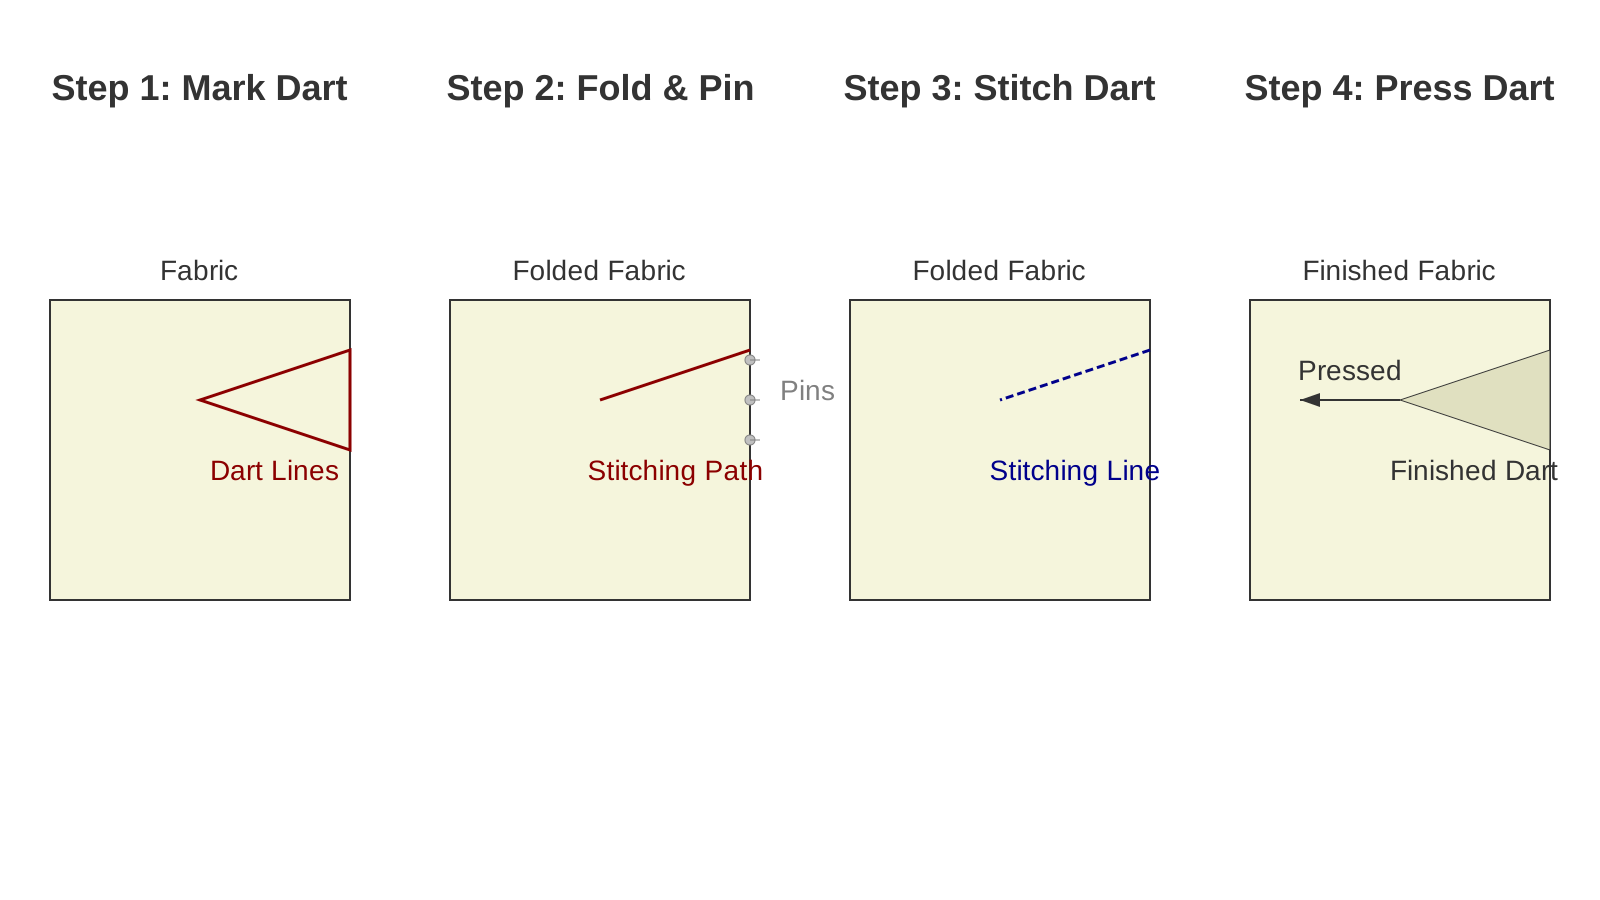
1. How to Work a Dart on Sample Fabric
A dart helps to shape fabric to a curve.
The procedure involves the following steps:
- Prepare the Fabric: Take a fabric sample.
- Mark the Dart: On the wrong side of the fabric, use a ruler and fabric marker to draw a triangle. The base of the triangle (the widest part) should be about 8-10 cm long, and the point (apex) should be about 10-12 cm from the base. This forms the dart legs and dart point.
- Fold the Fabric: Fold the fabric along the centre line of the dart, bringing the two dart legs together so that the markings align perfectly. Pin the fold in place.
- Stitch the Dart: Starting from the widest part of the dart (the base), stitch along the marked line towards the dart point. As you approach the point, gradually reduce your stitch length to a very small stitch (almost a knot) and stitch off the edge of the fabric for the last 1 cm. Do not backstitch at the point to avoid bulk. Backstitch securely at the base of the dart.
- Press the Dart: Press the dart flat. For vertical darts (like waist darts), press the fullness towards the centre of the garment. For horizontal darts (like bust darts), press the fullness downwards.
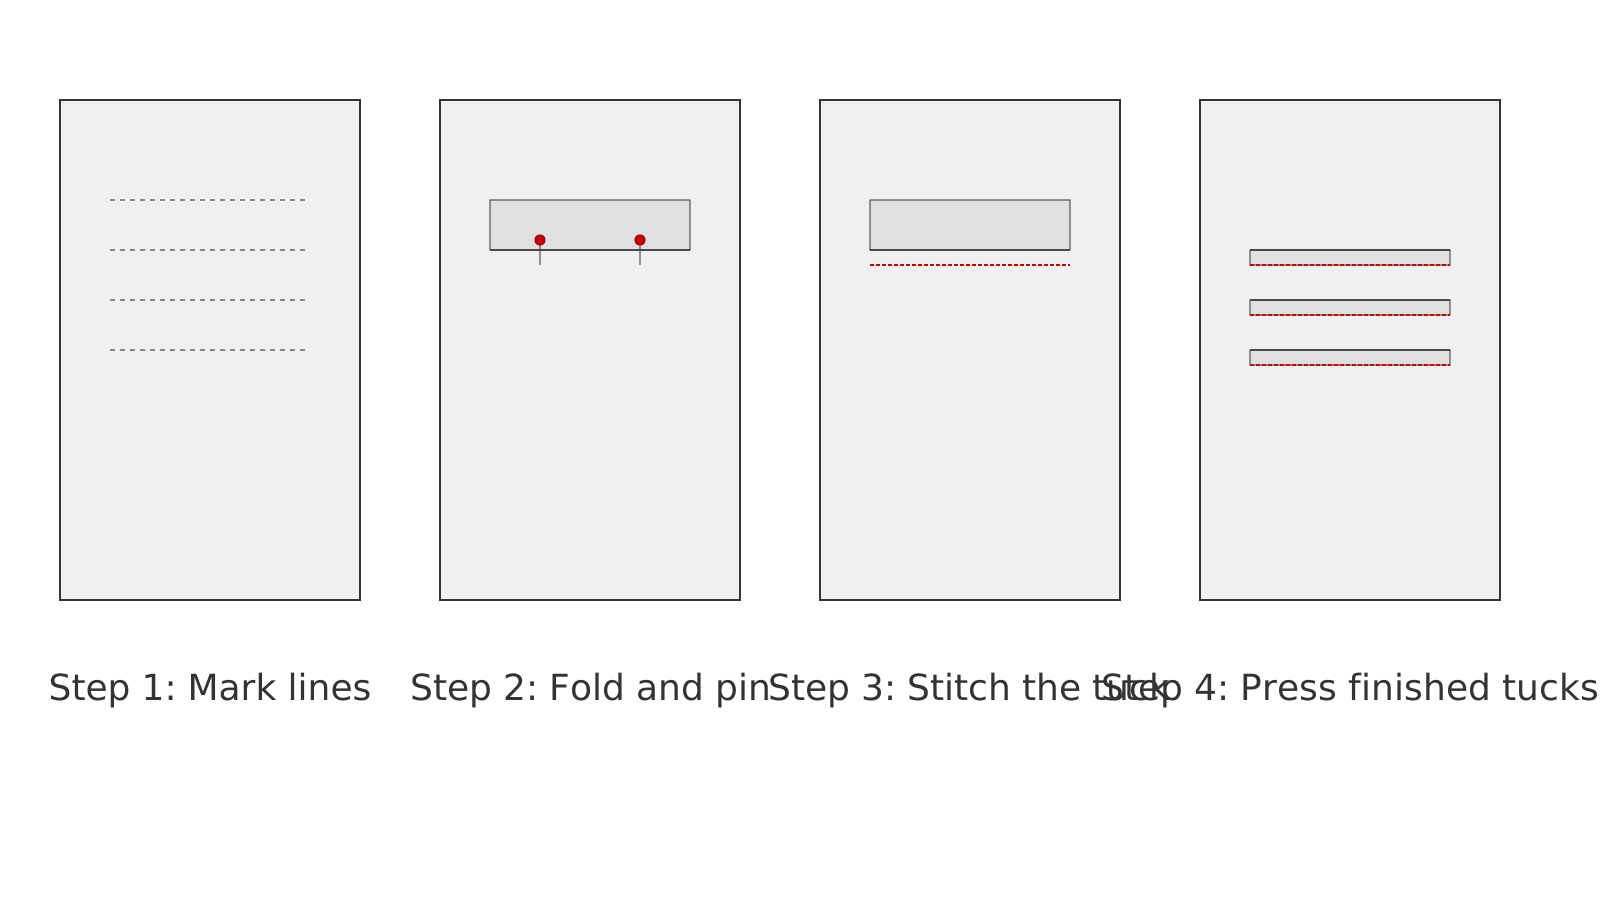
2. How to Work Tucks on Sample Fabric
Tucks create decorative folds and control fullness.
The procedure involves the following steps:
- Prepare the Fabric: Take a fabric sample.
- Mark the Tucks: On the wrong side of the fabric, mark parallel lines for the tucks. For example, mark a line for the fold and another line for the stitching line, 0.5 cm away from the fold line. Repeat for several tucks, ensuring even spacing (e.g., 2 cm apart).
- Fold and Pin: Fold the fabric along the fold line, bringing the marked stitching line to the edge of the fold. Pin in place.
- Stitch the Tucks: Stitch along the marked stitching line for the desired length of the tuck (e.g., 5-10 cm). Backstitch at the beginning and end of each tuck.
- Press the Tucks: Press all tucks in the same direction, usually towards the centre or side seam of the garment.
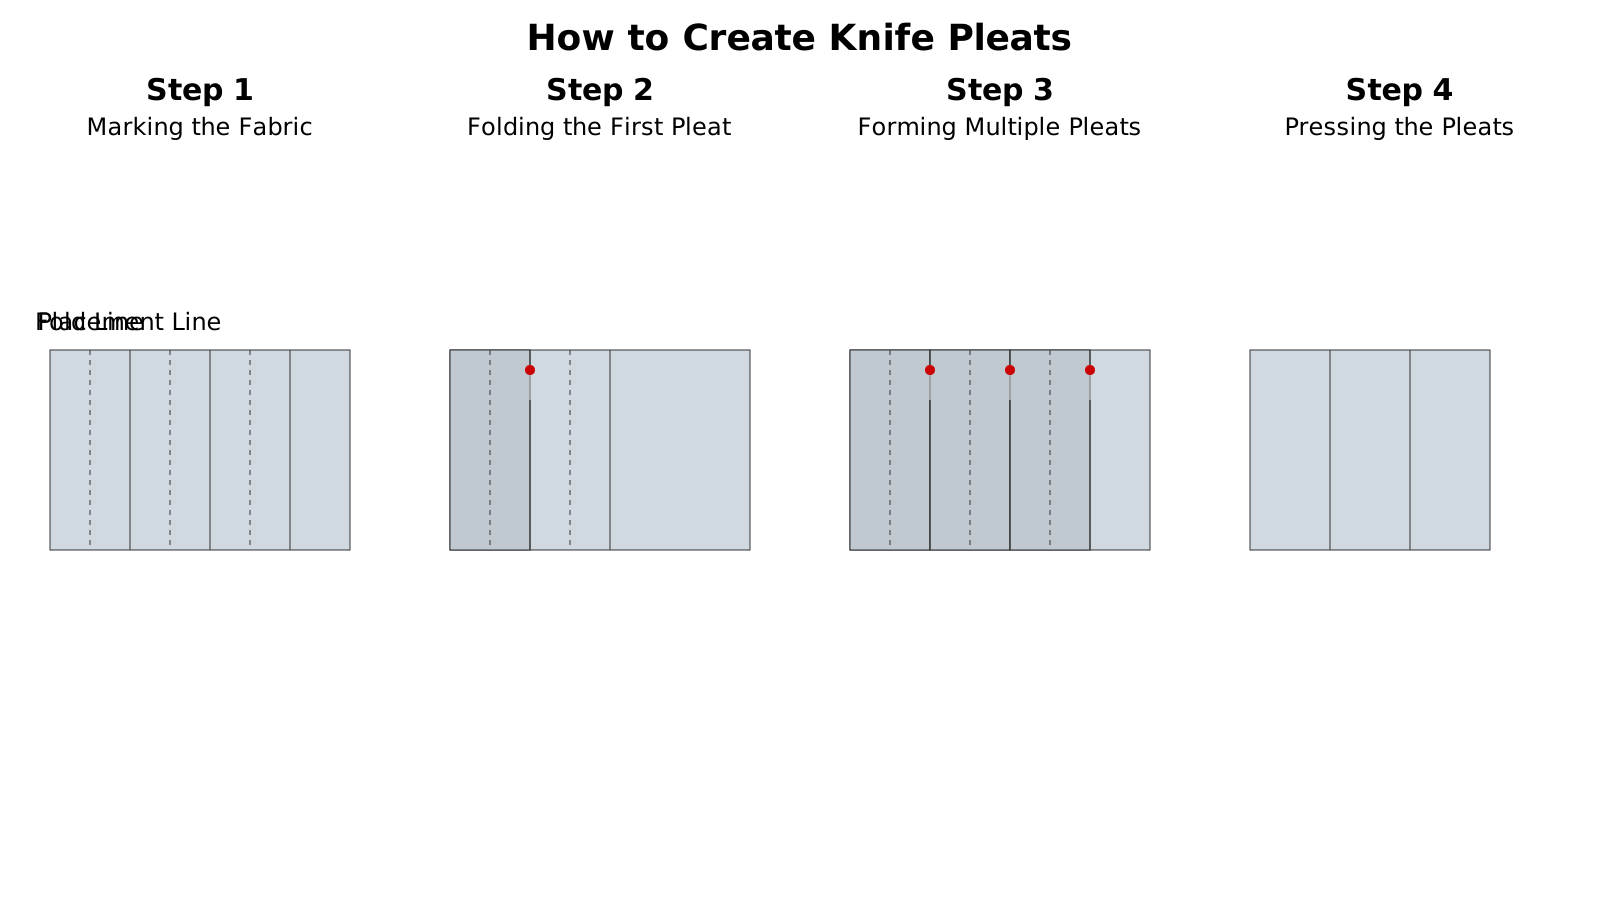
3. How to Work Pleats on Sample Fabric
Pleats create structured folds for shaping and decoration.
The procedure involves the following steps:
- Prepare the Fabric: Take a fabric sample.
- Mark the Pleats: On the wrong side of the fabric, mark lines for the pleats. For a knife pleat, mark a fold line, then a placement line (where the fold will meet), and then the next fold line. For example, mark lines 2 cm apart for the fold, then 2 cm for the underlay, then 2 cm for the next fold.
- Fold and Pin: Fold the fabric along the first fold line. Bring this fold to the first placement line. Pin in place. Repeat for subsequent pleats.
- Stitch (Optional): For permanent pleats, you can stitch across the top edge of the pleats (e.g., at the waistband line) to hold them in place. For decorative pleats, stitching might not be needed along the length.
- Press the Pleats: Carefully press each pleat firmly into place using an iron. For knife pleats, press all folds in the same direction. For box or inverted pleats, press the folds away from or towards the centre, respectively.
4. How to Work Gathering on Sample Fabric
Gathering creates soft, even fullness.
The procedure involves the following steps:
- Prepare the Fabric: Take a fabric sample.
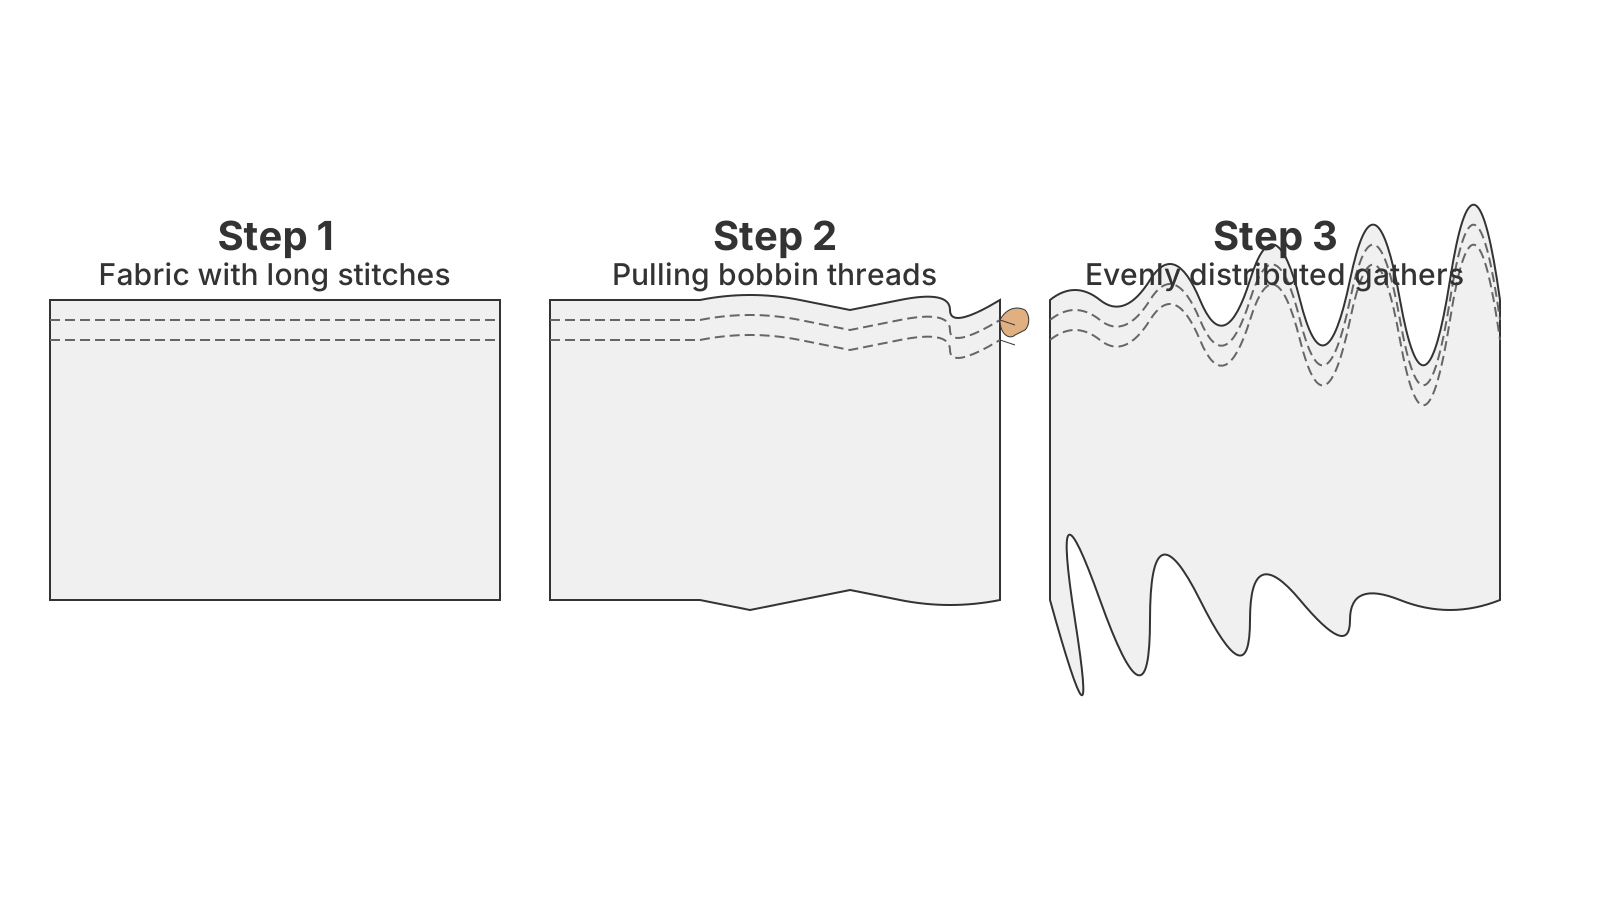
- Set Machine Stitch: Set your sewing machine to a long stitch length (e.g., 4-5 mm). Do not backstitch.
- Stitch Gathering Rows: Stitch two parallel rows of stitches within the seam allowance (e.g., 0.5 cm and 1.5 cm from the raw edge). Leave long thread tails at both ends of each row.
- Gather the Fabric: Hold the bobbin threads (the threads from the underside of the fabric) from both rows at one end. Gently pull these threads while pushing the fabric along the threads with your other hand. This will draw the fabric into gathers.
- Distribute Gathers: Continue pulling until the gathered fabric reaches the desired length. Evenly distribute the gathers so they are smooth and consistent. Secure the threads by tying them off or winding them around a pin.
5. How to Work Shirring on Sample Fabric
Shirring creates stretchy, textured fullness with elastic thread.
The procedure involves the following steps:
- Prepare the Fabric: Take a fabric sample.
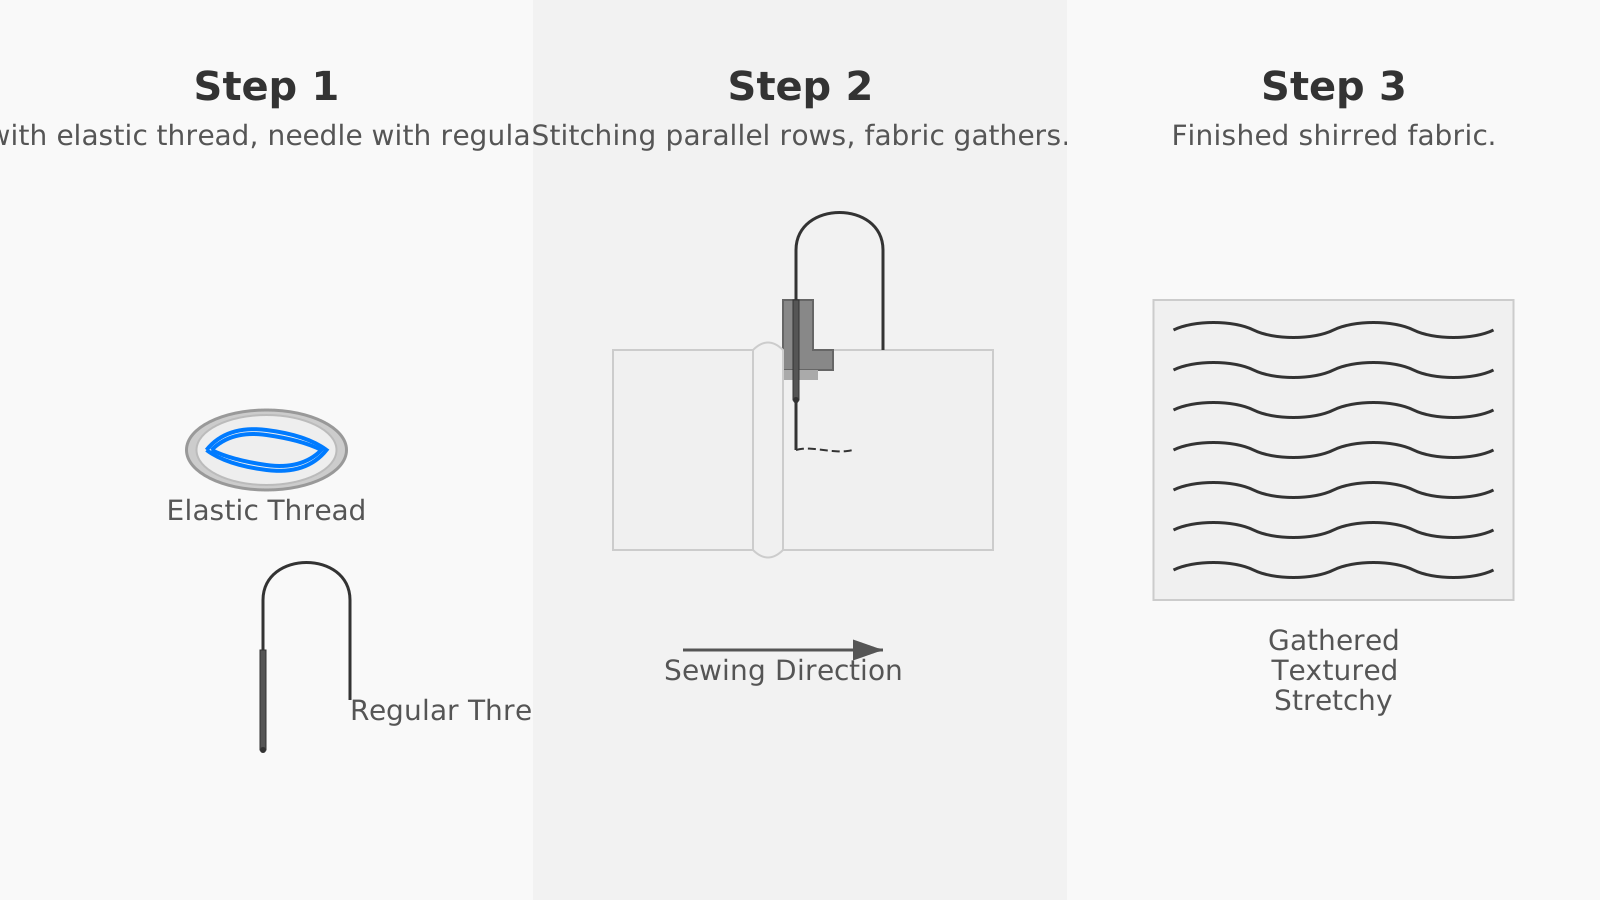
- Prepare Machine for Shirring: Wind elastic thread onto your bobbin by hand, stretching it slightly as you wind. Do not overfill the bobbin. Use regular sewing thread in the needle. Set your sewing machine to a longer stitch length (e.g., 3-4 mm).
- Stitch Shirring Rows: Place the fabric under the presser foot. Stitch parallel rows across the fabric, ensuring each row is evenly spaced (e.g., 1-2 cm apart). The elastic thread in the bobbin will automatically gather the fabric as you stitch.
- Continue Shirring: Continue stitching multiple rows until the desired shirred effect is achieved. The more rows you stitch, the more gathered and stretchy the fabric will become.
- Finish: Backstitch at the beginning and end of each row to secure the threads. Steam the shirred area with an iron (without touching the fabric directly) to help the elastic contract further and set the gathers.
0 comments
Open the discussion when you need it. Comments stay collapsed until requested so the initial article remains light.