



ARTICLE CONTENTSOn this page 11 sections
Use and Care of Sewing Tools and Equipment
Performance Objectives
By the end of the lesson, students should be able to:
- identify and classify sewing tools and equipment according to their various functions for garment making;
- explain factors to consider when choosing sewing tools and equipment;
- describe different types of sewing machine and their functions;
- identify parts of sewing machines with their functions.
Meaning of Sewing Tools and Equipment
Sewing tools are small, portable hand-held instruments used in garment making to perform specific manual tasks such as measuring, marking, cutting, and hand stitching.
Sewing equipment refers to larger, more permanent appliances, devices, or machines, such as sewing machines and pressing tables, that are used to facilitate and speed up the garment-making process.
Having a clear understanding of these items is essential for efficiency, accuracy, and professional results in fashion design and garment making.
Classification of Sewing Tools and Equipment
Sewing tools and equipment are classified according to their specific functions in the garment-making process. This systematic grouping helps tailors and designers select the correct instrument for each stage of production.
The primary classifications of sewing tools and equipment include:
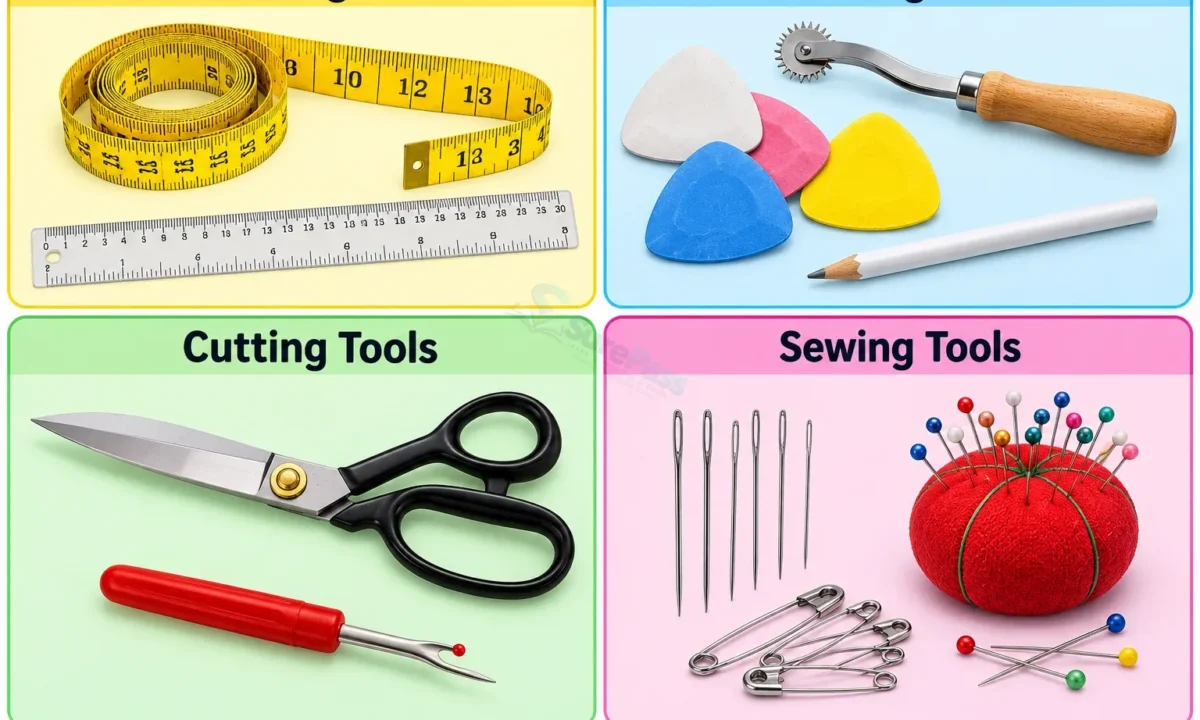
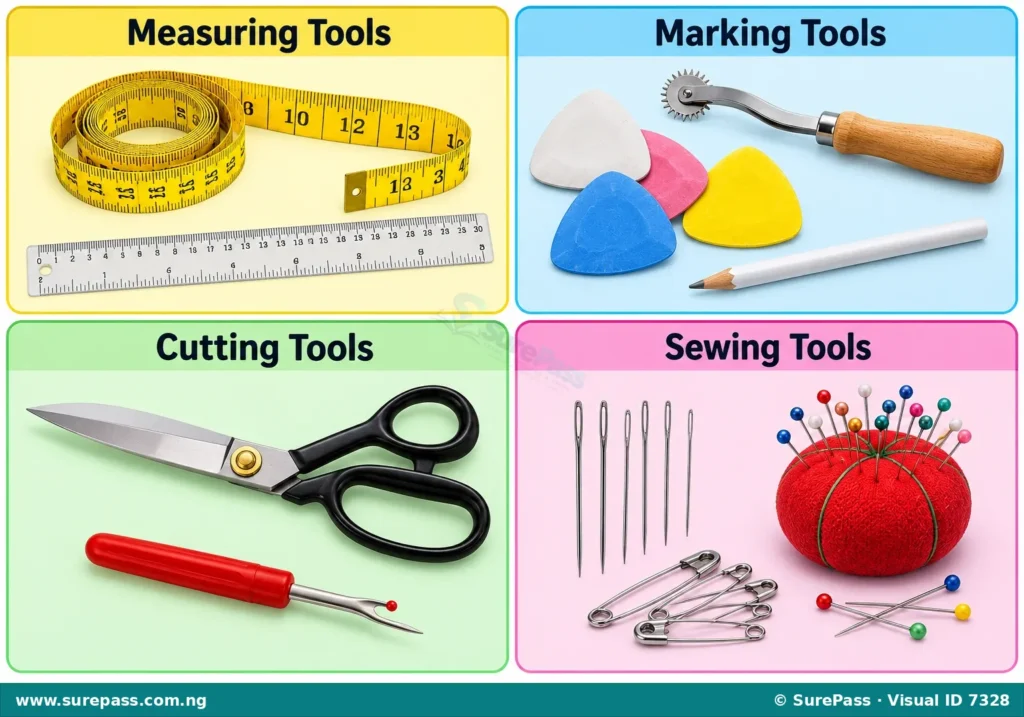
- Measuring Tools: These are used to take body measurements, measure fabric, and check pattern dimensions. Examples include tape measures, yardsticks, rulers, and hem gauges.
- Marking Tools: These are used to transfer pattern markings, construction lines, and design details onto the fabric. Examples include tailor’s chalk, tracing wheels, dressmaker’s carbon paper, and marking pens.
- Cutting Tools: These are sharp instruments used to cut paper patterns, fabrics, and threads. Examples include dressmaker’s shears, pinking shears, embroidery scissors, seam rippers, and rotary cutters.
- Sewing and Stitching Tools: These are hand-held tools used during the actual assembly of the garment. Examples include hand sewing needles, pins, pincushions, thimbles, and needle threaders.
- Pressing Equipment: These are used to flatten seams, remove wrinkles, and shape garments during and after construction. Examples include electric dry or steam irons, ironing boards, sleeve boards, and tailor’s hams.
- Fitting and Work Aids: These are items that assist in checking the fit of a garment or organizing the workspace. Examples include dress forms (mannequins) and sewing boxes.
Detailed Description of Selected Sewing Tools
Specific tools within each classification have unique features designed for precise tasks:
- Tape Measure: A flexible, plastic-coated ribbon marked with inches and centimetres, usually 60 inches (150 cm) long, used for taking body measurements.
- Tailor’s Chalk: Small, hard blocks of wax or chalk used to make temporary marks on fabric that can be easily brushed away.
- Dressmaker’s Shears: Large cutting tools with offset handles that allow the fabric to lie flat on the table while being cut, ensuring accuracy.
- Pinking Shears: Scissors with saw-toothed blades that cut a zigzag edge, used to finish raw fabric edges and prevent fraying.
- Seam Ripper: A small tool with a hook-like blade used to remove unwanted stitches and open seams.
- Thimble: A small, protective cap worn on the finger to push needles through heavy fabric without injuring the skin.
Guidelines for Choosing Sewing Tools and Equipment
Selecting the right tools and equipment is critical for achieving high-quality results and ensuring safety during garment construction. Poorly chosen tools can damage fabrics, cause frustration, or wear out quickly.
The key factors to consider when choosing sewing tools and equipment include:
- Quality and Durability: Tools should be made of high-quality materials. For example, scissors and shears should be made of stainless steel or high-carbon steel to maintain their sharpness and resist rust.
- Purpose and Suitability: The tool must be appropriate for the specific fabric and task. Heavy-duty fabrics require stronger needles and larger shears, while delicate fabrics require fine pins and needles.
- Cost and Budget: It is advisable to buy the best quality tools that can be afforded. While high-quality tools may have a higher initial cost, they last longer and perform better than cheap, low-quality alternatives.
- Ease of Operation and Maintenance: Equipment, especially sewing machines, should be easy to operate, clean, and oil. There should also be readily available spare parts and local technicians for repairs.
- Safety Features: Electrical equipment like irons and sewing machines must have safety certifications, insulated cords, and stable bases to prevent accidents.
- Comfort and Ergonomics: Tools like shears and scissors should fit comfortably in the hand of the user to prevent fatigue and strain during long periods of use.
Types of Sewing Machines and Their Functions
A sewing machine is a mechanical or electrical device used to stitch fabric, leather, or other materials together with thread.
Sewing machines are classified based on their source of power and their intended use. The main types of sewing machines include:
- Hand-operated Sewing Machine: This is a manual machine powered by turning a handwheel with the right hand while guiding the fabric with the left hand. It is highly portable and useful in areas without electricity, but it is slow because only one hand is free to guide the fabric.
- Treadle Sewing Machine: This is a manual machine mounted on a stand and powered by a foot pedal (treadle). The operator rocks the pedal back and forth with their feet to turn the drive wheel. This leaves both hands free to guide the fabric, making it faster than a hand-operated machine.
- Electric Domestic Sewing Machine: This machine is powered by an electric motor controlled by a foot pedal. It is faster than manual machines and often includes features for decorative stitches, buttonholes, and zig-zag stitching. It is designed for home use and light tailoring.
- Industrial Sewing Machine: This is a heavy-duty, high-speed machine powered by a powerful electric motor. It is designed for continuous, long-term use in factories and commercial tailoring shops. These machines are usually specialized to perform one specific task, such as straight stitching, overlocking (serging), or buttonholing, at very high speeds.
Parts of a Sewing Machine and Their Functions
Understanding the parts of a sewing machine is essential for correct operation, troubleshooting, and maintenance. The machine consists of both visible external parts and internal mechanisms.
The principal parts of a domestic sewing machine and their functions are:
- Spool Pin: A metal or plastic rod that holds the spool of thread in place at the top of the machine.
- Thread Guide: Small metal loops or slots that direct the thread along the correct path from the spool to the needle.
- Tension Regulator: A mechanism consisting of two metal discs and a spring that controls the tightness or looseness of the upper thread.
- Thread Take-up Lever: A moving metal lever that pulls thread from the spool and feeds it through the tension discs down to the needle, releasing thread to form each stitch.
- Needle Bar: A vertical steel rod that holds the needle and moves it up and down to carry the upper thread through the fabric.
- Needle Clamp: A small screw that holds the sewing machine needle securely in the needle bar.
- Presser Foot: A metal attachment that holds the fabric flat against the feed dog while stitching is in progress.
- Presser Foot Lifter: A lever located at the back of the machine head used to raise and lower the presser foot.
- Feed Dog: A set of metal teeth located directly under the presser foot that rises and moves backward to pull the fabric forward after each stitch.
- Throat Plate (Needle Plate): A flat metal plate under the presser foot with a hole for the needle to pass through and slots for the feed dog. It often has etched guidelines for maintaining straight seams.
- Slide Plate: A movable metal cover that slides open to allow access to the bobbin case and shuttle mechanism underneath.
- Bobbin and Bobbin Case: The bobbin is a small spool that holds the lower thread, while the bobbin case holds the bobbin and regulates the tension of the lower thread.
- Bobbin Winder: A mechanism used to wind thread from the main spool onto the bobbin.
- Balance Wheel (Flywheel): A large wheel on the right side of the machine that is turned manually to raise or lower the needle, or driven by a belt to run the machine.
- Stitch Regulator: A dial or lever used to adjust the length and direction (forward or reverse) of the stitches.
How to Operate a Sewing Machine
Operating a sewing machine requires coordination, practice, and adherence to a systematic procedure to ensure safety and prevent damage to the machine or fabric.
Threading the Sewing Machine
Proper threading is essential for the machine to form stitches correctly. Threading is divided into upper threading and lower threading.
The procedure for upper threading involves the following steps:
- Raise the needle to its highest point by turning the balance wheel toward the body.
- Raise the presser foot using the presser foot lifter.
- Place the spool of thread on the spool pin.
- Pass the thread through the upper thread guides.
- Lead the thread down and pass it between the tension discs from right to left.
- Bring the thread up and thread it through the eye of the thread take-up lever from right to left.
- Pass the thread down through the lower thread guides.
- Thread the needle from the correct side (usually from left to right or front to back, depending on the machine model).
The procedure for lower threading and drawing up the bobbin thread involves the following steps:
- Wind thread onto the bobbin using the bobbin winder.
- Place the wound bobbin into the bobbin case, ensuring the thread pulls in the direction specified by the machine manual.
- Insert the bobbin case into the shuttle under the slide plate until it clicks into place.
- Hold the end of the upper needle thread loosely with the left hand.
- Turn the balance wheel toward the body with the right hand to lower the needle into the throat plate.
- Continue turning the balance wheel until the needle rises back to its highest point.
- Gently pull the upper thread; it will bring up a loop of the bobbin thread through the needle hole.
- Pull both the upper and lower threads toward the back of the machine, under the presser foot.
Stitching Fabric
Once the machine is threaded, stitching can begin.
The procedure for stitching involves the following steps:
- Place the fabric under the presser foot, aligning the edge with the desired seam allowance guide on the throat plate.
- Lower the presser foot using the presser foot lifter.
- Turn the balance wheel toward the body to insert the needle into the fabric.
- Gently apply power by turning the handwheel (for hand machines), rocking the treadle (for treadle machines), or pressing the foot controller (for electric machines).
- Guide the fabric gently with both hands, keeping fingers at a safe distance from the needle. Do not pull or push the fabric; let the feed dog move it naturally.
- When reaching the end of the seam, stop the machine, turn the balance wheel to raise the needle to its highest point, and raise the presser foot.
- Pull the fabric gently toward the back of the machine and cut the threads using the thread cutter or scissors, leaving about 6 inches of thread tail.
Care and Maintenance of Sewing Tools, Equipment, and Machines
Proper care and maintenance prolong the lifespan of sewing tools and machines, prevent fabric damage, and ensure smooth operation.
Care of Sewing Tools
The guidelines for maintaining sewing tools include:
- Scissors and Shears: Keep blades clean and dry. Wipe them with a soft cloth after use. Oil the pivot screw occasionally. Never use dressmaker’s shears to cut paper, cardboard, or wire, as this dulls the blades.
- Tape Measure: Roll or fold the tape measure neatly after use to prevent stretching or creasing. Do not leave it near heat sources.
- Pins and Needles: Store pins in a pincushion or magnetic holder. Discard bent, rusted, or blunt needles immediately to prevent snagging fabrics.
- Marking Tools: Keep tailor’s chalk in a dry container to prevent it from breaking or absorbing moisture.
Care and Maintenance of the Sewing Machine
A sewing machine requires regular cleaning, oiling, and proper storage to function efficiently.
The guidelines for maintaining a sewing machine include:
- Cleaning: Remove lint, dust, and loose threads from the bobbin area, feed dog, and tension discs regularly using a small brush. Accumulated lint can cause jammed stitches and noisy operation.
- Oiling: Apply a drop of high-quality sewing machine oil to all moving parts and oil holes as specified in the instruction manual. Never use vegetable oil or motor oil, as they gum up the mechanisms. Run the machine unthreaded on a scrap piece of fabric after oiling to absorb excess oil.
- Needle Replacement: Change the needle regularly (after about 8 to 10 hours of sewing) or whenever it becomes blunt, bent, or damaged.
- Storage: Keep the machine covered with a dust cover when not in use to protect it from dust and moisture. Store manual and electric machines in a dry, cool place.
- Professional Servicing: Have the machine serviced by a qualified technician periodically to check internal gears, belt tension, and motor function.
Summary of Sewing Machine Troubleshooting
Common minor faults can occur during sewing. The table below outlines these faults, their causes, and solutions:
| Fault | Possible Cause | Remedy / Solution |
|---|---|---|
| Thread breaking (Upper) | Tension too tight; incorrect threading; needle inserted backward; blunt needle. | Loosen tension; rethread machine; insert needle correctly; replace needle. |
| Thread breaking (Lower) | Bobbin wound unevenly; bobbin tension too tight; dirt in bobbin case. | Rewind bobbin; adjust bobbin case screw; clean bobbin case. |
| Skipped stitches | Bent or blunt needle; needle inserted incorrectly; wrong needle size for fabric. | Replace needle; insert needle correctly; use appropriate needle size. |
| Puckered seams | Tension too tight; stitch length too long for fabric; blunt needle. | Adjust tension; shorten stitch length; replace needle. |
| Machine running heavily | Lack of oil; lint accumulation; thread jammed in shuttle. | Oil the machine; clean out lint; remove jammed thread. |
Study Questions
Answer the following questions to review the material:
- Define sewing tools and sewing equipment, highlighting the difference between them.
- Classify sewing tools and equipment into six functional groups, giving two examples of each.
- State four important guidelines to consider when choosing sewing tools and equipment.
- Describe the differences between a treadle sewing machine and an industrial sewing machine.
- List ten parts of a domestic sewing machine and state the function of each.
- Outline the step-by-step procedure for threading the upper part of a sewing machine.
- Explain four essential maintenance practices for a sewing machine.




0 comments
Open the discussion when you need it. Comments stay collapsed until requested so the initial article remains light.