


ARTICLE CONTENTSOn this page 6 sections
Beading
Performance Objectives
By the end of the lesson, students should be able to:
- explain the meaning of beads;
- select the materials and tools used in beading;
- explain the process of beading;
- create a beaded craft.
Meaning of Beading
Beading is the art and craft of attaching beads to one another or to a surface to create decorative items.
Beads are small, decorative objects that usually have a hole for stringing or attaching. They come in many shapes, sizes, and colours. Beading is a popular craft used to make jewellery, decorate clothing, create artworks, and adorn household items.
Materials and Tools for Beading
To create beautiful beaded crafts, specific materials and tools are needed. Each item plays an important role in the beading process.
Beads
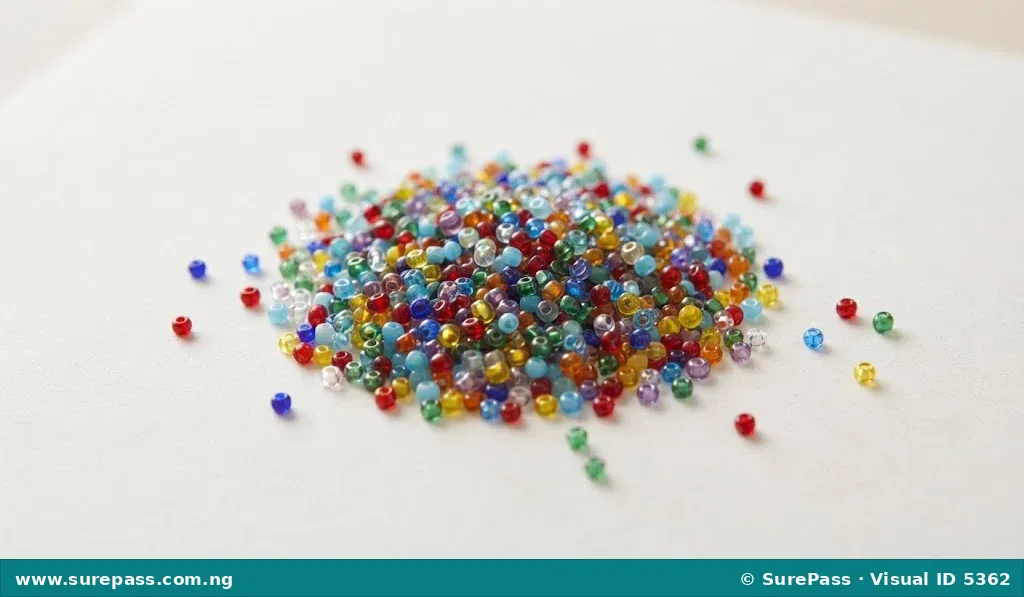
Beads are the main material in beading. They are available in various types, but for many crafts, especially for beginners, seed beads are commonly used.
- Seed Beads: These are small, round, or tube-shaped beads that come in a wide range of colours. They are often used for intricate designs, filling spaces, or creating delicate patterns.
Threads and Wires
Threads and wires are used to string beads together or to hold them in place.
- Beading Thread: This is a strong, thin thread specifically designed for beading. It is durable and helps to hold the beads securely. It comes in different colours to match or contrast with the beads.
- Copper Wire: This is a flexible metal wire that can be used for stringing beads, especially when a stiffer structure is needed. It can also be shaped to create hooks, clasps, or other decorative elements in a beaded craft.
Tools
Tools help in cutting, shaping, and securing the beading materials.
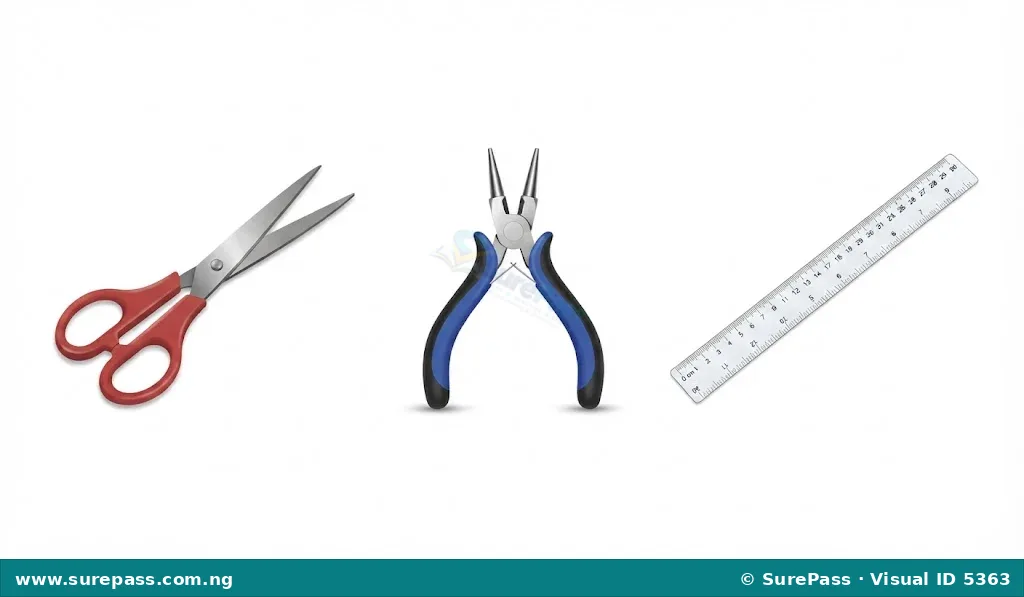
- Scissors: Used for cutting beading thread or thin wires to the desired length.
- Pliers: These are hand tools used for gripping, bending, and cutting wires. In beading, pliers help to shape copper wire, open and close jump rings, or secure clasps.
- Ruler: Used for measuring the length of thread, wire, or the overall size of the beaded craft.
Other Materials
These materials are used for specific types of beaded crafts, such as those that involve attaching beads to a surface.
- Cardboard: A stiff paper material that can serve as a base for creating beaded designs. Beads can be glued onto cardboard to make pictures, decorations, or patterns.
- Glue: Used to attach beads to surfaces like cardboard or fabric. It can also be used to secure knots in beading thread to prevent the beads from coming loose.
The Beading Process
The process of creating a beaded craft generally involves several steps, from planning to finishing the item.
- Planning the Design: Before starting, decide what you want to create (e.g., a bracelet, a necklace, a design on cardboard). Choose the colours and types of beads you want to use and plan the pattern or arrangement.
- Gathering Materials and Tools: Collect all the necessary beads, threads, wires, and tools according to your design.
- Preparing the Base: This might involve cutting a piece of thread or wire to the correct length, or preparing a cardboard surface if you are gluing beads.
- Attaching the Beads: This is the main part of the process. Beads can be strung onto a thread or wire, or they can be glued onto a surface one by one to form a pattern.
- Finishing the Craft: Once all the beads are in place, the craft needs to be finished. This could involve tying secure knots, adding clasps, trimming excess thread or wire, or allowing glue to dry completely.
Creating a Simple Beaded Craft
One of the simplest and most common beaded crafts is a bracelet or necklace made by stringing beads. This section describes how to make a simple beaded bracelet.
How to Make a Beaded Bracelet
This procedure will guide you through making a basic beaded bracelet using seed beads and beading thread.
The required materials are:
- Seed beads (various colours if desired)
- Beading thread
- Scissors
- Ruler
The procedure involves the following steps:
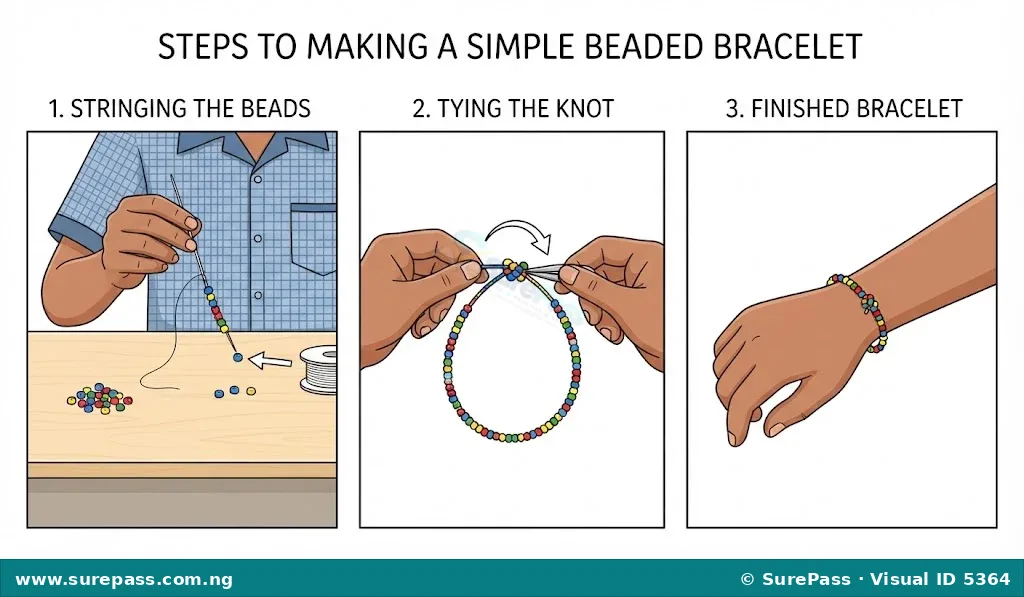
- Measure and Cut the Thread: Use the ruler to measure a length of beading thread. For a bracelet, about 40-50 centimetres is usually enough, allowing extra for tying knots. Cut the thread with scissors.
- Prepare the Thread: If the thread end is frayed, you can twist it tightly or apply a tiny drop of glue to make it easier to pass through the bead holes.
- Start Stringing Beads: Take one end of the thread and begin to string the seed beads onto it. You can follow a pattern, mix colours randomly, or use a single colour. Push each bead gently down the thread.
- Continue Stringing: Keep adding beads until the strung length is enough to fit comfortably around your wrist. You can measure it against your wrist as you go. Remember to leave about 5-7 centimetres of thread free at both ends for tying.
- Tie a Secure Knot: Once you have strung enough beads, bring the two ends of the thread together. Tie a strong double knot to secure the beads in a loop. Ensure the knot is tight so the beads do not slip off.
- Trim Excess Thread: After tying the knot, use the scissors to carefully trim any long excess thread, leaving a small tail of about 1 centimetre. You can add a tiny drop of glue to the knot for extra security, if available.
Other Beaded Crafts
Beads can also be used to decorate other items. For example, you can create a beaded design on cardboard by drawing a pattern and then carefully gluing seed beads onto the lines or within the shapes of your drawing. This method allows for creating flat artworks or decorative panels.


0 comments
Open the discussion when you need it. Comments stay collapsed until requested so the initial article remains light.