


ARTICLE CONTENTSOn this page 6 sections
Modelling
Performance Objectives
By the end of the lesson, students should be able to:
- explain the meaning of modelling;
- identify the techniques used in modelling;
- list the materials and tools used in modelling;
- mould a simple object: cup or pot, using clay.
Meaning of Modelling
Modelling is the art of creating three-dimensional forms or objects by shaping soft materials.
These materials can be pushed, pulled, squeezed, and smoothed to form different shapes. The finished object has height, width, and depth, meaning it can be viewed from all sides.
Techniques Used in Modelling
Artists and craftspeople use various techniques to shape materials into desired forms. For JSS1, common hand-building techniques are used to create simple objects.
The main techniques used in modelling at this level include:
- Pinching
- Coiling
Pinching Technique
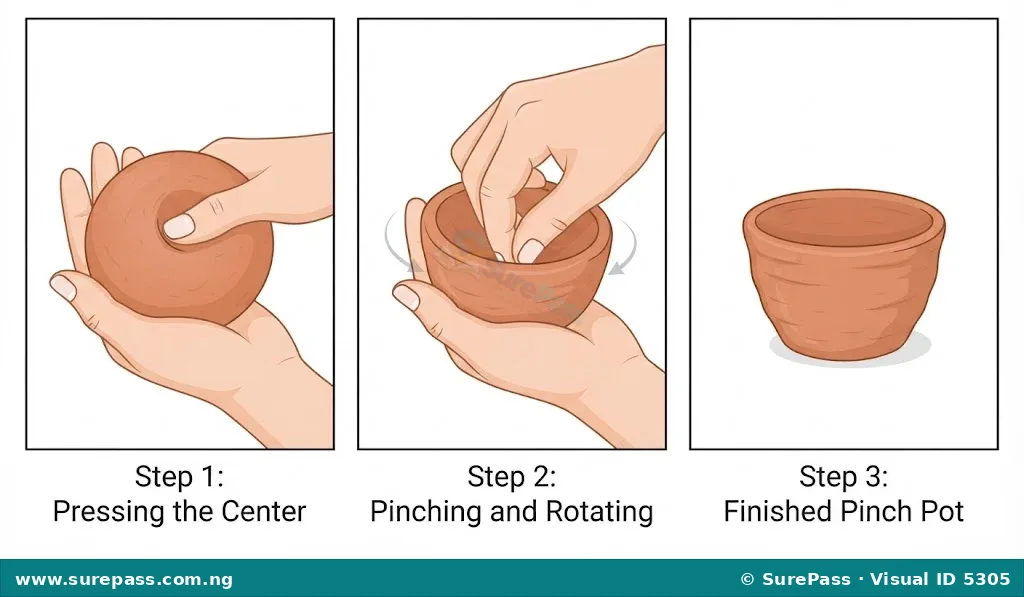
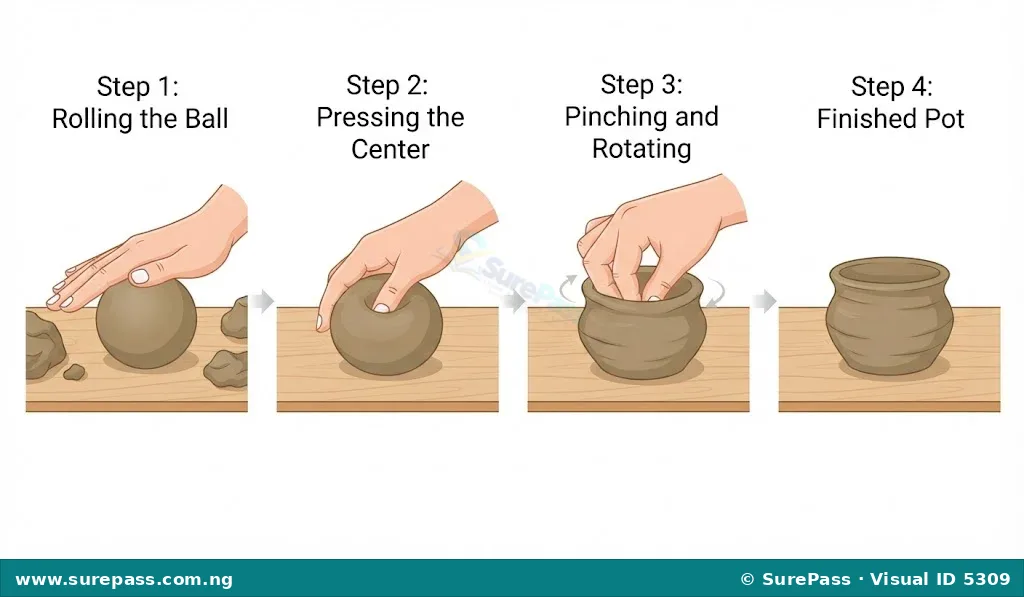
The pinching technique involves using the thumb and fingers to gently press and shape a ball of soft material, usually clay, into a desired form.
This method is often used to create small, simple, hollow forms like cups, bowls, or small pots. It allows for direct control over the shape and thickness of the object.
Coiling Technique
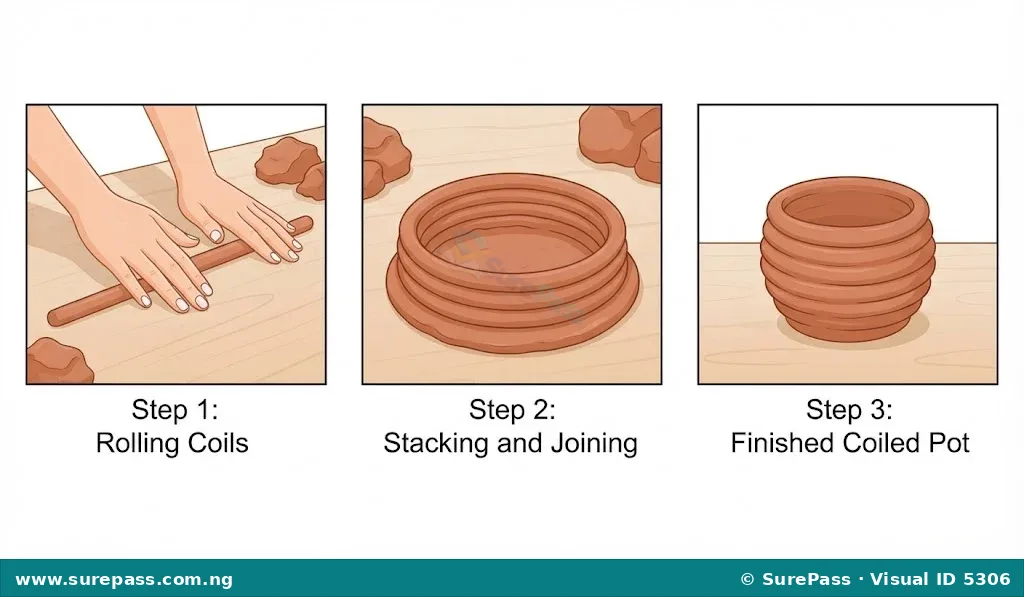
The coiling technique involves rolling the modelling material, typically clay, into long, rope-like strands called coils. These coils are then stacked on top of each other and joined to build up the walls of an object.
This method is suitable for creating larger or taller forms, such as pots, vases, or bowls, by gradually adding and blending the coils. The coils can be left visible for a decorative effect or smoothed together to create a seamless surface.
Materials and Tools Used in Modelling
To create modelled objects, specific materials are shaped, and various tools assist in the process. The choice of materials and tools depends on the desired outcome and the technique being used.
Modelling Materials
Modelling materials are soft and pliable substances that can be easily shaped and retain their form once set or dried.
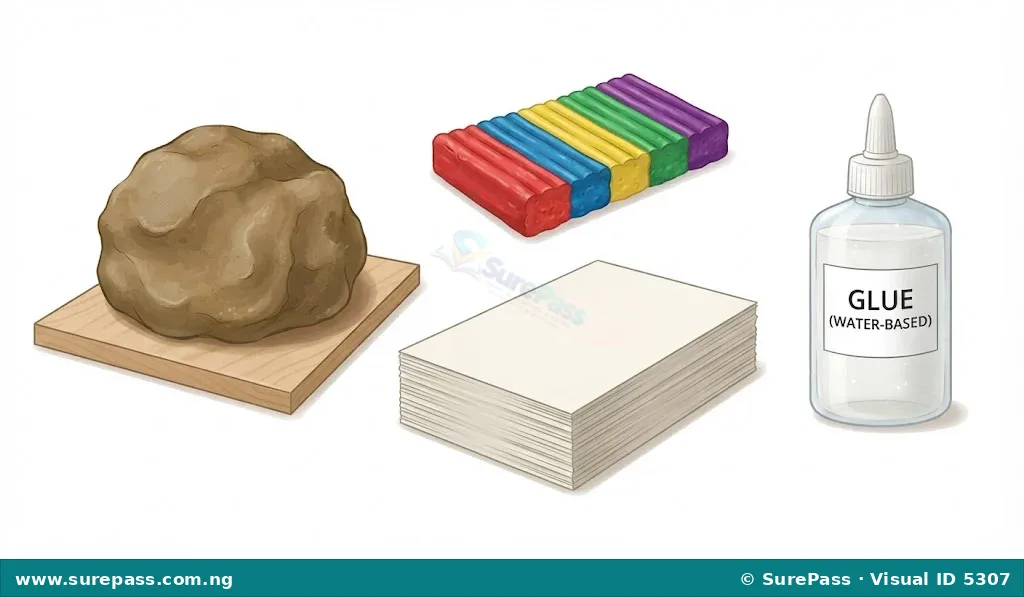
Common modelling materials include:
- Clay: A natural, earthy material that is soft when wet and hardens when dried or fired. It is widely used for pottery and sculpture.
- Plasticine: A type of oil-based modelling clay that remains soft and pliable, making it reusable and easy to work with without drying out.
- Paper: Can be used in paper mache, where strips of paper are soaked in glue and layered over a form to create a hard, lightweight object.
- Water-based glue: Used with paper for paper mache, acting as a binder to hold the paper strips together.
Modelling Tools
Modelling tools help artists shape, cut, smooth, and add details to their modelled objects. While hands are the primary tools, these additional items can enhance the creative process.
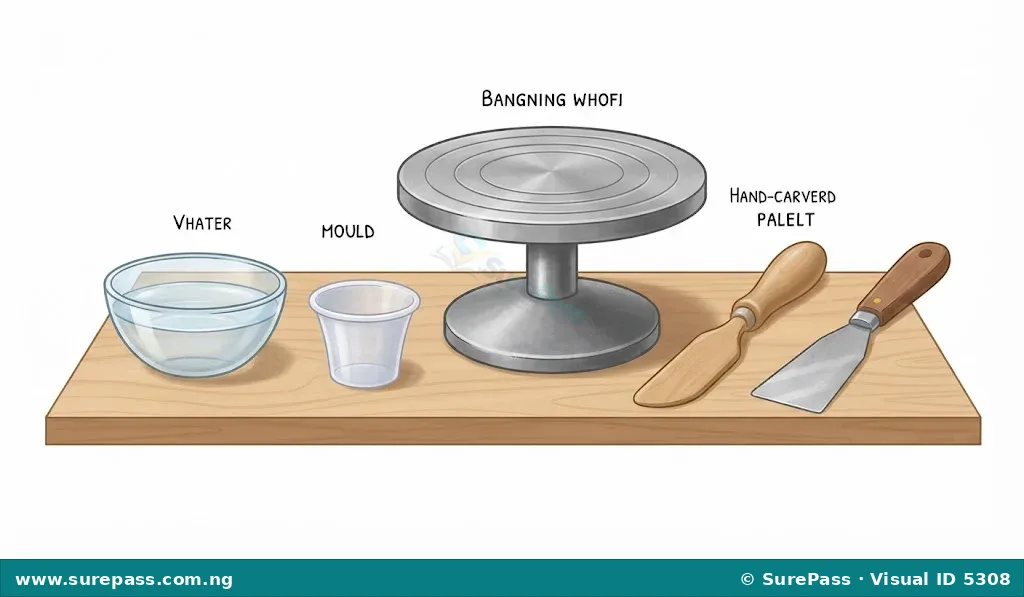
Useful modelling tools include:
- Water: Used to keep clay moist and pliable, and to smooth surfaces.
- Moulds: Pre-shaped forms that can be used to press clay into a specific shape, or to support a modelled object as it dries.
- Banding wheels: Rotating platforms that allow an artist to turn a piece of clay smoothly while working on it, making it easier to create symmetrical forms.
- Pallets: Flat, thin tools, often made of wood or plastic, used for lifting, shaping, and smoothing clay.
- Spatulas: Tools with flat, flexible blades used for spreading, smoothing, and shaping modelling materials.
Modelling a Simple Object: Cup or Pot (Pinching Technique)
This practical activity guides students through creating a simple cup or pot using the pinching technique with clay. This method is excellent for beginners as it relies mostly on hand manipulation.
Required Materials:
- A lump of soft, workable clay (about the size of a large orange)
- A small bowl of water
- A smooth, clean surface to work on (e.g., a plastic mat or newspaper)
Procedure for Pinching a Clay Cup or Pot:
The procedure involves the following steps:
- Prepare the Clay: Take the lump of clay and roll it into a smooth, compact ball in your hands. Ensure there are no cracks or air bubbles.
- Create the Opening: Hold the clay ball in one hand. With the thumb of your other hand, gently press into the centre of the ball, stopping about halfway down. Do not press all the way through.
- Begin Pinching: Start pinching the clay between your thumb (inside) and fingers (outside). Slowly rotate the clay ball with one hand while gently pinching and thinning the walls with the other.
- Shape the Walls: Continue pinching and rotating, moving your fingers upwards to gradually thin and raise the walls of your cup or pot. Try to keep the thickness of the walls even.
- Form the Rim: As the walls get taller, pay attention to the rim. Gently smooth and even out the top edge of the cup or pot.
- Shape the Base: If the base becomes too wide or thin, gently push it inwards or thicken it from the outside. Ensure the base is flat enough for the object to stand steadily.
- Smooth the Surface: Dip your fingers lightly in water and gently smooth the entire surface of your cup or pot, both inside and out. This removes finger marks and small cracks.
- Refine the Shape: Look at your object from all sides. Make any final adjustments to the shape, ensuring it is balanced and stands upright.
- Drying: Place your finished clay cup or pot in a safe place to dry slowly. Drying too quickly can cause cracks. Once completely dry, it will become hard.

0 comments
Open the discussion when you need it. Comments stay collapsed until requested so the initial article remains light.