



ARTICLE CONTENTSOn this page 7 sections
Preparing a Henna Cone
Performance Objectives
By the end of the lesson, students should be able to:
- state the meaning and uses of Henna Cone;
- select materials for making a henna cone;
- prepare a Henna cone,
- demonstrate how to hold a Henna Cone.
Meaning of Henna Cone
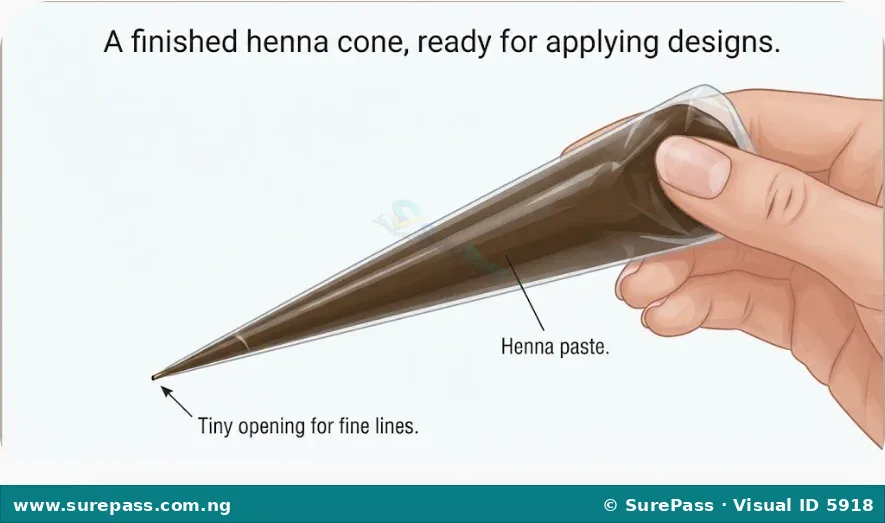
A henna cone is a small, cone-shaped tool used to apply henna paste onto the skin to create temporary body art designs.
It acts like a piping bag, allowing for precise control over the flow of henna paste, which helps in drawing intricate patterns and lines.
Uses of Henna Cone
Henna cones are primarily used for applying henna paste to create temporary tattoos or body art.
The designs are popular for various occasions, including:
- Celebrations: Henna designs are often applied during weddings, festivals, and other special events in many cultures.
- Fashion and Beauty: People use henna to adorn their hands, feet, and other body parts as a form of personal expression and beauty enhancement.
- Cultural Practices: In some traditions, henna application is a significant ritual, symbolising good luck, fertility, or protection.
Materials for Making a Henna Cone
Making a henna cone requires simple and readily available materials. These materials help to create a tool that can hold henna paste securely and allow for controlled application.
The essential materials are:
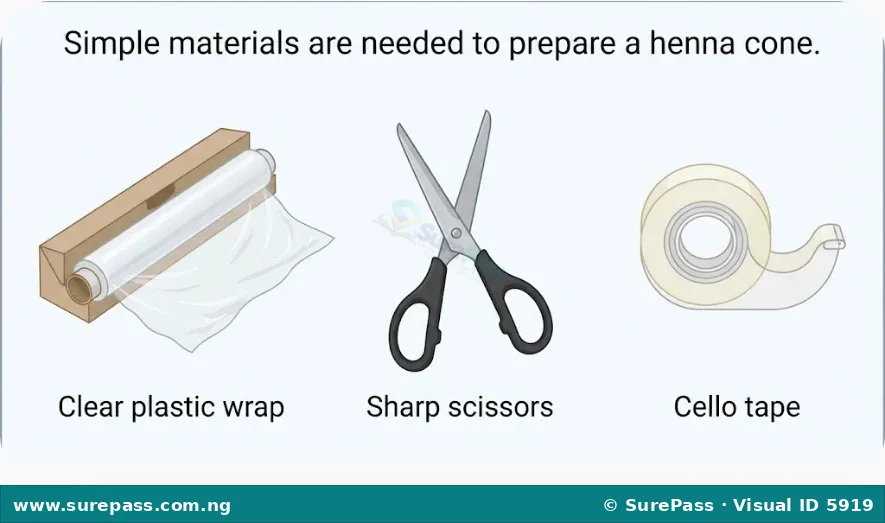
- Plastic Wrap or Piping Bags: These form the main body of the cone. Plastic wrap (like cling film) is flexible and transparent, allowing the user to see the henna paste inside. Piping bags, often used in baking, are thicker and more durable.
- Scissors: Used for cutting the plastic wrap or piping bag into the correct shape and for trimming the tip of the cone to create the desired opening size.
- Tape or Stapler: These are used to secure the rolled cone shape, preventing it from unrolling or leaking during use. Cello tape is commonly used for its strong adhesive properties.
Steps in Preparing a Henna Cone
Preparing a henna cone involves carefully shaping and securing the chosen material to create a stable and functional tool for henna application.
The procedure involves the following steps:
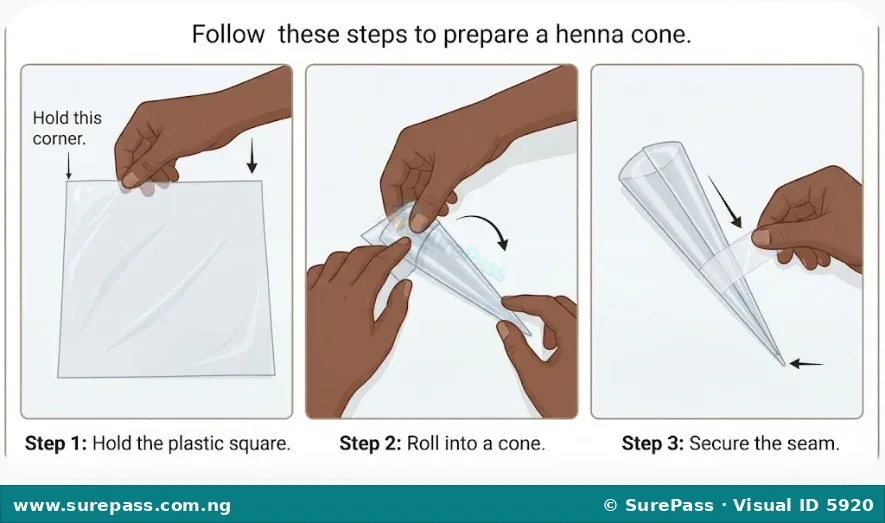
- Cut the Material: Take a piece of plastic wrap or a piping bag. If using plastic wrap, cut a square or rectangular piece, about 20-30 cm in size. If using a piping bag, you may need to trim the top edge if it’s too wide.
- Form a Cone Shape: Hold one corner of the plastic wrap or piping bag. Begin rolling or folding the material diagonally from that corner towards the opposite side. Continue rolling tightly to form a cone shape. The tip of the cone should be very narrow and pointed.
- Secure the Cone: Once the cone shape is formed, use tape or a stapler to secure the overlapping edges. Apply tape firmly along the seam of the cone to prevent it from coming apart. If using a stapler, place staples along the seam. Ensure the tip remains tightly closed.
- Check for Leaks: Before filling, gently squeeze the cone to check for any gaps or holes. If there are any, add more tape to seal them. The cone must be completely sealed except for the very tip.
- Trim the Tip (Optional): If the cone is too pointed or you need a wider opening for thicker lines, use scissors to snip a tiny bit off the very end of the cone’s tip. Start with a very small cut, as you can always make it larger if needed.
Techniques for Holding and Using a Henna Cone
Holding a henna cone correctly is important for controlling the flow of paste and creating smooth, consistent designs. Proper technique helps in achieving neat and beautiful patterns.
The technique involves the following steps:
- Fill the Cone: Carefully spoon the prepared henna paste into the wider opening of the cone. Do not overfill; fill it about two-thirds full to allow space for sealing and squeezing.
- Seal the Top: Fold the open end of the cone over several times to seal the paste inside. You can secure this fold with another piece of tape if needed. This prevents the paste from spilling out the top.
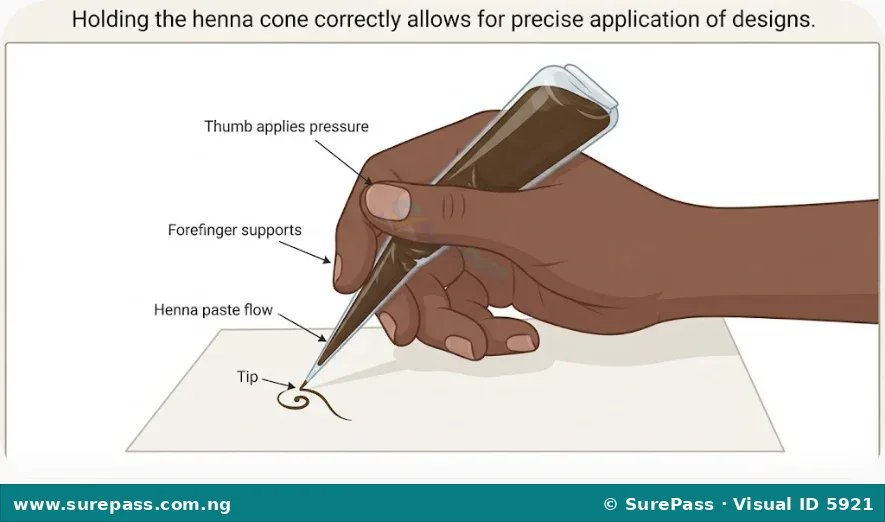
- Position the Hand: Hold the sealed cone in the dominant hand, similar to how a pen or pencil is held. The folded end should rest in the palm, and the fingers should grip the body of the cone.
- Apply Gentle Pressure: Use the thumb and forefinger to apply gentle, steady pressure to the body of the cone, near the sealed end. This pressure pushes the henna paste down towards the tip.
- Control the Flow: As pressure is applied, a thin stream of henna paste will emerge from the tiny opening at the tip. Adjust the pressure to control the thickness of the line. Less pressure creates thinner lines, while more pressure creates thicker lines.
- Maintain a Steady Hand: Keep the hand steady and move the cone smoothly across the skin to draw designs. Practice on a piece of paper first to get a feel for the pressure and movement.


0 comments
Open the discussion when you need it. Comments stay collapsed until requested so the initial article remains light.