



ARTICLE CONTENTSOn this page 7 sections
Handling and maintenance of sewing tools and equipment
Performance Objectives
By the end of the lesson, students should be able to:
- handle sewing tools and equipment appropriately;
- maintain and store sewing tools and equipment properly.
Meaning of Sewing Tools and Equipment
Sewing tools are small, portable items used by hand to perform various sewing tasks such as measuring, marking, cutting and stitching.
Sewing equipment refers to larger, often mechanical or electrical devices used to facilitate garment construction and fabric care.
Proper handling, maintenance and storage of these items prevent accidents in the laboratory, prolong the lifespan of the tools and ensure high-quality garment production.
Handling Sewing Tools and Equipment
Sewing tools and equipment must be handled with care to prevent injury to the user and damage to the items. Different categories of tools require specific handling methods.
Handling Sharp Objects
Sharp objects include hand sewing needles, machine needles, dressmaker pins and seam rippers. These items can cause puncture wounds or scratches if handled carelessly.
Safe methods for handling sharp sewing tools include:
- Keep pins and needles in a pincushion or a magnetic holder during work rather than leaving them loose on the table.
- Avoid putting pins or needles in the mouth, as they can be swallowed accidentally.
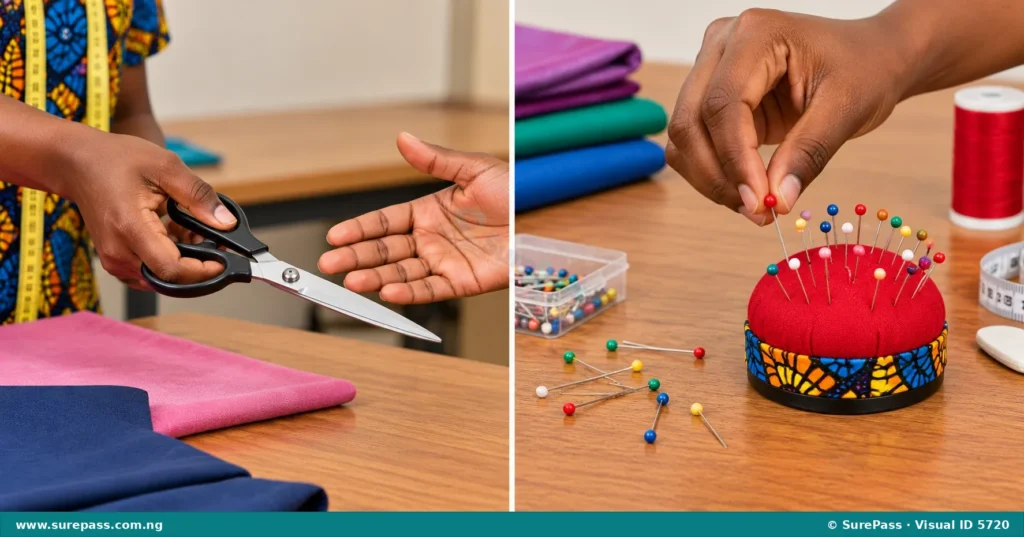
- Pass pins or needles to another person with the blunt end or eye facing the receiver, or place them in a container to hand over.
- Discard bent or rusted needles and pins safely in a designated disposal container.
Handling Cutting Objects
Cutting objects include dressmaker shears, pinking shears, embroidery scissors and rotary cutters. These tools have sharp blades that can cause deep cuts.
Safe methods for handling cutting tools include:
- Hold scissors by the handles with the blades closed and pointed downwards when walking.
- Pass scissors to another person handle-first, keeping the closed blades in the palm of the hand.
- Use scissors only for their intended purpose, such as cutting fabric or paper, to keep the blades sharp.
- Retract or lock the blade of a rotary cutter immediately after making a cut.
Gentle Placing of Sewing Tools and Equipment
Larger equipment, such as sewing machines and pressing irons, requires careful physical handling to maintain functionality.
Guidelines for placing sewing equipment gently include:
- Set the pressing iron down on its heel or on a heat-resistant silicone pad when not in active use.
- Avoid slamming or dropping the sewing machine head onto the cabinet or table.
- Place heavy equipment on stable, level surfaces to prevent tipping or falling.
- Handle electrical cords gently, avoiding tight wrapping or pulling from the socket by the cord.
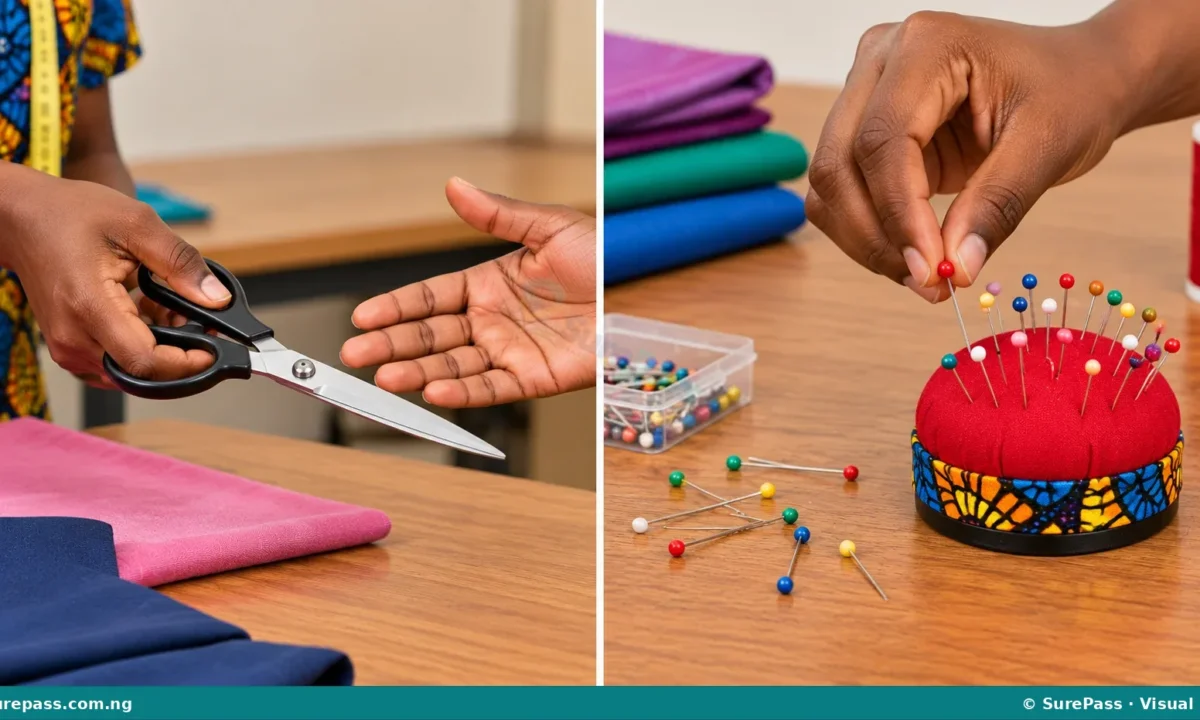
Observe the illustration below to understand the correct handling of sharp and cutting tools.
Maintenance and Storage of Sewing Tools and Equipment
Proper maintenance and storage protect sewing tools from rust, dust and physical damage, ensuring they remain in good working condition.
Storage of Small Sewing Tools
Moisture and humidity can cause metal tools like needles, pins and scissors to rust. Rust ruins the tools and stains fabrics during sewing.
Common storage containers and methods for sewing tools include:
- Jars with talcum powder: Storing hand sewing needles and pins in glass or plastic jars containing talcum powder keeps them dry and prevents rust.
- Small boxes with talcum powder: Small metal or plastic boxes lined with talcum powder can be used to store spare machine needles and safety pins.
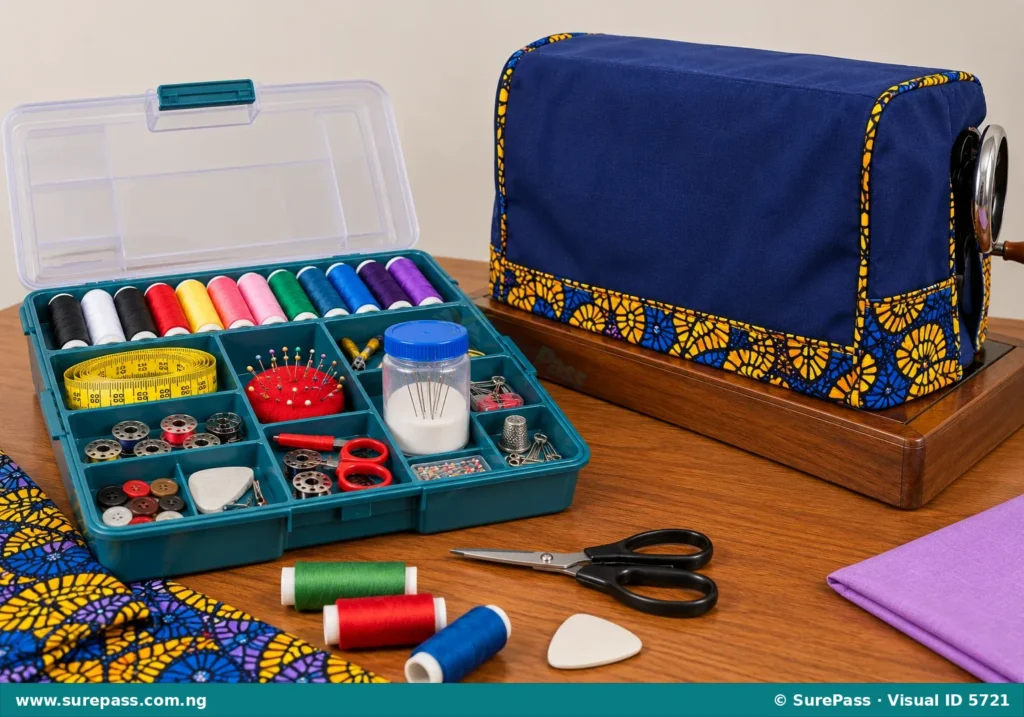
- Sewing kit (bag or box): A dedicated sewing kit keeps all small tools, including tape measures, chalk, threads and thimbles, organized in one place, preventing loss and damage.
Maintenance of the Sewing Machine
The sewing machine is a valuable piece of equipment that requires regular care to function smoothly.
Key maintenance practices for the sewing machine include:
- Covering the machine: Always cover the sewing machine with a plastic, wooden or cloth cover after use to protect it from dust, lint and moisture.
- Regular cleaning: Remove lint and loose threads from the bobbin area, feed dog and needle bar using a small brush.
- Regular oiling: Apply a few drops of sewing machine oil to the designated oiling points and moving parts to reduce friction and wear.
- Regular servicing: Arrange for professional servicing by a technician to adjust internal gears and repair worn parts.
The diagram below shows how a sewing kit and a covered machine should look when properly stored.
Safety in Handling Tools and Equipment
Safety in the garment-making laboratory prevents injuries, electrical hazards and damage to materials.
Obeying Manufacturer’s Instructions
Every piece of electrical or mechanical equipment comes with a user manual. These instructions must be read and followed carefully.
Key safety rules based on manufacturer guidelines include:
- Operate the sewing machine at the recommended speed limit.
- Use the correct voltage and plug types for electrical sewing machines and pressing irons.
- Unplug electrical equipment before cleaning, oiling or changing parts like needles and light bulbs.
Following Laboratory Safety Regulations
The garment-making laboratory has specific rules that all students must follow to maintain a safe working environment.
Important laboratory safety regulations include:
- Keep the floor clear of pins, needles, scrap fabric and electrical cords to prevent trips and falls.
- Do not eat or drink near sewing machines, pressing tables or fabrics.
- Ensure hands are completely dry before plugging in or unplugging any electrical appliance.
- Report any faulty equipment, damaged cords or injuries to the teacher immediately.
- Turn off and unplug pressing irons and sewing machines at the end of every practical session.
Practical Demonstrations
Developing practical skills in basic maintenance ensures that sewing equipment remains reliable and safe to use.
How to Change a Sewing Machine Needle
A sewing machine needle must be changed when it becomes blunt, bent or broken. Using the correct needle size and inserting it properly prevents skipped stitches and fabric damage.
The required materials for changing a needle are:
- A new sewing machine needle of the correct size
- A small screwdriver (usually provided in the machine maintenance kit)
- A piece of scrap fabric
The procedure for changing a sewing machine needle involves the following steps:
- Turn off the power switch of the sewing machine (if electrical) and raise the needle bar to its highest point by turning the handwheel.
- Lower the presser foot to create space for working.
- Hold the old needle with one hand, and use the screwdriver to loosen the needle clamp screw by turning it towards you.
- Pull the old needle straight down out of the needle clamp.
- Identify the flat side and the round side of the new needle shank.
- Insert the new needle up into the needle clamp as far as it will go, ensuring the flat side faces the correct direction (usually to the back or the right, depending on the machine model).
- Tighten the needle clamp screw securely using the screwdriver.
- Turn the handwheel slowly by hand to ensure the needle moves down into the needle plate hole without hitting any metal parts.
How to Clean and Oil a Sewing Machine
Cleaning and oiling should be done regularly to remove lint and keep the machine running quietly.
The required materials for cleaning and oiling are:
- A small lint brush or clean toothbrush
- A soft, dry cloth
- Sewing machine oil (do not use vegetable oil or motor oil)
- A screwdriver
The procedure for cleaning and oiling a sewing machine involves the following steps:
- Unplug the machine from the power source.
- Remove the needle, presser foot and slide plate to access the bobbin area.
- Use the screwdriver to remove the throat plate (needle plate) screws and lift off the plate.
- Use the lint brush to gently sweep out all dust, lint and thread pieces from the feed dog and the bobbin case area.
- Wipe the exterior of the machine with a soft, dry cloth to remove surface dust.
- Locate the oiling points indicated in the machine manual. These are usually small holes on the machine head and moving joints in the bobbin area.
- Apply one or two drops of sewing machine oil to each oiling point. Do not over-oil, as excess oil can stain sewing threads and fabrics.
- Turn the handwheel slowly by hand several times to distribute the oil evenly through the moving parts.
- Replace the throat plate, slide plate, presser foot and needle.
- Stitch on a piece of scrap fabric for a few minutes to absorb any excess oil before starting actual garment construction.
The diagram below shows the structure of a machine needle and the key areas that require cleaning and oiling.




0 comments
Open the discussion when you need it. Comments stay collapsed until requested so the initial article remains light.