



ARTICLE CONTENTSOn this page 6 sections
Sketch with Block Coding (Using Scratch)
Performance Objectives
By the end of the lesson, students should be able to:
- explain the meaning of Pen blocks
- identify the functions of Pen Blocks;
- use Pen Extension Blocks to create 2D images.
Introduction to Scratch and Drawing
Computers can do many things, including helping people draw and create pictures. In Basic Digital Literacy, drawing on a computer often involves using special tools or programs. One fun way to draw with a computer is by using a program called Scratch.
Scratch is a visual programming language. This means that instead of typing complicated words, people use colourful blocks that fit together like puzzle pieces to tell the computer what to do. These blocks control a character called a “sprite” on the screen.
What Are Pen Blocks in Scratch?
Pen blocks in Scratch are special programming blocks that allow the sprite to draw lines and shapes on the screen. Imagine the sprite has a pen attached to it. When the pen is down, the sprite draws a line as it moves. When the pen is up, the sprite moves without drawing.
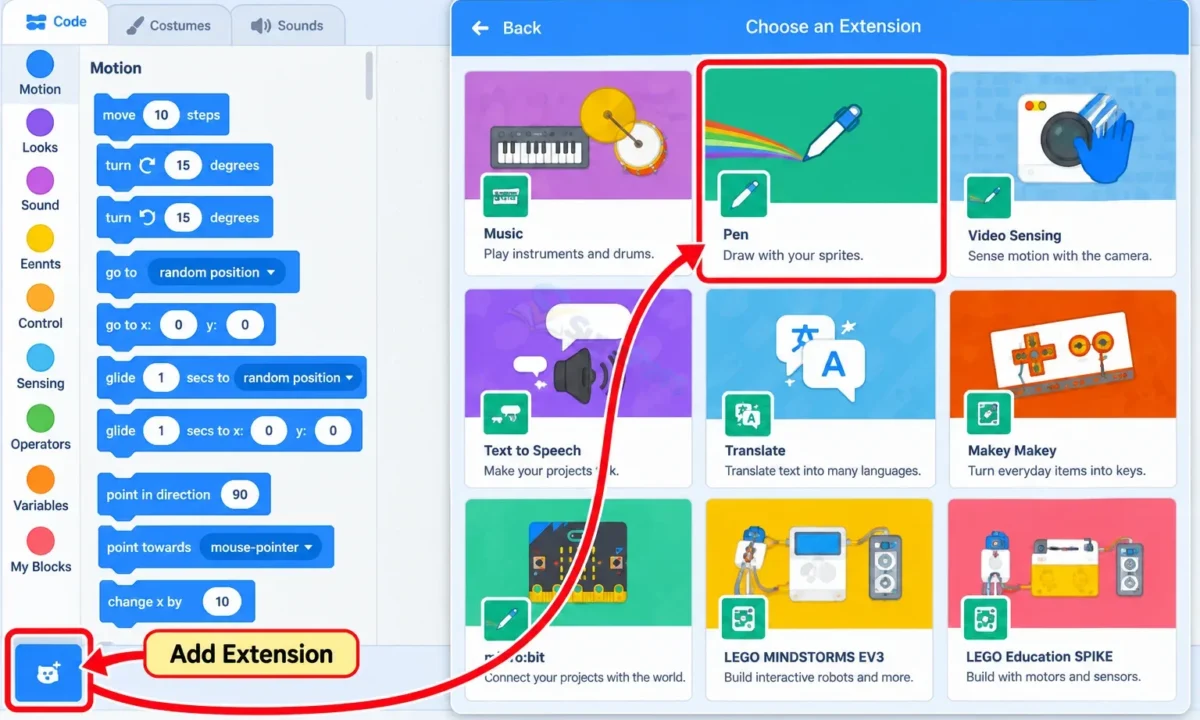
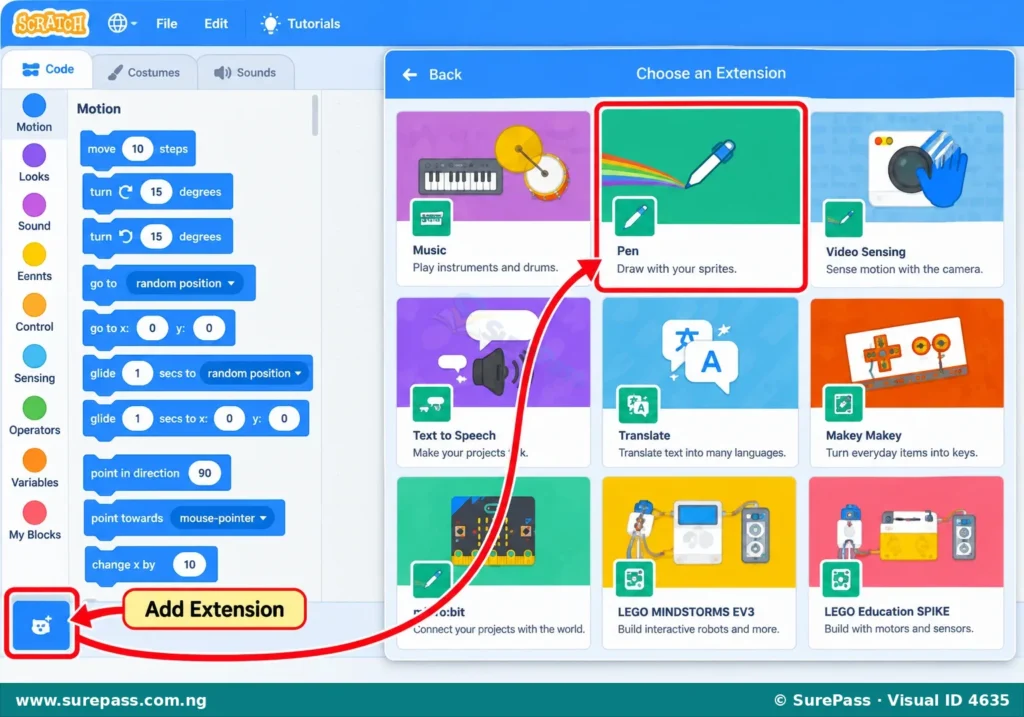
Pen blocks are not part of the main blocks when Scratch first opens. They need to be added as an “extension” to the project. This makes them available for use in drawing.
Functions of Pen Extension Blocks
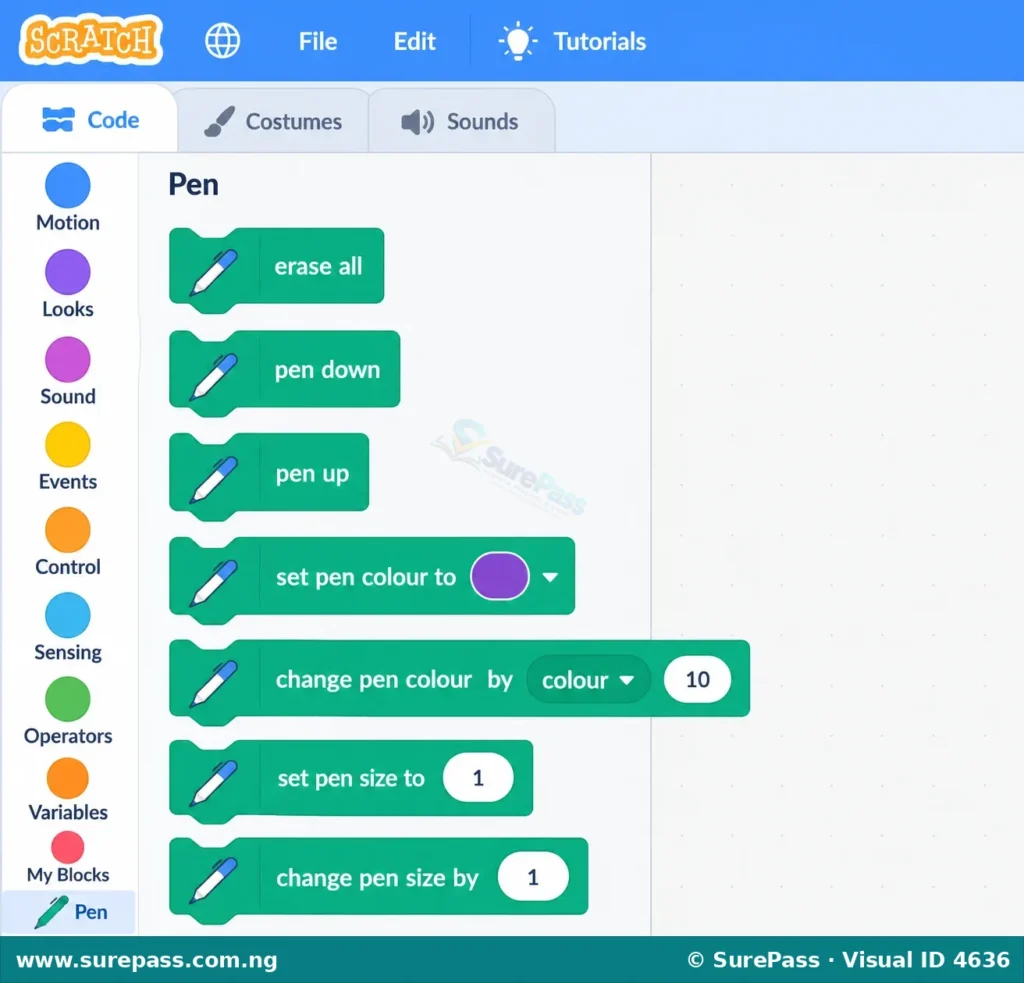
The Pen extension in Scratch provides several blocks, each with a specific function to help draw on the screen. These blocks control the pen’s state, colour, size, and how it clears the drawing.
The main functions of Pen Blocks are:
- Erase All: This block clears everything drawn on the screen by the pen. It makes the drawing area clean again.
- Pen Down: This block tells the sprite to put its pen down. From this moment, as the sprite moves, it will draw a line.
- Pen Up: This block tells the sprite to lift its pen up. When the pen is up, the sprite can move without drawing any lines.
- Set Pen Colour to: This block changes the colour of the line the pen will draw. People can choose any colour they like.
- Change Pen Colour by: This block changes the pen’s colour by a certain amount. It can be used to create a rainbow effect or gradually shift colours.
- Set Pen Size to: This block sets the thickness of the line the pen will draw. A larger number makes a thicker line, and a smaller number makes a thinner line.
- Change Pen Size by: This block increases or decreases the thickness of the pen’s line by a certain amount.
Sketching with Pen Blocks in Scratch
To sketch 2D images using Scratch Pen blocks, a person needs to combine movement blocks with Pen blocks. The sprite’s movement (like moving forward or turning) will create the lines, while the Pen blocks control the drawing itself.
Creating a Rectangle
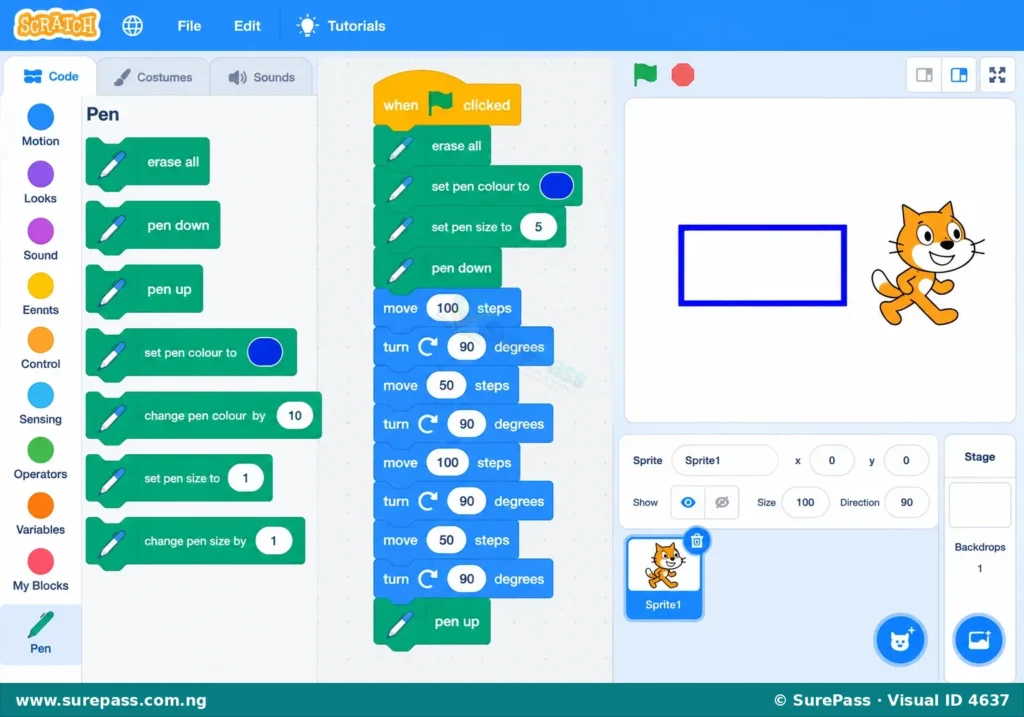
A rectangle has four sides and four corners. Opposite sides are equal in length, and all corners are right angles (90 degrees). To draw a rectangle, the sprite needs to draw a side, turn, draw another side, turn, and repeat this until all four sides are drawn.
The procedure to create a rectangle involves the following steps:
- Start a new Scratch project: Open Scratch and add the Pen extension.
- Clear the screen: Drag the
Erase Allblock to the scripting area. - Set pen properties: Drag
Set Pen Colour toand choose a colour. DragSet Pen Size toand set it to a number like 3 or 5 for a visible line. - Put the pen down: Drag the
Pen Downblock. - Draw the first side: Drag a
Move (100) stepsblock. (100 is an example length). - Turn: Drag a
Turn (90) degreesblock. - Draw the second side: Drag another
Move (50) stepsblock. (50 is an example length for the shorter side). - Turn: Drag another
Turn (90) degreesblock. - Draw the third side: Drag a
Move (100) stepsblock. - Turn: Drag another
Turn (90) degreesblock. - Draw the fourth side: Drag a
Move (50) stepsblock. - Lift the pen: Drag the
Pen Upblock to stop drawing. - Run the script: Click the green flag or the script itself to see the rectangle drawn.
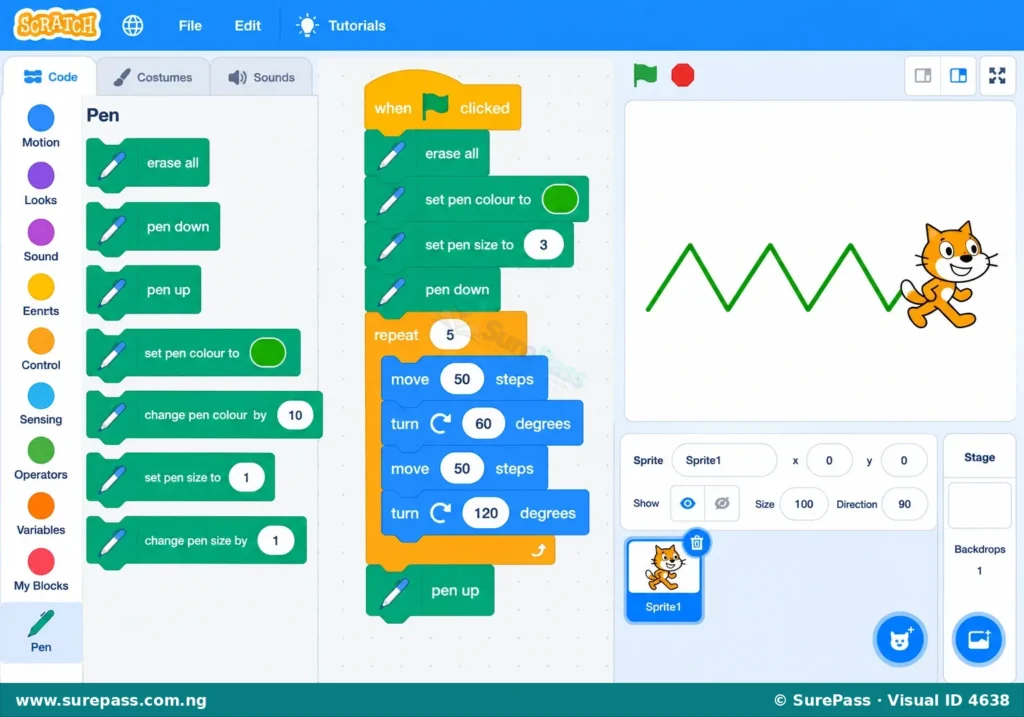
Creating a Zig-Zag Pattern
A zig-zag pattern is a series of short lines that go back and forth, like a saw blade or a lightning bolt. It involves moving forward and then turning at an angle, then moving forward and turning back at another angle.
The procedure to create a zig-zag pattern involves the following steps:
- Start a new Scratch project: Open Scratch and add the Pen extension.
- Clear the screen: Drag the
Erase Allblock to the scripting area. - Set pen properties: Drag
Set Pen Colour toand choose a colour. DragSet Pen Size toand set it to a number like 3. - Put the pen down: Drag the
Pen Downblock. - Draw the first segment: Drag a
Move (50) stepsblock. - Turn right: Drag a
Turn (60) degreesblock. (60 degrees is an example angle). - Draw the second segment: Drag a
Move (50) stepsblock. - Turn left: Drag a
Turn (120) degreesblock. (120 degrees is an example angle to turn back). - Repeat: To make the zig-zag longer, repeat steps 5 to 8 several times. A
Repeatblock can be used to make this easier. For example, put steps 5-8 inside aRepeat (5)block. - Lift the pen: Drag the
Pen Upblock. - Run the script: Click the green flag or the script to see the zig-zag pattern.



0 comments
Open the discussion when you need it. Comments stay collapsed until requested so the initial article remains light.