


ARTICLE CONTENTSOn this page 9 sections
Robotics
Performance Objectives
By the end of the lesson, students should be able to:
- explain the uses of robots;
- Physically identify digital electronic accessories in a robot;
- identify basic electronic components in a robot;
- state the functions of basic components in a robot;
- program autonomous robot.
What is Robotics?
Robotics is the study of robots. It is a field of science and engineering that deals with the design, construction, operation, and use of robots.
Robotics helps people create machines that can do tasks automatically or with some guidance. These machines are called robots.
What Are Robots?
A robot is a machine that can carry out a series of actions automatically, especially one programmable by a computer.
Robots are designed to help humans with different tasks. They can be found in many places, from factories to homes. Some robots look like humans, while others look like machines with arms or wheels.
Uses of Robots
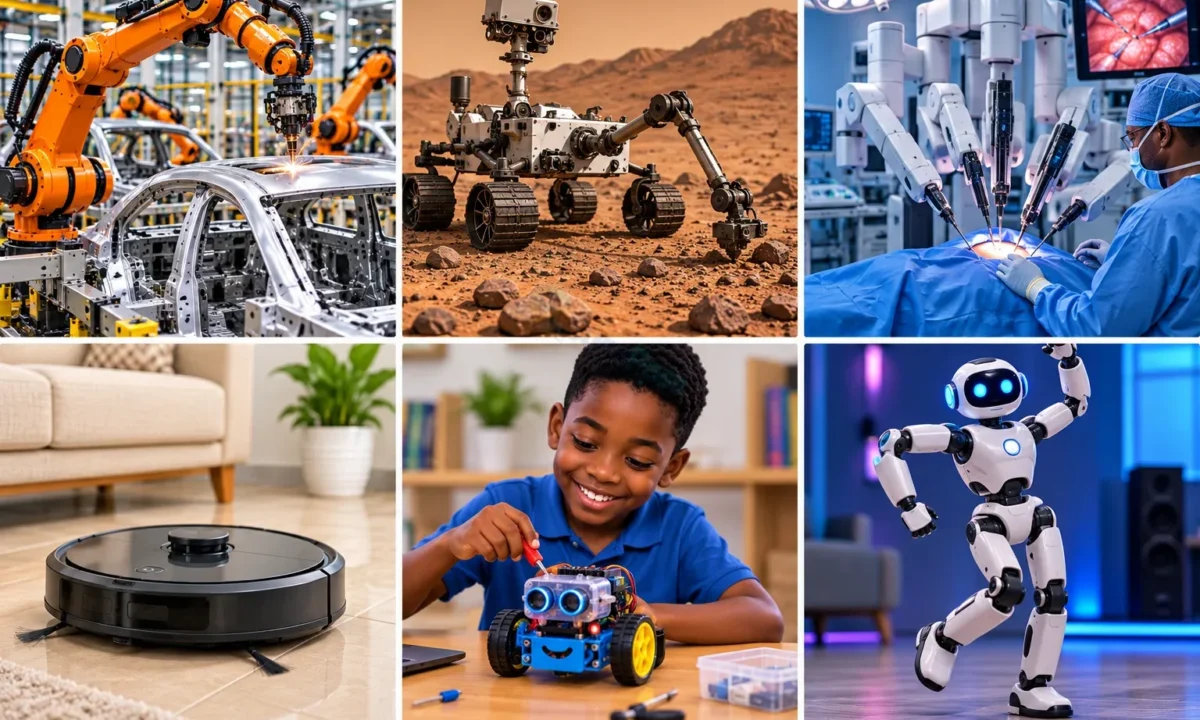
Robots are used for many different purposes. They can do jobs that are dangerous, difficult, or boring for humans. Robots can also do tasks that need to be done very precisely.
Common uses of robots include:
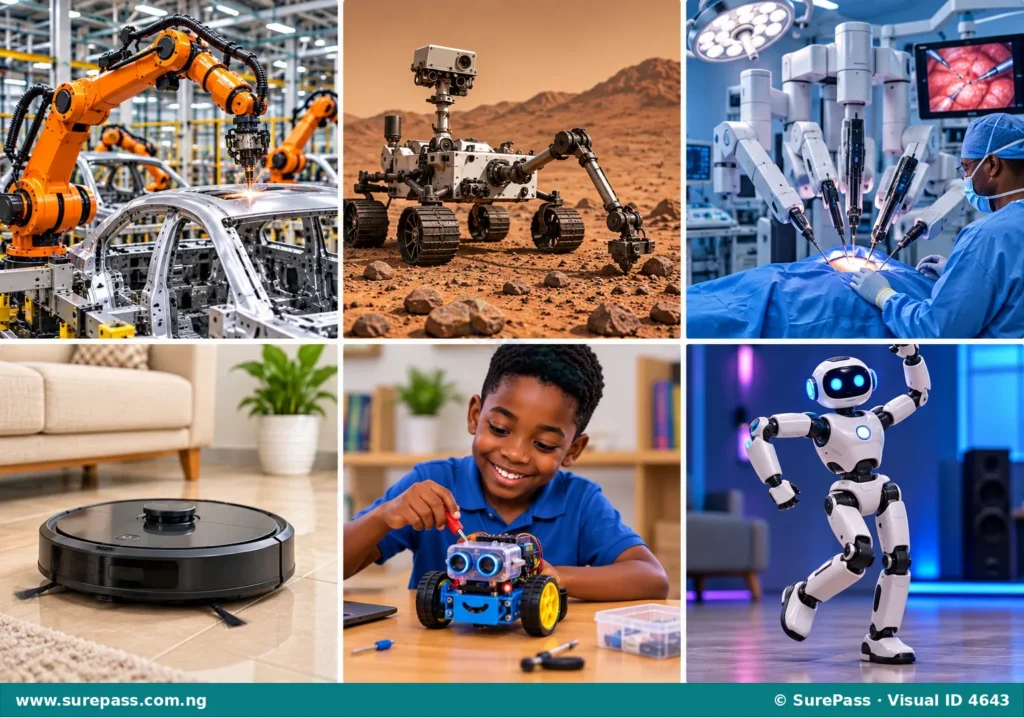
- Manufacturing: Robots are used in factories to build cars, phones, and other products. They can weld, paint, and assemble parts quickly and accurately.
- Exploration: Robots are sent to explore places that are too dangerous or far for humans, like outer space or the deep sea. They collect information and send it back to scientists.
- Healthcare: Some robots help doctors perform surgeries with great precision. Others help move heavy equipment in hospitals or deliver medicines.
- Cleaning: Robotic vacuum cleaners can clean floors in homes automatically. Some robots are also used to clean large buildings or dangerous areas.
- Education: Small robots are used in schools to help students learn about programming and technology. They make learning fun and practical.
- Entertainment: Robots are used in movies, theme parks, and even as toys. They can dance, play music, and interact with people.
Digital Electronics Accessories
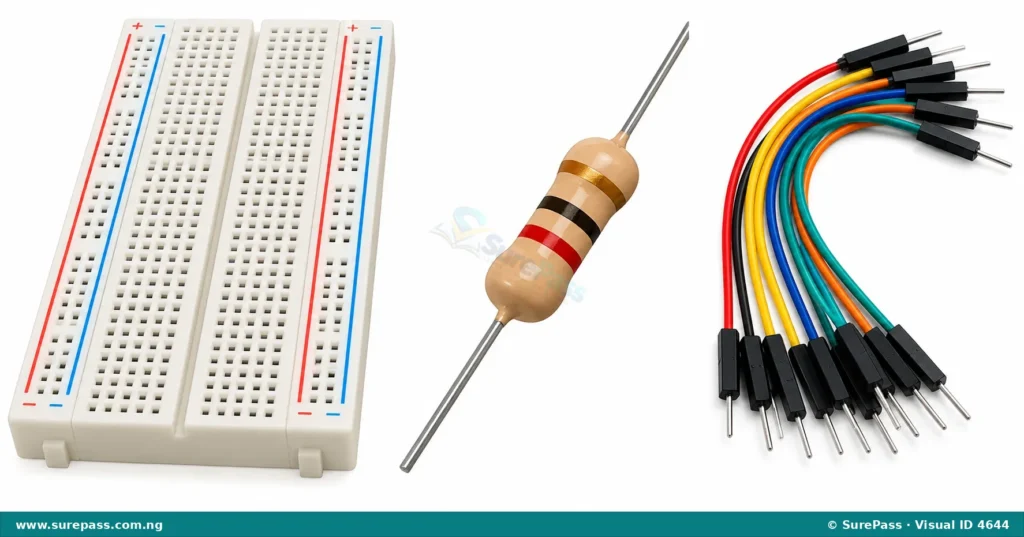
Digital electronics accessories are small parts that help connect and control electronic components. They are important for building and testing circuits, which are like the “brains” of robots.
Some common digital electronics accessories include:
- Breadboard: A breadboard is a special board used to build temporary electronic circuits without soldering. It has many small holes where electronic components and wires can be easily plugged in and connected. This allows people to test their circuit designs quickly.
- Resistor: A resistor is a small electronic component that limits the flow of electric current in a circuit. It helps to protect other components from too much electricity and ensures they receive the correct amount of power to function properly.
- Jumper Wire: Jumper wires are small wires used to connect different parts of a circuit on a breadboard or between electronic components. They come in various colours and lengths, making it easy to see and manage connections.
Components of Robots
Robots are made up of many different parts that work together. These parts are called components. Each component has a special job that helps the robot function.
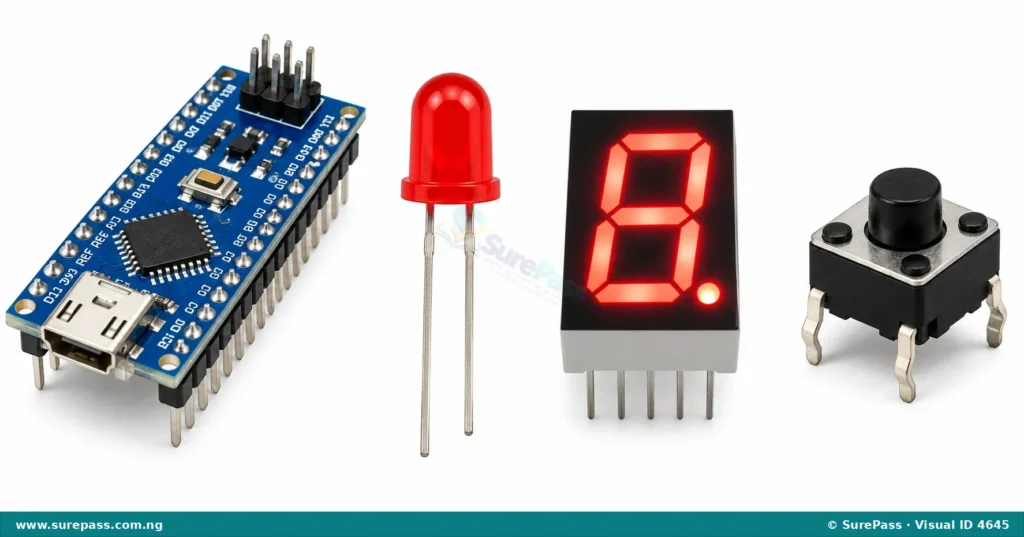
Basic electronic components found in a robot include:
- Microcontrollers: A microcontroller is like a tiny computer brain for the robot. It receives instructions, processes information, and controls all the other parts of the robot. It tells the robot what to do and when to do it.
- Light Emitting Diode (LED): An LED is a small light bulb that glows when electricity passes through it. In robots, LEDs can be used as indicator lights, to show status, or for simple visual displays.
- LED Display: An LED display is a screen made up of many small LEDs arranged in a grid. It can show numbers, letters, or simple images. Robots use LED displays to communicate information to people, such as showing sensor readings or messages.
- Tactile Switch: A tactile switch is a small button that makes an electrical connection when pressed. In robots, tactile switches are used as input devices, allowing the robot to detect when it has touched something or when a user presses a button.
Autonomous Robots
An autonomous robot is a robot that can operate and make decisions on its own without constant human control.
These robots use sensors to understand their surroundings and built-in programs to decide what to do next. For example, an autonomous robot car can move around a room, avoid obstacles, and reach a destination all by itself.
Programming an Autonomous Robot Car
Programming an autonomous robot car means giving it instructions so it can move and react to its environment on its own. This involves telling the robot what to do in different situations.
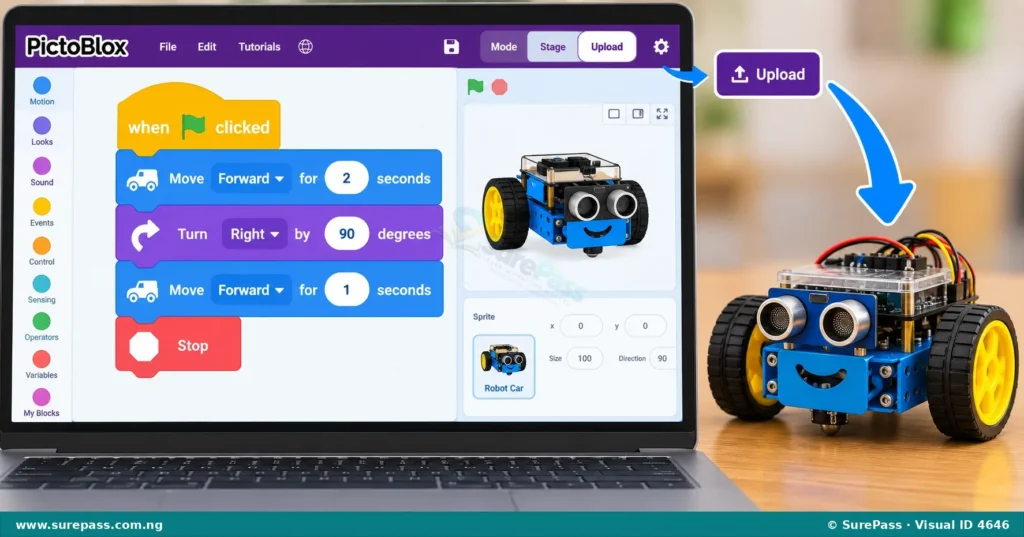
One way to program a robot car is by using visual programming software like Pictoblox. This software uses blocks that represent different commands, making it easy to drag and drop instructions to create a program.
How to Program a Robot Car to Move in Different Directions
To program an autonomous robot car to move in different directions, you need to give it commands for its motors. Most robot cars have two motors, one for each wheel. By controlling these motors, you can make the car move forward, backward, turn left, or turn right.
The procedure involves the following steps using a visual programming tool like Pictoblox:
- Connect the Robot: First, connect your robot car to the computer using a USB cable or Bluetooth, as instructed by the software.
- Open Programming Software: Launch the Pictoblox software on your computer or tablet.
- Identify Movement Blocks: Look for programming blocks that control robot movement. These blocks usually have names like “move forward,” “move backward,” “turn left,” or “turn right.”
- Drag and Drop Blocks: Drag the “move forward” block into the programming area. This block will tell the robot to move straight ahead.
- Set Duration or Speed: Some blocks allow you to set how long the robot moves or how fast it goes. For example, you might set “move forward for 2 seconds.”
- Add Turning Commands: To make the robot turn, drag a “turn left” or “turn right” block after the “move forward” block. You can also set how much it turns (e.g., “turn left by 90 degrees”).
- Combine Movements: Create a sequence of blocks to make the robot move in a path. For example, “move forward,” then “turn right,” then “move forward” again.
- Upload the Program: Once your program is ready, click the “Upload” or “Run” button in the software. This sends the instructions to the robot car.
- Test the Robot: Observe the robot car as it executes the program. See if it moves in the directions you intended.
- Adjust and Improve: If the robot does not move as expected, go back to the program, make changes to the blocks or their settings, and upload it again. This process of testing and fixing is called debugging.



0 comments
Open the discussion when you need it. Comments stay collapsed until requested so the initial article remains light.