


ARTICLE CONTENTSOn this page 9 sections
Scribbling and Drawing
Performance Objectives
By the end of the lesson, students should be able to:
- properly gripping of pencils;
- demonstrate proper wrist movements
- create varieties of scribbles
- create varieties of free lines
Introduction to Drawing
Drawing is a fun way to make pictures and express ideas using pencils, crayons, or other tools on paper. Before drawing clear pictures, it is important to learn some basic skills. These skills help a person to control the drawing tools and make different kinds of marks on paper.
Holding a Pencil Correctly
Holding a pencil correctly is the first step to drawing well. A proper grip helps a person to control the pencil easily and draw smooth lines. It also prevents the hand from getting tired quickly.
How to Grip a Pencil Properly
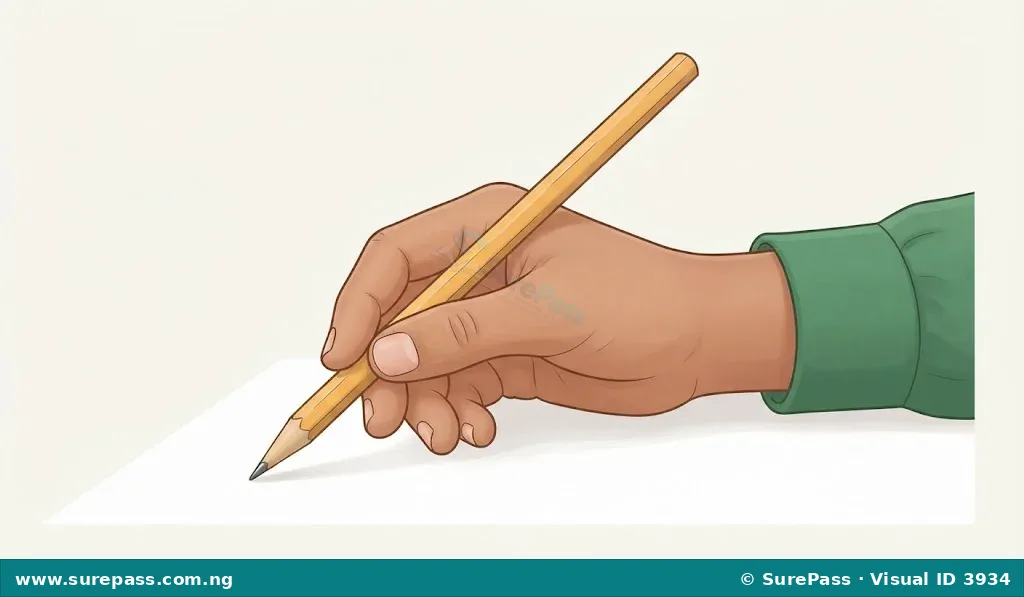
The correct way to hold a pencil is called the tripod grip. It uses three fingers to hold the pencil firmly but gently. The procedure involves the following steps:
- Place the pencil on the middle finger.
- Hold the pencil with the thumb on one side and the index finger on the other side.
- Make sure the pencil rests comfortably between the thumb and index finger.
- The other two fingers (ring finger and pinky finger) should be tucked into the palm or rest gently below the middle finger.
- Hold the pencil close to the sharpened tip, but not too close that the fingers touch the paper.
Moving the Wrist for Drawing
After learning to hold the pencil, the next important skill is moving the wrist. Moving the wrist helps to make smooth, curved, and long lines without moving the whole arm. It gives more control over the pencil.
How to Move the Wrist Properly
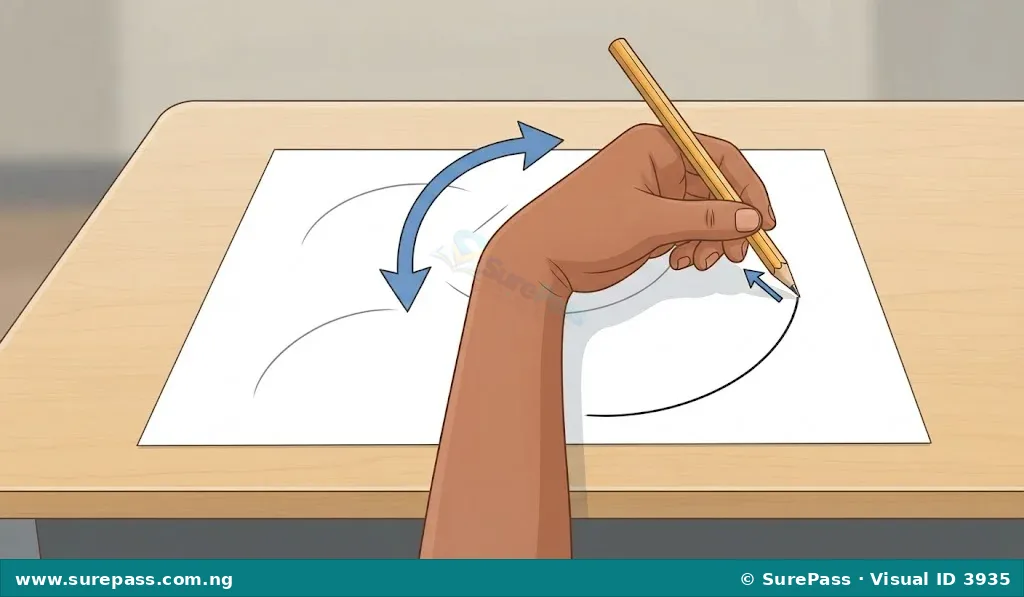
When drawing, the wrist should be relaxed and able to move freely. The procedure involves the following steps:
- Hold the pencil correctly.
- Rest the forearm gently on the table or paper.
- Move only the wrist to make small circles or curves on the paper.
- Practise moving the wrist up and down, and side to side, to feel how it helps to draw different shapes.
What is Scribbling?
Scribbling is making quick, uncontrolled, or random marks on paper. It is one of the first ways children learn to use drawing tools. Scribbling helps to warm up the hand and wrist, and it is a fun way to explore colours and textures.
Creating Varieties of Scribbles
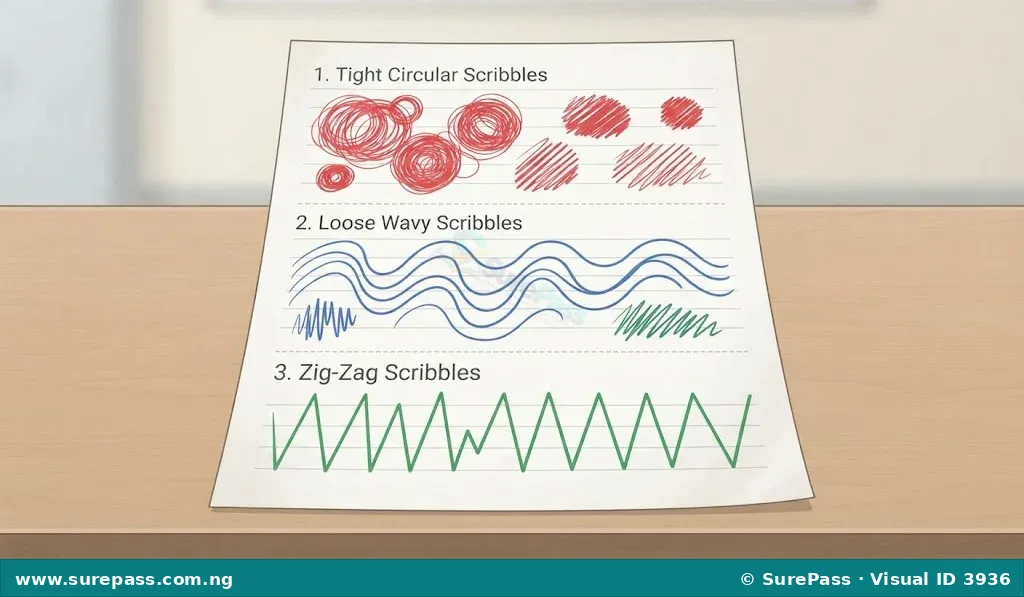
Scribbling can be done in many ways. It helps to practise hand-eye coordination and control. The procedure involves the following steps:
- Hold a pencil or crayon properly.
- Move the hand and wrist freely on the paper.
- Make quick, looping, or zig-zag marks without lifting the pencil too much.
- Try making small, tight scribbles in one spot.
- Try making large, loose scribbles that cover more space.
- Use different colours to make colourful scribbles.
Creating Varieties of Free Lines
Free lines are lines drawn without using a ruler or any other tool to guide them. They are drawn by hand, allowing for different shapes and directions. Practising free lines helps to develop control and precision in drawing.
Types of Free Lines
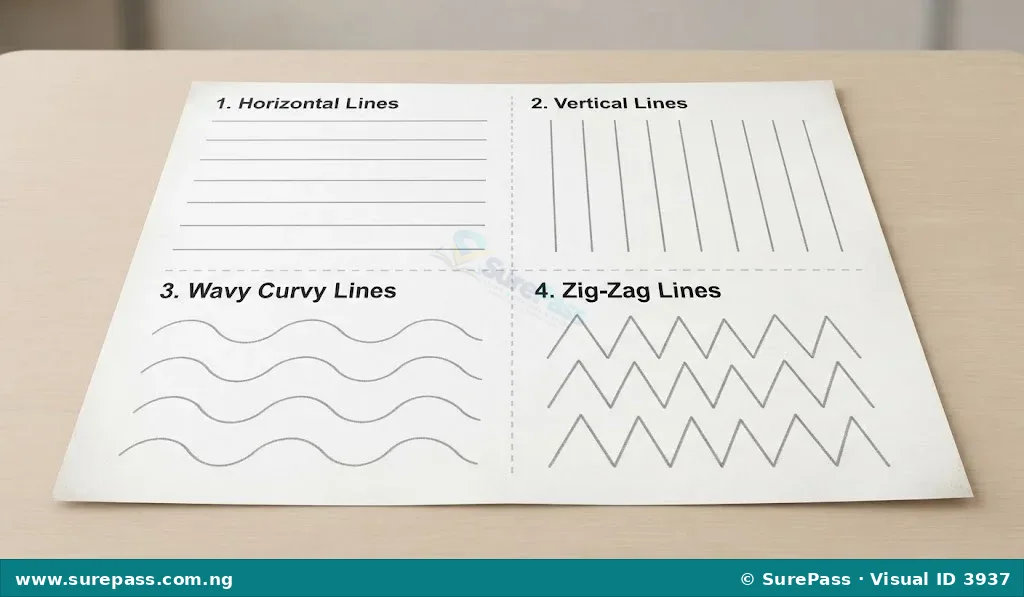
There are many types of free lines that can be created:
-
Straight Lines: These lines go in one direction without bending. They can be:
- Horizontal lines: Lines that go across the page, like the horizon.
- Vertical lines: Lines that go up and down the page, like a standing tree.
-
Curvy Lines: These lines bend and curve smoothly. They can look like waves, hills, or even circles.
-
Zig-zag Lines: These lines change direction sharply, making a pattern like a saw blade or lightning.
How to Create Free Lines
Creating different free lines helps to improve hand control and prepares a person for drawing more complex shapes. The procedure involves the following steps:
- Hold the pencil correctly and relax the wrist.
- To draw a straight horizontal line, move the hand steadily across the page from left to right.
- To draw a straight vertical line, move the hand steadily up or down the page.
- To draw a curvy line, move the wrist and hand in a smooth, flowing motion, making gentle bends.
- To draw a zig-zag line, make short, straight strokes that quickly change direction, moving up and down or side to side.
- Practise making these lines in different sizes and directions on the paper.
Materials for Drawing
To practise scribbling and drawing, some simple materials are needed. These materials help to make different kinds of marks and add colour to drawings.
The required materials are:
- Pencils (for drawing lines and scribbles)
- Crayons (for adding colour and making bold scribbles)
- Colour pencils (for adding colour with more control)
- Variety of paper (different sizes or textures)
- Sharpener (to keep pencils sharp)
Safety Tips for Drawing
When using drawing materials, it is important to be careful to avoid accidents and keep the materials in good condition.
Important safety tips include:
- Always use a sharpener carefully. Ask an adult for help if needed.
- Do not put pencils or crayons in the mouth.
- Keep drawing materials tidy and in their proper place after use.
- Avoid poking others with pencils.

0 comments
Open the discussion when you need it. Comments stay collapsed until requested so the initial article remains light.