


ARTICLE CONTENTSOn this page 11 sections
Basics of Robotics
Performance Objectives
By the end of the lesson, students should be able to:
- state the advantages of robots;
- describe the applications of robots;
- describe the components of a robot;
- differentiate among the components of a robot;
- couple a robot car;
- program the robot car to move in different directions.
Introduction to Robotics
A robot is an automatic machine that can perform physical tasks, sense its environment and make decisions based on programming.
Robotics is the branch of technology and engineering that deals with the design, construction, operation and application of robots.
Unlike ordinary machines that require constant human control, a robot can perform tasks independently or semi-independently. Robots combine computer science, electronics and mechanical engineering to interact with the physical world.
Advantages of Robots
Robots are used to perform tasks that are difficult, dangerous or repetitive for humans. The main advantages of using robots include:
- High Speed and Efficiency: Robots can perform tasks much faster than human workers without losing accuracy.
- Consistency and Precision: Robots perform the same task in the exact same way every time, reducing errors in manufacturing.
- Ability to Work in Dangerous Environments: Robots can operate in hazardous conditions, such as deep underwater, in outer space, in high-temperature factories or in areas with toxic chemicals.
- Continuous Operation: Robots do not experience fatigue and can work twenty-four hours a day, seven days a week, without needing breaks or holidays.
- Cost Reduction over Time: Although purchasing and setting up a robot is expensive, they reduce the cost of production over long periods by increasing output and reducing waste.
Applications of Robots
Robots are applied in various fields to improve productivity, safety and convenience. Common applications of robots include:
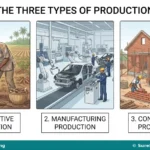
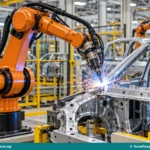
- Manufacturing and Industry: In factories, robots are used for heavy lifting, welding, painting, assembling parts and packaging goods. For example, automobile factories in Nigeria and around the world use robotic arms to assemble cars.
- Medicine and Healthcare: Surgeons use highly precise robotic systems to perform complex surgeries. Robots are also used to disinfect hospital rooms and deliver medicine to patients.
- Agriculture: Agricultural robots are used to plant seeds, harvest crops, spray fertilisers and monitor soil health.
- Space and Deep-Sea Exploration: Space agencies use robotic rovers to explore the surface of other planets, such as Mars. Underwater robots are used to repair oil pipelines and study marine life deep in the ocean.
- Domestic and Household Chores: Simple robots, such as robotic vacuum cleaners, are used in homes to sweep and mop floors automatically.
- Military and Security: Unmanned aerial vehicles, commonly known as drones, are used for surveillance, border patrol and bomb disposal to keep security personnel safe.
Components of a Robot
Every robot consists of three main types of components that work together to allow the robot to function. These components are microcontrollers, sensors and actuators.
Microcontrollers
A microcontroller is a small computer on a single integrated circuit that acts as the brain of the robot.
The microcontroller receives information from the sensors, processes that information using a stored program, and sends instructions to the actuators. Examples of microcontrollers used in school robotics kits include Arduino boards, Micro:bit and Raspberry Pi Pico.
Sensors
A sensor is an input device that detects changes in the environment and sends this information to the microcontroller.
Sensors act as the eyes, ears and skin of the robot. Common types of sensors used in basic robotics include:
- Ultrasonic Sensors: These sensors measure distance by sending out high-frequency sound waves and timing how long they take to bounce back from an object. They are used to detect obstacles.
- Infrared (IR) Sensors: These sensors emit and detect infrared light. They are commonly used for line-following robots or detecting nearby objects.
- Light Sensors: These sensors detect the level of brightness in the surrounding environment.
Actuators
An actuator is an output device that converts electrical energy into physical movement or action.
Actuators act as the muscles of the robot, allowing it to move, turn, make sound or emit light. Common types of actuators include:
- DC Motors: These motors rotate continuously to turn wheels and move a robot forward or backward.
- Servo Motors: These motors rotate to specific angles with high precision. They are used to move robotic arms, steering mechanisms or camera mounts.
- LEDs (Light Emitting Diodes): These are small lights used to give visual signals or illuminate the path of the robot.
- Buzzers: These are audio devices used to produce warning sounds or beeps.
Observe the diagram below to see how these components interact.
Differentiating Robot Components
To build and program a robot successfully, a person must be able to distinguish between inputs (sensors), processors (microcontrollers) and outputs (actuators).
The table below highlights the differences among these three core components:
| Feature | Microcontroller | Sensor | Actuator |
|---|---|---|---|
| Primary Role | Processes data and makes decisions. | Detects environmental changes. | Performs physical actions or movements. |
| Direction of Signal | Receives input signals and sends output signals. | Sends signals to the microcontroller. | Receives signals from the microcontroller. |
| Human Body Equivalent | Brain | Sensory organs (eyes, ears, skin) | Muscles and limbs |
| Examples | Arduino Uno, Micro:bit, PictoBlox controller | Ultrasonic sensor, IR sensor, Light sensor | DC motor, Servo motor, Buzzer, LED |
How to Build a Robot Car
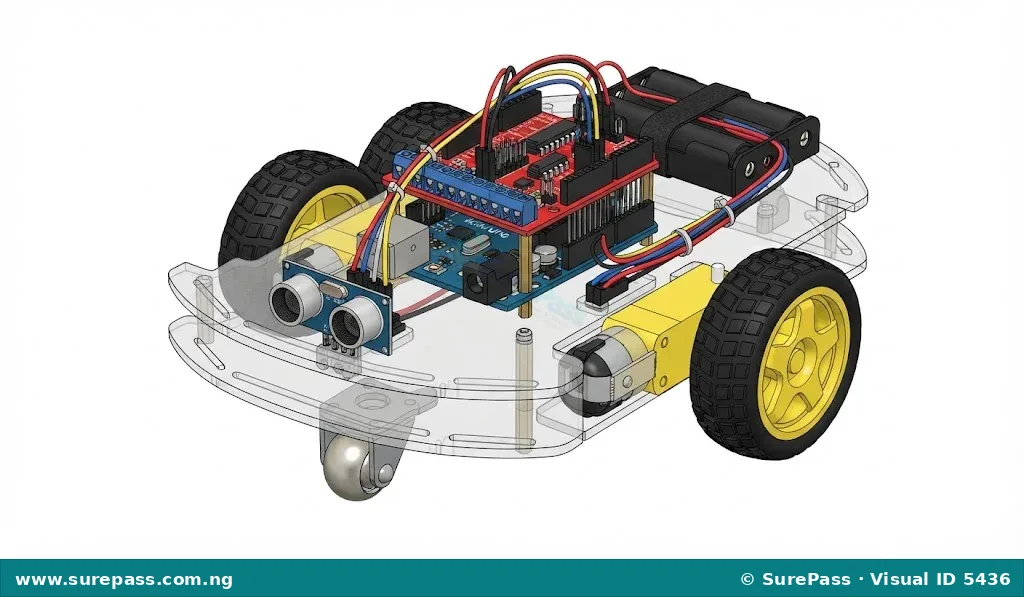
Building a robot car involves assembling the physical structure (chassis), mounting the electrical components, and wiring them correctly. This process is called coupling.
The required materials for building a basic robot car are:
- A robot car chassis (plastic or acrylic base plate)
- Two DC motors with matching wheels
- One caster wheel (for balance and steering)
- A microcontroller board (such as an Arduino Uno or compatible board)
- An ultrasonic sensor with a mounting bracket
- A motor driver shield or module (to control the DC motors)
- A battery holder with batteries (power source)
- Jumper wires and a small screwdriver
The procedure for coupling the robot car involves the following steps:
- Mount the Motors: Attach the two DC motors to the sides of the chassis using the provided screws and brackets.
- Attach the Wheels: Push the main wheels firmly onto the shafts of the DC motors. Attach the caster wheel to the front or rear of the chassis to keep the car balanced.
- Mount the Microcontroller and Motor Driver: Screw the microcontroller board onto the top of the chassis. Plug the motor driver shield directly on top of the microcontroller board.
- Install the Sensor: Mount the ultrasonic sensor at the very front of the chassis, facing forward like eyes.
- Connect the Wires: Connect the wires from the DC motors to the motor terminals on the motor driver. Use jumper wires to connect the ultrasonic sensor pins (VCC, GND, Trig, Echo) to the corresponding pins on the microcontroller or motor driver shield.
- Connect the Power Source: Mount the battery holder onto the chassis. Connect the positive (red) and negative (black) wires of the battery holder to the power input terminals of the motor driver.
Look at the diagram below to see how the coupled robot car should appear.
Programming the Robot Car
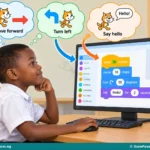
Once the robot car is coupled, it must be programmed to move. Programming is done using block-based software such as Scratch 3.0 or PictoBlox. Block-based programming allows learners to drag and drop instruction blocks to control the robot.
Programming Basic Movement
To make the robot car move, the microcontroller must turn the DC motors on and off in specific patterns. The motor driver controls the direction of rotation for each motor.
The movement patterns are determined as follows:
- Move Forward: Both the left motor and the right motor spin forward.
- Move Backward: Both the left motor and the right motor spin backward.
- Turn Left: The right motor spins forward while the left motor stops or spins backward.
- Turn Right: The left motor spins forward while the right motor stops or spins backward.
- Stop: Both motors stop spinning.
Observe the block programming representation below for basic movements.
Obstacle Avoidance and Flowcharts
An obstacle-avoiding robot car uses its ultrasonic sensor to detect objects in its path. If an object is too close, the robot stops, turns in a different direction, and then continues moving forward.
Flowchart for Obstacle Avoidance
A flowchart is a diagram that shows the step-by-step decision-making process of a program using shapes connected by arrows.
The flowchart for an obstacle-avoiding robot car uses the following logic:
- Start the program.
- Measure the distance to the nearest object using the ultrasonic sensor.
- Check if the distance is less than 20 centimetres.
- If the distance is NOT less than 20 centimetres (No), keep moving forward, then measure the distance again.
- If the distance IS less than 20 centimetres (Yes), stop the car, backward slightly, turn right, and then measure the distance again.
Observe the flowchart diagram below.
<!– SUREPASS_VISUAL type: ai format: svg use_case: science_diagram description: A standard programming flowchart for obstacle avoidance. It starts with an oval labeled "Start". An arrow points down to a rectangle labeled "Move Forward". An arrow points down to a diamond decision box labeled "DistanceProgramming Obstacle Avoidance
To implement this logic in PictoBlox or Scratch 3.0, a conditional block (an “if-then-else” block) is used inside a continuous loop (a “forever” block).
The block programming steps are:
- Create a
foreverloop so the robot continuously checks its surroundings. - Inside the loop, place an
if-then-elseblock. - For the condition, use a green operator block to check if the
ultrasonic sensor distance in cmisless than 20. - Inside the
thensection (when an obstacle is detected), place blocks to:stop robotwait 0.5 secondsmove backward at speed 40 for 1 secondturn right at speed 50 for 0.8 seconds
- Inside the
elsesection (when the path is clear), place a block tomove forward at speed 60.
Summary
Robots are powerful tools that assist humans in manufacturing, medicine, exploration and daily life. By understanding how microcontrollers, sensors and actuators work together, students can build and program their own robotic systems to solve real-world problems.

0 comments
Open the discussion when you need it. Comments stay collapsed until requested so the initial article remains light.